

How to Choose a PVC Sewer Line Repair
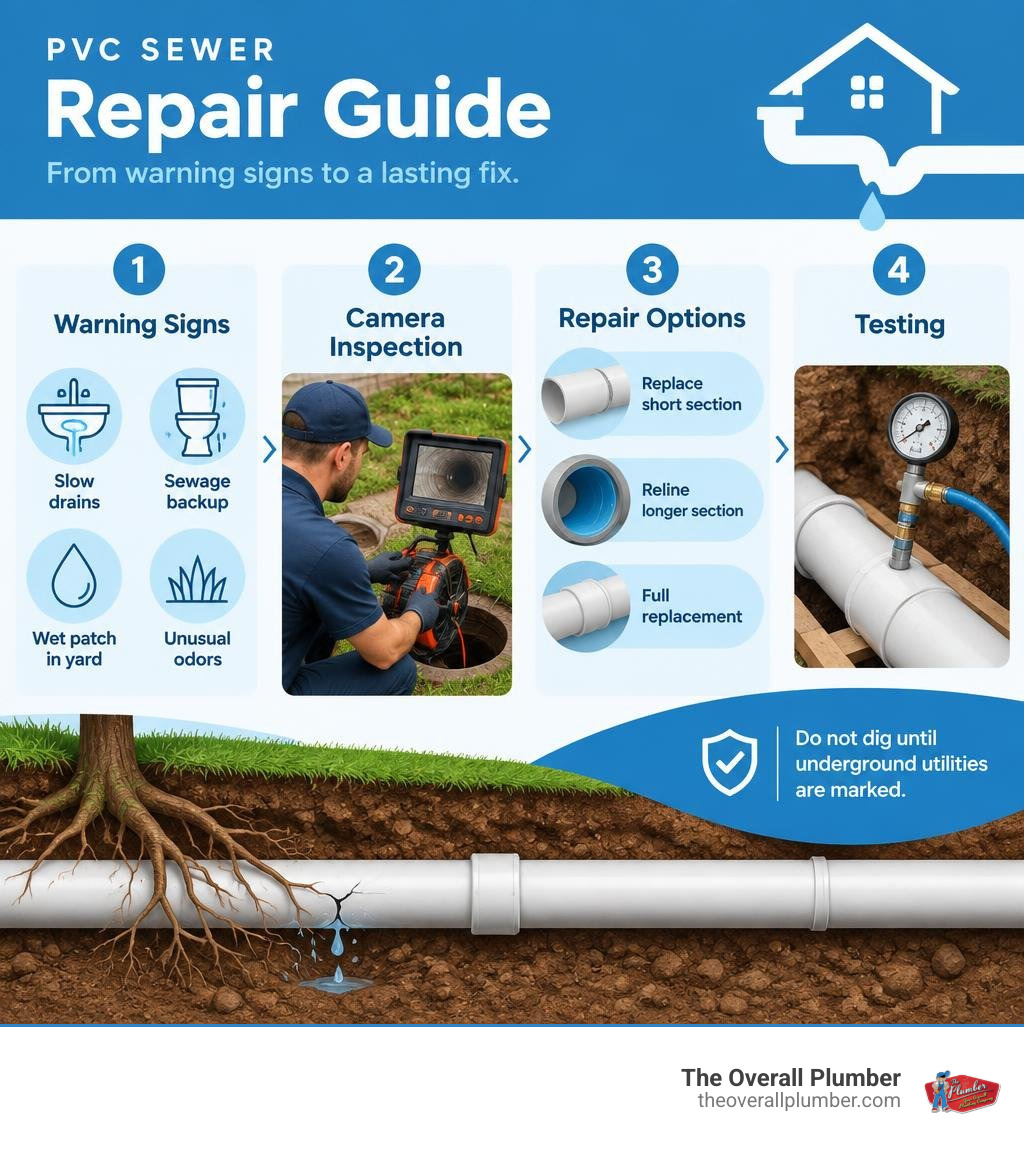
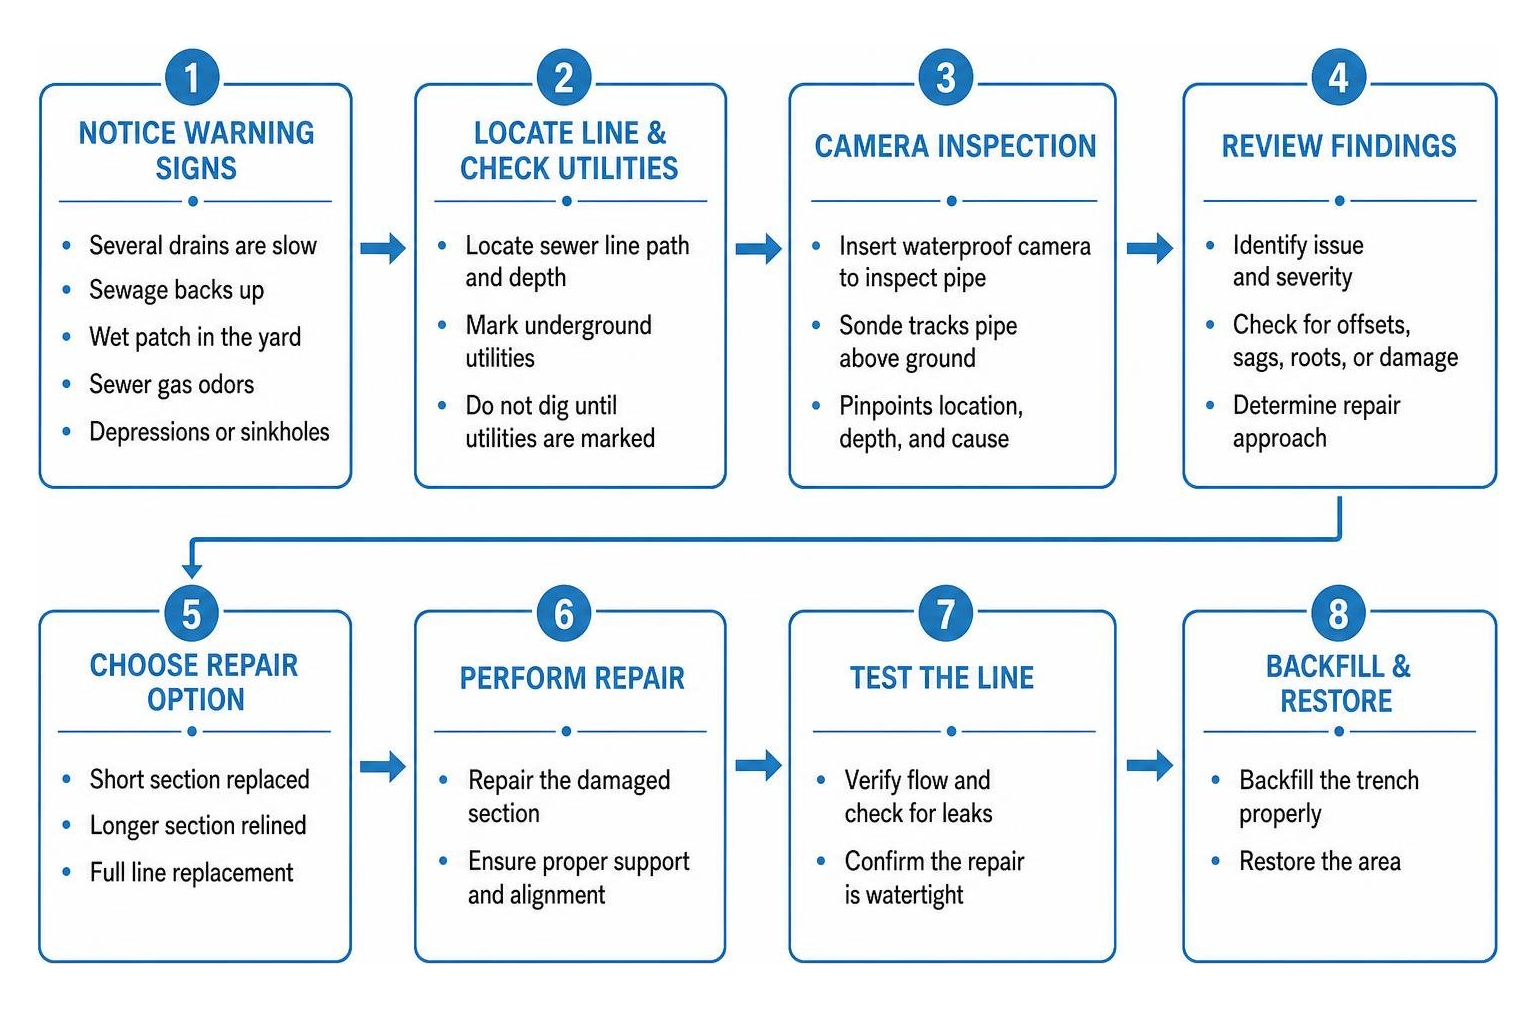
If several drains are slow, sewage backs up, or you notice a wet patch in the yard, start with a sewer camera inspection. A plumber can locate the damage and check whether the line needs a short section replaced, a longer section relined, or a full replacement. Do not dig until underground utilities are marked. After the repair, the pipe needs proper support and testing before the trench is filled.
I’m Dayton Whitworth, a second-generation plumber serving Greater Houston and the Gulf Coast. My plumbing experience and ongoing training help me guide homeowners through PVC sewer line repair options and what each fix involves.
Identifying Damaged Underground PVC Sewer Lines
Underground sewer pipe problems often hide out of sight until wastewater backs up into your tubs or yard. Because polyvinyl chloride (PVC) is lightweight, corrosion-resistant, and relatively smooth, it serves as the standard material for modern drain-waste-vent and main sewer installations across Texas. However, ground shifting, severe soil settling, improper initial bedding, or intrusive tree roots can still compromise PVC lines.
Homeowners can look for several classic indicators of line failure:
- Slowing fixtures across the home: When multiple toilets, sinks, and showers drain slowly at the same time, the blockage is rarely in a single trap. It indicates a restriction in the main sewer lateral.
- Sewer gas odors: A cracked pipe allows methane and hydrogen sulfide gases to escape through soil layers and surround your home’s foundation or lawn.
- Unexplained lush grass or wet patches: Leaking wastewater acts as an unwanted fertilizer, creating soggy, unusually vibrant green patches across your yard.
- Depressions or sinkholes: Escaping wastewater erodes the supporting subsoil over time, causing pavers, driveways, or soil beds to sink.
When these symptoms appear, guessing where the leak is located leads to unnecessary digging. The most reliable diagnostic step is to schedule a video camera sewer line inspection to pinpoint the precise location, depth, and cause of the structural failure. Understanding the secret life of buried pipes and how to find their leaks can help you prevent small hairline fractures from expanding into full pipe collapses.
Locating the Line and Diagnosing Structural Failure
A diagnostic camera inspection uses a high-resolution, waterproof CCTV camera head mounted on a flexible fiberglass push-rod or motorized crawler. As we navigate the camera through the pipe, a built-in sonde transmitter emits a 512 Hz signal through the ground. Above ground, we track this signal with an electronic locator wand to determine the pipe’s exact depth, trajectory, and geographic position.
Reviewing The Homeowner’s Guide to Sewer Camera Inspections will help you understand how camera technicians assess physical defects, including:
- Offset or sheared joints: Ground movement can pull glued or gasketed hub joints apart, allowing soil infiltration.
- Pipe belly (sagging): Inadequate support beneath the pipe causes standing water pools that catch solid waste and cause recurring clogs.
- Tree root intrusion: Fine root hairs penetrate microscopic hairline fractures or rubber gasket seals, expanding inside the pipe until flow is restricted.
- Crushed or deformed pipe walls: Excessive soil compaction or heavy vehicle traffic over shallow burials can ovalize PVC piping.
Accessing the pipe starts by demystifying your basement drain cleanout and main sewer line. Outdoor two-way cleanouts installed near the foundation provide direct camera access toward both the home and the municipal sewer main.
Safe Excavation and Trenching Requirements
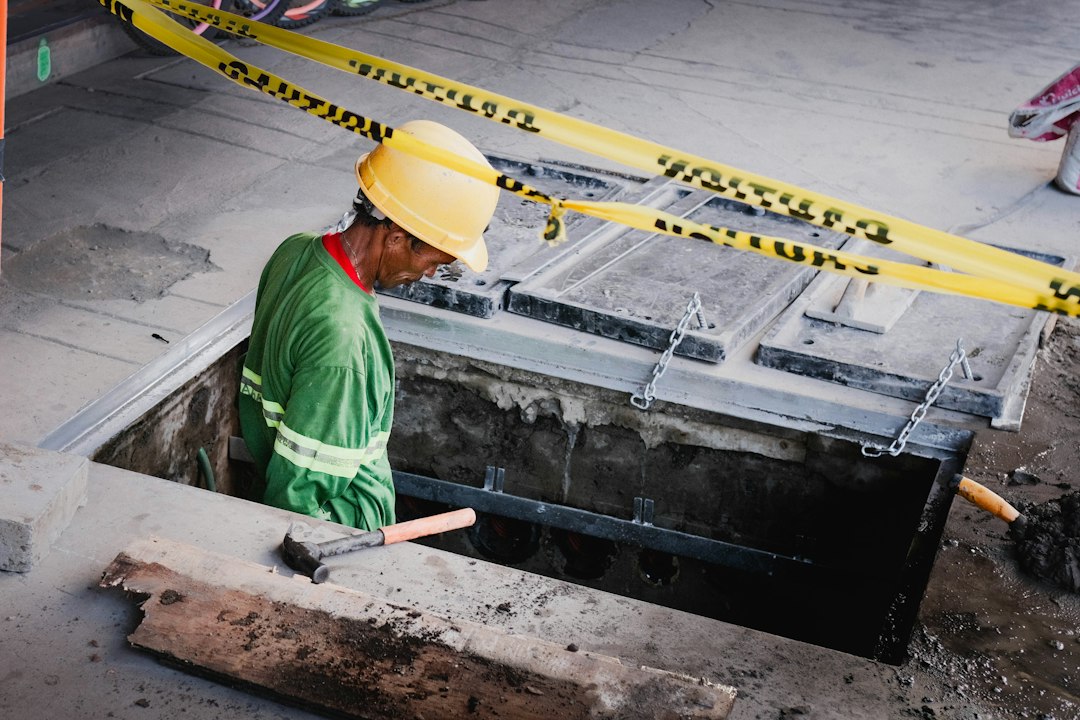
Before excavating an underground PVC sewer line, safety protocols must be followed. Calling 811 is mandatory before digging to have public utilities mark underground power, gas, communications, and water lines with color-coded spray paint.
Excavation best practices include:
- Respect the tolerance zone: Maintain an 18-inch hand-digging tolerance zone on either side of marked utility lines to avoid dangerous utility strikes.
- OSHA trench safety standards: Any excavation 5 feet or deeper requires protective cave-in systems, such as trench boxes, hydraulic shoring, or proper soil sloping/benching.
- Soil classification awareness: Much of coastal Texas consists of cohesive clays and saturated soils classified as OSHA Class C soils. These soils require a sloping ratio of 1.5:1 (a 34-degree angle) or rigid shoring shields to prevent trench wall collapse.
- Excavation depth below pipe: Always dig at least 6 inches beneath the damaged PVC pipe to remove disturbed mud and create adequate space for fresh structural bedding.
Proven Methods for Underground PVC Sewer Line Repair
Selecting the appropriate repair approach depends on the depth of the pipe, the severity of the damage, surface obstacles (such as driveways or patios), and local soil conditions.
| Repair Method | Best Use Case | Primary Advantages | Limitations | Applicable Standards |
|---|---|---|---|---|
| Shielded Rubber Couplings | Localized breaks, cracks, and spot repairs on open trenches | Absorbs ground movement; simple installation; prevents shear misalignment | Requires localized excavation; must be torqued accurately | ASTM D5926, ASTM C1461 |
| Slip-Fix Expansion Joints | Confined open-cut repairs with zero axial pipe movement | Creates a rigid, solvent-welded connection without flexing existing pipes | Requires dry conditions; no flexibility for shifting soils | ASTM D2467, ASTM D2564 |
| Cured-in-Place Pipe (CIPP) | Long-run damage beneath driveways, landscaping, or slabs | Trenchless “no-dig” installation; 50-year lifespan; seamless jointless pipe | Higher upfront equipment cost; cannot fix severely crushed pipes | ASTM F1216, ASTM F1698 |
All materials and replacement sections must comply with industry standards, such as the ASTM D3034 pipe installation guide, to ensure wall thickness and pipe stiffness match standard sewer dimensions (such as SDR 26 or SDR 35).
Step-by-Step Mechanical Shielded Coupling Installation
Shielded rubber couplings (such as heavy-duty Fernco or Mission couplings) are widely considered the gold standard for spot repairs in buried PVC lines. Unlike unshielded rubber sleeves that can shear or bulge under soil weight, shielded couplings feature an outer stainless steel band that prevents pipe ends from shifting out of alignment.
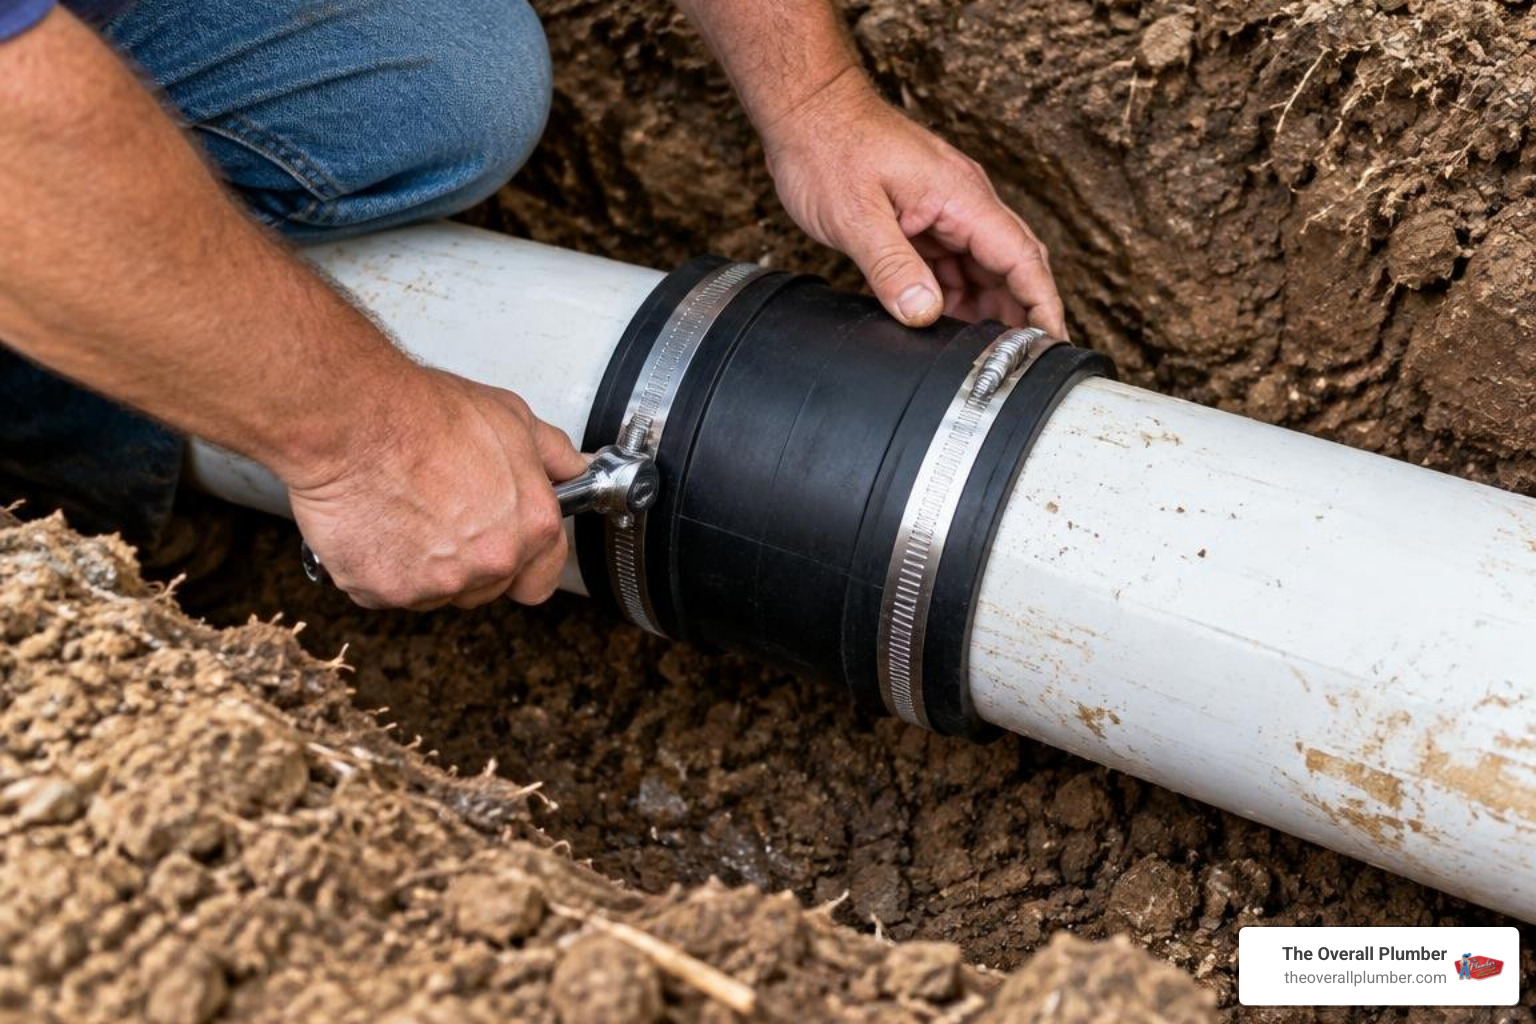
Here is how to complete a shielded mechanical coupling repair:
- Expose and isolate the break: Dig a clear working space around the damaged section, maintaining at least 6 inches of clearance beneath and around the pipe perimeter.
- Make clean, square cuts: Use an oscillating saw, wheel cutter, or handsaw to cut out the broken pipe section. Perpendicular, square cuts ensure even pipe seating.
- Deburr and chamfer: Remove all inner and outer plastic burrs using a deburring tool, file, or utility knife. Burrs create snag points for paper products and waste.
- Measure and cut the replacement piece: Cut a matching length of identical PVC pipe (ASTM D3034 SDR-35 or Schedule 40 DWV), making it roughly 1/4-inch shorter than the cutout gap to allow easy insertion.
- Slide the couplings in place: Slide one shielded coupling onto each end of the existing buried pipe. Fold the rubber gaskets back over themselves if working in tight clearances.
- Position the replacement pipe: Set the replacement pipe into the gap and slide the rubber sleeves over the joints until the inner rubber stop ridge seats against the pipe ends.
- Tighten to specification: Slide the stainless steel shear rings over the rubber sleeves. Using a calibrated torque wrench, tighten the worm-drive clamps in an alternating pattern to 60 in-lb of torque. This provides a watertight seal without crushing the PVC pipe wall.
Following these detailed mechanical steps prevents joint offsets and ensures that your repair matches standard guides on how to fix a broken pipe in 7 easy steps.
PVC Slip-Fix Expansion Joints and Solvent Welding
When a rigid, glued connection is required and the existing buried pipe cannot be flexed or shifted outward, a telescoping PVC slip-fix coupling provides an effective solution. A slip-fix fitting features an inner sliding piston barrel equipped with internal O-rings that expands outward to bridge the repair gap.
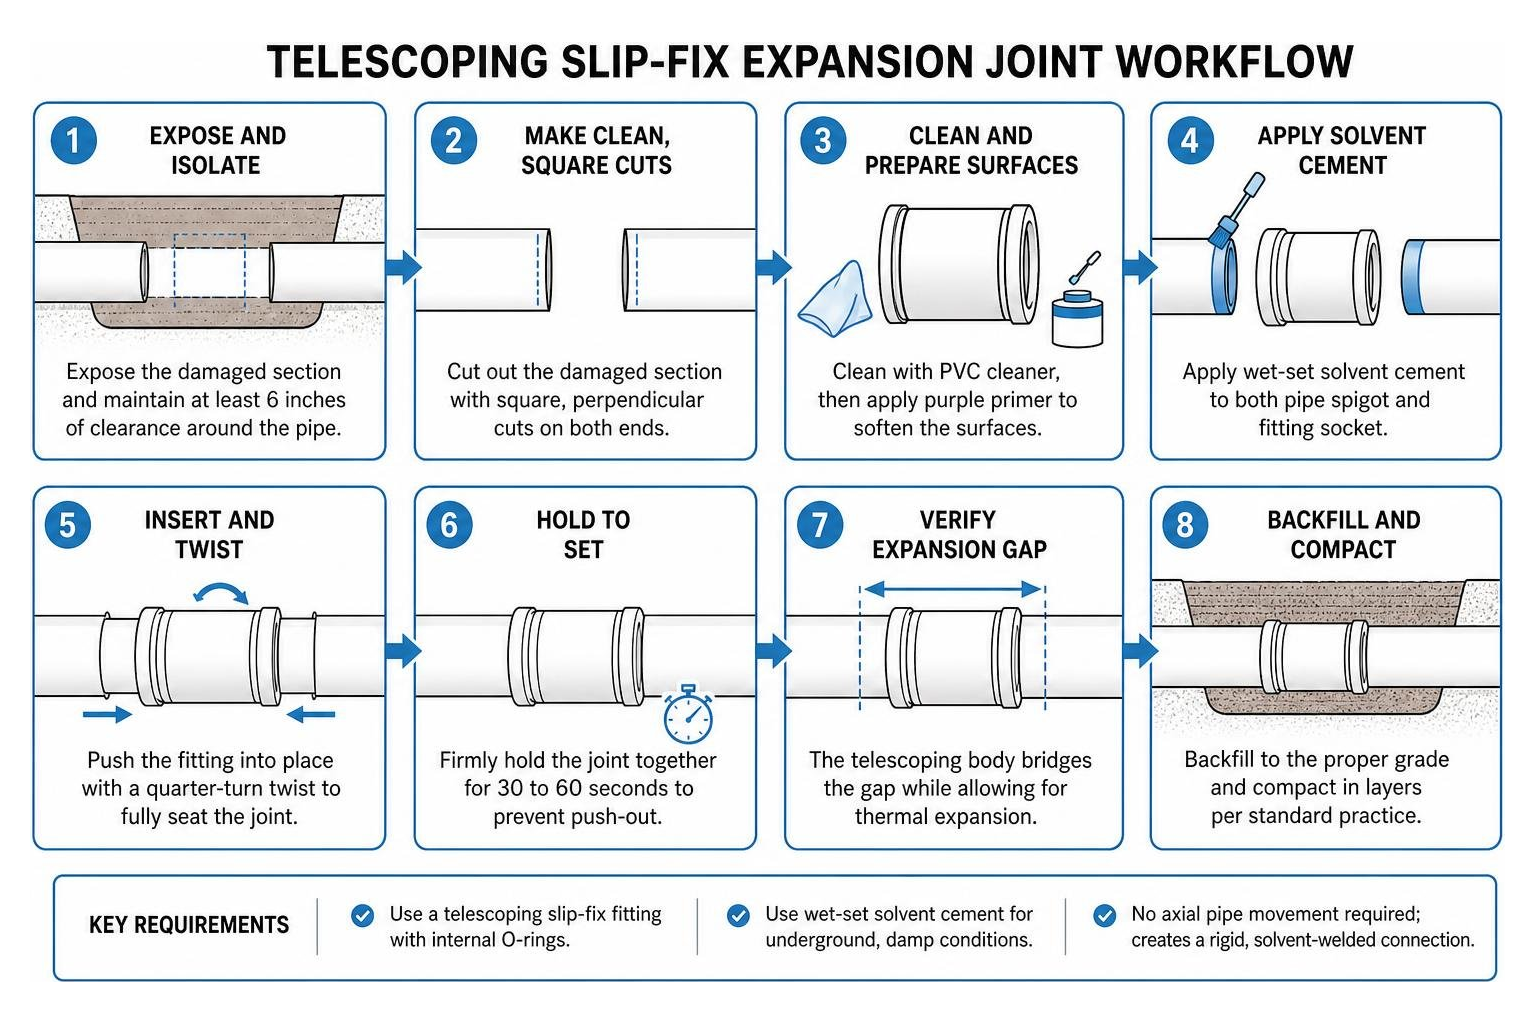
When using solvent welding underground:
- Temperature and thermal expansion: PVC pipe expands and contracts at a rate of roughly 0.36 inches per 100 feet of pipe for every 10°F temperature change. Gasketed joints or slip expansion fittings accommodate this movement without snapping.
- Surface preparation: Clean the outer pipe walls and fitting sockets with PVC cleaner, followed by purple primer to soften the plastic surface.
- Wet-set solvent cement: For underground applications where moisture or high humidity is present, use a heavy-bodied, wet-set solvent cement designed to cure reliably in damp conditions.
- Assembly and hold: Apply cement generously to both the pipe spigot and fitting socket. Push the telescoping body into the receiving hub with a quarter-turn twist, then firmly hold the joint together for 30 to 60 seconds to prevent the tapered fitting from pushing itself apart.
For minor fractures that do not involve structural failure, review our guide on repairing cracks in PVC drain lines before starting excavation.
Trenchless CIPP vs. Open-Cut PVC Sewer Line Repair
Trenchless Cured-in-Place Pipe (CIPP) lining offers a modern alternative to extensive yard excavation. Instead of digging a continuous trench through mature landscaping, driveways, or concrete patios, CIPP creates a new, structurally sound pipe inside the old one using existing cleanout access points.
The process involves:
- Mechanical cleaning and hydro-jetting: High-pressure water nozzles and mechanical root cutters remove scale, roots, and debris from the host pipe.
- Resin saturation (wet-out): A flexible polyester-felt liner tube is thoroughly saturated with an epoxy or vinyl ester thermosetting resin.
- Inversion or pull-in: The liner is inverted into the sewer line using compressed air or water pressure, pressing the resin-soaked felt against the inner walls of the damaged PVC.
- Curing: The resin is cured using circulating hot water, steam, or ultraviolet (UV) light curing systems, transforming the soft felt into a rigid, jointless pipe.
The ASTM F1698 liner specifications and ASTM F1216 standards govern these composite liners, which carry a 50-year structural design life. Discover more about the benefits of trenchless sewer line replacement to see if your property qualifies for a trenchless solution.
Bedding, Soil Compaction, and Post-Repair Testing
A sewer repair is only as durable as the foundation beneath it. Simply backfilling a trench with native dirt or heavy clay clumps creates uncompacted voids that settle over time, causing the repaired pipe to sag, belly, or shear at the connection points.
Proper bedding and backfilling require a systematic, layered approach:
- Class I granular bedding: Place a minimum 4 to 6 inches of crushed stone, pea gravel, or coarse sand along the trench floor. This material compacts easily and provides a stable, non-compressible foundation.
- Pipe haunching: Carefully shovel and tamp aggregate beneath the lower curves (haunches) of the PVC pipe to prevent voids and eliminate downward deflection under soil weight.
- Initial backfill: Add clean granular material to a level at least 6 to 12 inches above the top crown of the pipe before using mechanical compaction equipment.
- Controlled compaction lifts: Backfill remaining soil in 6- to 8-inch layers (lifts), compacting each lift to at least 95% Standard Proctor Density.
Following proper backfill practices is critical for avoiding sewer line problems and soil washout under heavy Texas rainfall.
Deflection and Hydrostatic Testing Standards
Before closing the trench, the repaired line must be tested for structural alignment and water tightness. Engineering guidelines, such as the design guide for solid wall PVC sewer fittings, specify strict performance benchmarks:
- Deflection Mandrel Testing: Flexible thermoplastic pipes like PVC can experience ring deflection under earth loads. A rigid cylindrical go/no-go mandrel sized to 7.5% maximum allowable deflection of the pipe’s base inside diameter is pulled through the repaired run. If the mandrel passes smoothly, the pipe has retained its round shape and structural integrity.
- Low-Pressure Air Testing: The repaired pipe section is isolated with pneumatic test plugs and pressurized with air to approximately 4.0 psig. The pressure must not drop more than 0.5 psig over a designated holding time (typically 3 to 5 minutes depending on pipe diameter and length).
- Hydrostatic Head and Water Infiltration Checks: In areas with high water tables, the pipe can be visually inspected via CCTV camera to ensure no external groundwater is infiltrating joints, or filled with water to verify zero leakage under static head pressure.
- Flotation Prevention: Because hollow PVC pipe weighs little and can float in waterlogged trenches, ensure proper bedding depth and weighting are maintained if groundwater enters the excavation.
Budgeting and Timeframes for a PVC Sewer Line Repair
The total cost and duration of an underground PVC sewer repair depend on pipe depth, accessibility, surface restoration needs, and whether open excavation or trenchless lining is used.
- Standard Spot Repair (Open Cut): Typically completed in 1 to 2 working days. Costs generally range from $1,500 to $4,500 depending on excavation depth and whether the line runs beneath grass, concrete walkways, or paved driveways.
- Trenchless CIPP Spot or Full-Length Relining: Often completed in a single day (4 to 8 hours) without destructive digging. Pricing usually ranges from $80 to $200 per linear foot, with total project costs averaging between $4,000 and $9,000.
- Major Line Replacement: Involves replacing long runs of damaged pipe, securing municipal permits, and comprehensive surface restoration, generally taking 2 to 4 days.
You can review a full breakdown of project variables in our guide on evaluating sewer line replacement costs and processes.
Frequently Asked Questions About Sewer Line Rehabilitation
Can standard PVC glue be used for underground sewer repairs?
Standard clear PVC cement can bond clean, dry pipes, but underground repairs frequently involve damp trench conditions and humid pipe interiors. For buried lines, we strongly recommend a heavy-body, wet-set solvent cement formulated specifically for quick bonding in moist conditions. Always use purple primer first to soften and etch the PVC pipe surface, and allow adequate cure time before running wastewater through the line.
How do you prevent sewer pipe from sagging after a repair?
Pipe sagging (bellies) occurs when the soil beneath the repaired section settles under the weight of backfill. To prevent this, dig at least 6 inches below the pipe and install a solid base of non-compressible Class I granular material (such as crushed angular gravel or pea gravel). Firmly pack the aggregate into the pipe haunches—the space beneath the lower curves of the pipe—before adding backfill in compacted 6- to 8-inch lifts.
What is the typical lifespan of a repaired PVC sewer pipe?
A properly installed and bedded PVC sewer pipe repair has a design lifespan of 50 to 100 years. PVC is immune to the rust, scaling, and corrosion that plague older cast iron or galvanized pipes. Similarly, high-grade epoxy CIPP liners carry a verified 50-year service life rating under standard residential sewer conditions.
If you suspect an underground line failure, contact a licensed professional for expert repair of broken sewer lines in Houston or contact our team to schedule service across Brazoria, Harris, and Galveston Counties.