


What You Need to Know Before Starting a Hot Water Unit Installation
Hot water unit installation is a project that ranges from a straightforward DIY afternoon to a job that absolutely requires a licensed professional — depending on your fuel type, local codes, and comfort level with plumbing and electrical work.
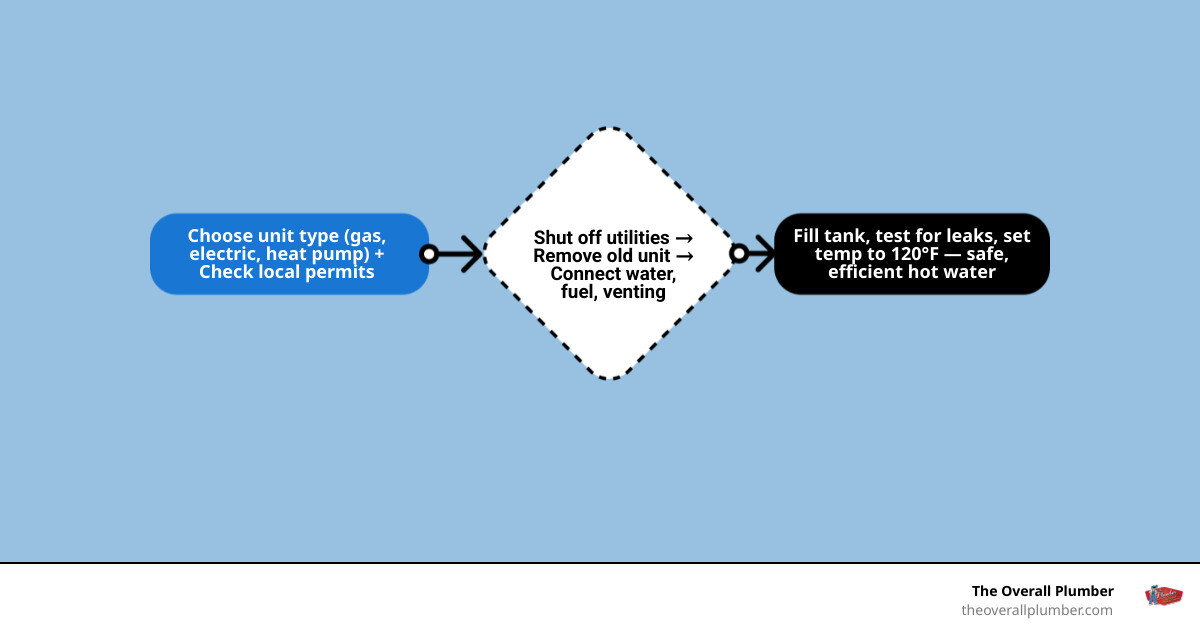
Here is a quick overview of what the process involves:
- Choose your unit — gas, electric, or heat pump
- Check permits — most municipalities require one before you start
- Shut off utilities — water, gas, or electricity depending on unit type
- Remove the old unit — drain the tank and disconnect all lines
- Install the new unit — connect water lines, fuel source, and venting
- Test and set temperature — fill the tank, check for leaks, set to 120°F
Water heaters quietly do their job for 8 to 15 years before most homeowners think about them. Then one day the hot water runs out faster, temperatures stop staying consistent, or you notice moisture around the base. By then, replacement is usually overdue.
The stakes are real. A gas line connected incorrectly can create a carbon monoxide hazard. An electric heater powered on before the tank is full will permanently damage the heating elements. And in most areas, skipping the permit means skipping the inspection that catches those mistakes.
This guide walks you through every type of installation — electric, gas, and heat pump — so you know exactly what to expect and where the line is between DIY and calling a pro.
I’m Dayton Whitworth, a second-generation plumber serving Houston, Pearland, League City, and the greater Gulf Coast area, with hands-on experience across all types of hot water unit installation for both residential and commercial properties. Whether you are tackling this yourself or need a licensed team to handle it, the steps below will give you a clear picture of the full process.
Relevant articles related to hot water unit installation:
Deciding on Your New Hot Water Unit Installation
Choosing a new water heater is not just about grabbing the first tank you see at the local home improvement store. Here in the Texas Gulf Coast region—from the high humidity of Galveston to the sprawling suburbs of Houston—your choice of water heater impacts your monthly utility bills, your home’s energy efficiency, and your daily comfort.
When planning your hot water unit installation, you must evaluate the three primary fuel and technology types: traditional gas, standard electric, and modern hybrid heat pumps.
Each system has distinct physical footprint requirements, installation complexities, and operational costs. For a deep dive into the broader planning process, check out our A Comprehensive Guide to Water Heater Installation.
To help you visualize the differences, look at how these systems compare:
| Feature | Gas Water Heaters | Electric Water Heaters | Hybrid Heat Pump Water Heaters |
|---|---|---|---|
| Average Lifespan | 8 to 12 Years | 10 to 15 Years | 10 to 15 Years |
| Upfront Cost | Moderate | Lower | Higher |
| Operating Cost | Moderate | Higher | Lowest |
| Key Requirement | Gas line & exhaust venting | 240V / 30-amp dedicated circuit | 450 cu. ft. air space & condensate drain |
| Recovery Rate | Fast | Slow | Moderate |
Signs Your Old Water Heater Needs Replacement
Water heaters rarely fail in a single, dramatic moment. Instead, their performance slips slowly over time. You might notice that your morning shower gets cold just a few minutes faster than it did last year, or you might hear strange popping and rumbling noises coming from your utility closet.
These noises are caused by sediment buildup at the bottom of the tank. As hard water is heated, minerals crystallize and settle. This sediment layer acts as a barrier between the burner or heating element and the water, forcing the system to work harder, overheat, and eventually crack.
If your tank is between 8 and 12 years old, these symptoms are clear indicators that a replacement is on the horizon. Keeping a failing unit running increases your risk of a catastrophic tank burst, which can flood your utility room or garage. If you want to try extending the life of your current unit first, you can learn how to clear out that sediment with our Easy to Follow Guide to Drain a Water Heater Safely.
Sizing Your System and Choosing a Fuel Type
Sizing your water heater correctly ensures you never run out of hot water during peak usage times while preventing you from paying to heat water you do not need. Sizing is determined by household size and your home’s peak hour demand:
- 1 to 2 People: A 30- to 40-gallon tank or a compact tankless unit.
- 3 to 4 People: A 40- to 50-gallon tank is standard.
- 5+ People: A 50- to 80-gallon tank, or a high-capacity tankless water heater.
Your fuel type is often dictated by your home’s existing infrastructure. If you currently have a gas line and a dedicated chimney or vent run, sticking with gas keeps your upfront installation costs low. If your home is strictly electric, upgrading to a 50-gallon electric unit is highly common. To understand the financial breakdown of these options, review our Electric Water Heater Costs a 50 Gallon Guide.
Pre-Installation: Tools, Permits, and Removing the Old Unit
Before you pick up a wrench, you must prepare your workspace, gather the correct tools, and verify that your project complies with municipal rules in your specific part of Texas.
Essential Tools and Materials for DIY
A successful hot water unit installation requires specialized tools to prevent leaks and ensure safe connections. Do not attempt this project with just a basic household toolkit. You will need:
- Pipe wrenches (two are recommended for leverage)
- Non-contact circuit tester (to verify electrical lines are dead)
- Garden hose (for draining the old tank)
- Teflon tape or pipe joint compound
- 3/4-inch NPT threaded copper adapters
- Tubing cutter and propane torch (if soldering copper lines) or push-to-connect fittings
- A metal drain pan (must be at least 2 inches wider than your new unit and no deeper than 1.75 inches)
If you live in an area with a closed water system, you will also need to install a thermal expansion tank to absorb excess pressure. You can read our guide on How to Install a Hot Water Expansion Tank Without Making a Mess to learn how to integrate this critical component safely.
Permits, Inspections, and Safe Disposal
In cities like Houston, Pasadena, and League City, municipal codes require a plumbing permit for any water heater replacement. This ensures that a city inspector will review your work to verify that the venting, gas connections, and temperature and pressure (T&P) relief valve lines are installed safely.
Additionally, you cannot simply throw your old water heater in the trash. Old tanks must be disposed of in accordance with EPA guidelines. Many local scrap metal yards in Harris and Galveston counties will accept old water heaters for recycling, or you can arrange for a bulk waste pickup through your municipal waste service, provided the tank has been fully drained.
Step-by-Step Guide to Gas and Electric Hot Water Unit Installation
Once your tools are gathered and your permits are secured, it is time to begin the actual physical installation. Always prioritize safety: shut off all relevant utilities before starting.
Safely Removing the Old System
- Turn off the power or gas: For electric units, switch off the dedicated 30-amp breaker. For gas units, turn the gas control valve to the “Off” position and close the manual gas shut-off valve on the supply line.
- Cool the water: Run a hot water faucet somewhere in your home for at least 10 minutes until the water runs cool. This prevents you from getting scalded by boiling water during the draining process.
- Shut off the water supply: Close the cold water inlet valve leading to the water heater.
- Drain the tank: Connect a standard garden hose to the drain valve at the bottom of the tank. Route the other end of the hose to a safe drainage area, such as a floor drain, utility sink, or outside your home. Open a hot water faucet upstairs or lift the lever on the T&P relief valve to break the vacuum inside the tank, allowing the water to flow freely.
- Disconnect the lines: Once empty, use your pipe wrenches to disconnect the hot and cold water pipes. For gas systems, carefully disconnect the gas supply line and the draft hood from the flue. For guidance on heavy-duty gas systems, you can reference the manufacturer instructions found in this Owner’s Guide Installation Instructions.
Installing an Electric Water Heater
- Position the new unit: Place the new electric water heater inside the metal drain pan. Align the unit so the electrical junction box and plumbing connections are easily accessible.
- Connect the water lines: Apply Teflon tape to the 3/4-inch NPT threaded nipples on top of the tank. Install your hot and cold water adapters. Connect your home’s plumbing lines, ensuring the cold inlet connects to the side marked “Cold” (which features a dip tube inside the tank) and the hot outlet connects to the side marked “Hot”.
- Install the T&P discharge pipe: Thread a new T&P relief valve into the side of the tank (never reuse an old valve). Connect a 3/4-inch discharge pipe that extends downward, terminating between 1 and 6 inches above the floor or drain pan.
- Fill the tank completely: Open the cold water supply valve and let the tank fill. Open the highest hot water faucet in your house and keep it running for at least 3 minutes after a steady stream of water begins to flow. This purges all trapped air from the system.
- Make the electrical connections: Once—and only once—the tank is completely full, connect the ground wire and the two power leads (typically black and red) inside the junction box using wire nuts. Secure the junction box cover. Turn the circuit breaker back on.
Warning: Turning the power on before the tank is completely full will cause “dry-firing,” which instantly destroys the upper heating element.
Steps for a Gas Hot Water Unit Installation
- Position and level the unit: Set the gas water heater in the drain pan, ensuring proper clearances from combustible walls as specified by the manufacturer.
- Connect the water lines: Just like the electric model, connect your hot and cold lines using 3/4-inch NPT fittings and Teflon tape.
- Connect the gas line: Thread the gas supply line into the gas control valve on the front of the heater. Always use two wrenches when tightening these connections to avoid putting stress on the internal gas valve mechanism. For detailed gas piping specifications, refer to the Owner’s Guide Installation Instructions.
- Perform a leak test: Mix a simple solution of dish soap and water. Brush it onto all gas line joints. Open the manual gas valve and watch for bubbles. If bubbles form, close the gas valve immediately and tighten the joints before testing again.
- Set up the vent hood: Align the draft hood over the flue terminal on top of the water heater and connect it to your home’s exhaust vent pipe. Secure the connections with sheet metal screws to ensure carbon monoxide is safely routed out of your home.
- Light the pilot: Follow the manufacturer’s lighting instructions on the tank’s label to ignite the pilot light and set your thermostat to 120°F.
Setting Up a Heat Pump Hot Water Unit Installation
Hybrid heat pump water heaters are incredibly energy-efficient, but they require a unique installation approach. Because they extract heat from the surrounding air and release cool air, they require at least 450 cubic feet of surrounding air space (roughly an 8′ x 8′ room) to operate effectively.
Additionally, as the heat pump cools the air, it produces condensation. You must install a dedicated condensate drain line. Route this line downward to a floor drain, or install a small condensate pump to push the water out of your home if a gravity drain is not nearby.
While a DIY heat pump installation can save you an estimated $500 to $750 in labor costs and takes about 4 to 5 hours to complete, the electrical and space requirements can be tricky. To learn more about the long-term financial benefits of this technology, read about The Real Cost to Install a Heat Pump Water Heater in 2026.
Frequently Asked Questions about Hot Water Unit Installation
How do I check for gas leaks after installing a gas water heater?
To check for gas leaks, mix a 50/50 solution of liquid dish soap and water. Apply this soapy mixture generously to all newly connected gas joints and fittings. Open the manual gas isolation valve.
If you see growing, bubbling foam at any connection point, you have a leak. Shut off the gas valve immediately, loosen the connection, reapply pipe compound or yellow gas-rated Teflon tape, retighten the joint, and run the test again. Never use an open flame to check for gas leaks.
Why shouldn’t you turn on an electric water heater before it is full?
Electric water heaters rely on the surrounding water inside the tank to absorb the intense heat generated by the upper and lower heating elements. If you turn on the circuit breaker while the tank is empty or only partially full, the heating elements will be exposed to open air.
This causes “dry-firing,” where the element overheats to the point of structural failure within seconds, burning itself out and requiring a complete element replacement before your system can produce hot water.
How much space does a heat pump water heater require?
A hybrid heat pump water heater needs at least 450 cubic feet of open, unconditioned or semi-conditioned air space to operate at peak efficiency. This is roughly equivalent to an 8-foot by 8-foot room with an 8-foot ceiling.
If you install the unit in a tight closet, it will quickly exhaust all the heat in the room, causing the system to run inefficiently or continuously default to standard electric resistance mode, which defeats the purpose of buying an energy-saving hybrid unit.
Professional Hot Water Unit Installation Services
While a DIY hot water unit installation is possible for highly handy homeowners, it carries significant risks. Handling high-voltage 240V electrical connections, routing natural gas lines, and managing heavy, water-filled tanks require specialized knowledge and tools. One small mistake can lead to water damage, electrical fires, or gas leaks.
At The Overall Plumber, we make the process entirely stress-free. We serve homeowners across Brazoria County, Houston, Clear Lake, Santa Fe, League City, Texas City, La Porte, Friendswood, Pearland, Pasadena, and Galveston.
Our licensed plumbers provide expert installation backed by our industry-leading satisfaction guarantees, priority scheduling, and absolutely no overtime fees.
Whether you are looking to install a traditional gas tank, a standard electric unit, or a high-efficiency hybrid system, our team is ready to help. Call us today at (281) 668-8055 or visit our Hot Water Heater Replacement page to learn more about our replacement services.