


A Comprehensive Guide to Water Heater Installation
What You Need to Know About Water Heater Installation
Water heater installation is the process of connecting a new water heating unit to your home’s water supply, power source (gas or electric), and drainage system — safely and up to local code.
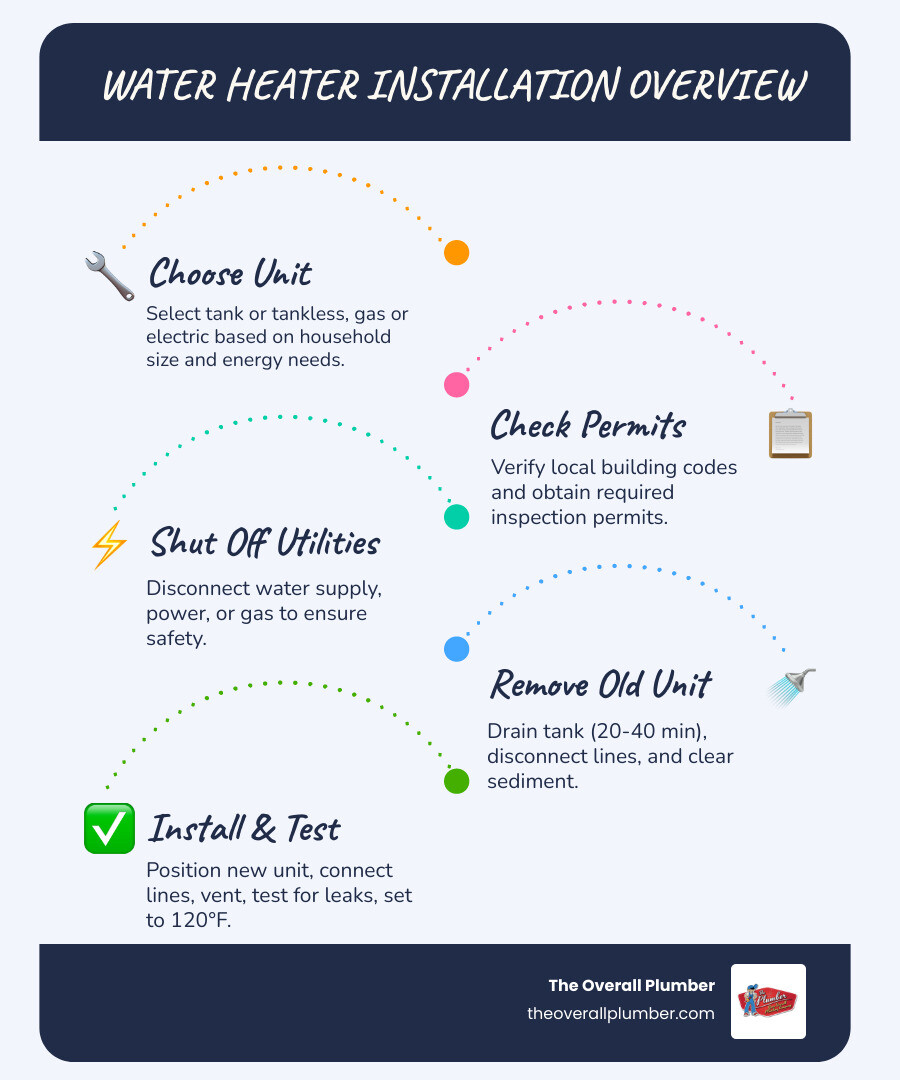
Here’s a quick overview of what the process involves:
- Choose your unit — tank or tankless, gas or electric
- Check permits and local codes — most areas require an inspection
- Shut off utilities — water supply and power or gas
- Remove the old unit — drain the tank (20–40 minutes), disconnect lines
- Install the new unit — level it, connect water lines, power/gas, and venting
- Test everything — check for leaks, purge air, set thermostat to 120°F
Most homeowners replace their water heater every 10 to 15 years. A straightforward tank-to-tank swap typically takes a skilled DIYer 3 to 4 hours and costs $100–$300 in materials. Hiring a professional runs $800–$2,500 but adds safety, code compliance, and peace of mind — especially for gas units.
I’m Dayton Whitworth, a second-generation plumber serving Greater Houston and the Gulf Coast, with hands-on experience handling water heater installation across dozens of residential properties in the region. Below, I’ll walk you through everything you need to make the right call for your home.
Choosing Your System: Types and Sizing
Selecting the right unit is the most critical step in the water heater installation process. If you choose a system that is too small, you’ll be shivering in a cold shower by the time the second person in your household lathers up. If it’s too large, you’re essentially paying to heat water you’ll never use.
In our service areas, from the humid coastal air of Galveston to the suburban reaches of Pearland and League City, we primarily see four types of systems:
- Electric Water Heaters: These use internal heating elements to warm the water. They are generally cheaper to buy upfront and easier to install since they don’t require complex venting.
- Gas Water Heaters: These use a burner at the bottom and require a flue to vent exhaust gases. While the units can be more expensive, natural gas is often cheaper than electricity in Texas, leading to lower monthly bills.
- Tankless Water Heaters: These heat water on demand rather than storing it. They are incredibly energy-efficient and take up very little space, but the initial water heater installation cost is higher due to the need for specialized venting and often larger gas lines.
- Heat Pump (Hybrid) Water Heaters: These “pull” heat from the surrounding air to warm the water. They are incredibly efficient—often reducing energy costs by up to 60%. However, they have specific space requirements.
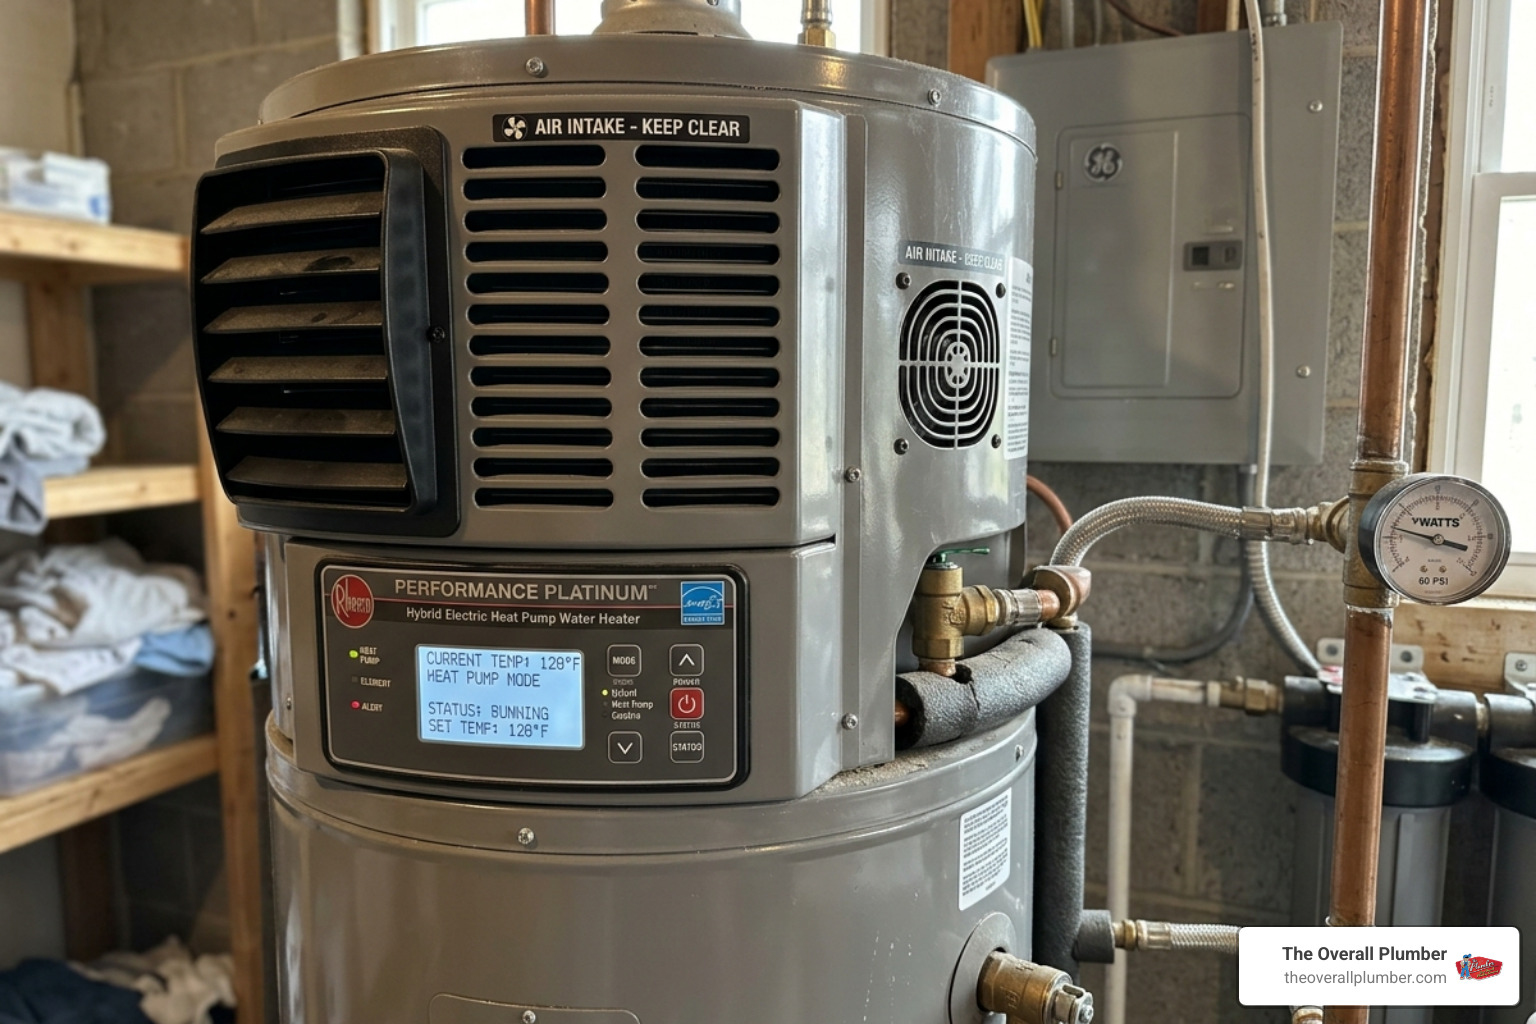
One unique consideration for heat pump models is that they require at least 450 cubic feet of air space to operate correctly. If you’re planning to tuck one into a tiny closet in a home in Pasadena or South Houston, you might need to install louvered doors to ensure it can “breathe.”
To help you decide, here is a quick comparison of the most common fuel types:
| Feature | Electric Tank | Gas Tank | Tankless (Gas) | Heat Pump |
|---|---|---|---|---|
| Upfront Cost | Low | Moderate | High | High |
| Efficiency | Moderate | Moderate | Very High | Excellent |
| Lifespan | 10–15 Years | 10–15 Years | 20+ Years | 10–15 Years |
| Venting Needed | No | Yes | Yes (Special) | No (Needs Airflow) |
For a deeper dive into which system fits your home’s infrastructure, check out Water Heater Installation Basics.
Sizing for Your Household
When sizing a tank-style heater, we look at the number of people in your home and your “peak demand” times.
- 2-3 People: A 30 to 40-gallon tank is usually sufficient.
- 4+ People: We strongly recommend a 40 to 50-gallon tank (or larger).
Beyond just gallons, look at the First Hour Rating (FHR) on the yellow EnergyGuide label. This tells you how much hot water the heater can produce in its first hour of operation when starting with a full tank. If your family all showers between 6:30 AM and 7:30 AM, the FHR is the number that actually matters.
Energy Efficiency Considerations
In the Texas heat, we’re always looking for ways to shave a few dollars off the utility bill. Look for the Energy Factor (EF); the higher the number, the more efficient the unit. Heat pump models are the reigning champions of efficiency, but even a modern standard tank is significantly better than a unit from 15 years ago due to improved insulation. If you’re considering an upgrade to a more efficient model, you can find more info about hot water heater replacement on our dedicated service page.
Pre-Installation and Old Unit Removal
Before you grab a pipe wrench, you need to handle the paperwork and preparation. In many parts of Harris and Galveston County, local building codes require a permit for water heater installation. This isn’t just a “suggestion”—it’s for your safety. An inspector will ensure the venting is correct and the unit won’t become a hazard.
Essential Tools and Materials
If you are attempting this as a DIY project, you will need:
- Pipe wrenches (two are better than one for leverage)
- Tubing cutter (for copper pipes)
- Non-contact voltage tester (for electric models)
- Teflon tape or pipe joint compound
- A level
- A garden hose
- A metal drain pan
- Seismic Strapping: In areas prone to movement (or per local Texas codes), you must use at least two 22-gauge steel straps to secure the unit to the wall studs.
Safely Removing the Old Heater
The first rule of removal: Safety first.
- Shut off the power/gas: For electric, flip the breaker. For gas, turn the individual valve to the “off” position.
- Turn off the water: Close the cold water supply valve.
- Drain the tank: Attach a garden hose to the drain valve at the bottom. Draining a full tank usually takes 20 to 40 minutes. If your heater is old, sediment buildup might clog the valve, making the process much slower.
- Disconnect: Once empty, disconnect the water lines and the gas or electrical supply.
For more detailed technical steps on the removal phase, you can refer to the Water Heater Installation Process.
Professional vs. DIY Considerations
We often get asked if water heater installation is a DIY job. While a tank-to-tank swap of the same fuel type is manageable for an intermediate DIYer, it’s not without risks.
- DIY Cost: $100–$300 (plus the cost of the unit).
- Professional Cost: $800–$2,500.
The extra cost of a professional covers the “what ifs.” We handle the permits, ensure the gas lines are leak-free, and guarantee the work. Furthermore, many homeowners’ insurance policies require professional installation for coverage in the event of a future leak or flood.
Step-by-Step Water Heater Installation Guide
Once the old unit is out and the area is clean, it’s time to prep the space for the new arrival.
The Setup
- The Drain Pan: Place your new heater inside a metal drain pan. The pan should be at least 2 inches wider than the unit and no deeper than 1.75 inches. This pan should be piped to a floor drain to prevent water damage if the tank ever leaks.
- Leveling: Use a level to ensure the unit is sitting straight. You can use plastic shims if the floor is uneven.
- Dielectric Unions: This is a “pro tip” that many DIYers miss. If you are connecting copper pipes to a steel tank, you must use dielectric unions. Without them, a process called galvanic corrosion will occur, and your connections will likely leak within 2 to 3 years.
For a comprehensive walkthrough, the A.O. Smith Installation Guide offers excellent manufacturer-specific details.
Electric Water Heater Installation
Electric models require a dedicated 240V circuit.
- Wiring: Connect the ground wire to the green screw and the power wires to the leads inside the junction box on top of the heater.
- Heating Elements: Never turn the power on until the tank is completely full of water. If you power it up while dry, you will “dry fire” and burn out the upper heating element instantly.
- Thermostat: Once running, set the thermostat to 120°F. This is the “sweet spot” for energy efficiency and preventing accidental scalds.
Gas Water Heater Installation
Gas units are more complex because they involve fire and exhaust.
- Gas Line: Use a flexible gas connector for the final hookup, but ensure you use two wrenches to tighten the fittings to avoid putting stress on the gas control valve.
- Venting: The vent pipe must slope upward at least 1/4 inch per foot. Ensure the draft hood is seated correctly.
- Leak Test: Once the gas is on, apply a mixture of dish soap and water to the connections. If you see bubbles, you have a leak. Tighten the connection and test again.
- Pilot Light: Follow the manufacturer’s instructions to light the pilot (many modern units have electronic igniters).
Safety Protocols and Common Mistakes
Safety is paramount when dealing with pressurized water and fuel. One of the most important safety features is the Temperature and Pressure (T&P) Relief Valve.
This valve is designed to open if the temperature or pressure inside the tank gets too high, preventing the tank from exploding. You must attach a discharge pipe to this valve that terminates 1 to 6 inches above the floor or drain. Never plug this valve!
Avoiding Galvanic Corrosion
As mentioned earlier, connecting dissimilar metals (copper and steel) causes a chemical reaction that eats away at the metal. Always use dielectric unions or plastic-lined nipples to keep these metals separated. This simple step can add years to the life of your water heater installation.
Thermal Expansion Solutions
In “closed” plumbing systems (those with a backflow preventer or pressure-reducing valve), water has nowhere to go when it expands as it heats up. This causes pressure spikes that can damage your pipes and the heater itself. The solution is an expansion tank. These small tanks are usually installed on the cold water inlet line to absorb that extra pressure.
Testing and Final Maintenance
After the pipes are connected and the tank is full, it’s time to “prime the pump.”
Testing the New Unit
- Open the cold inlet: Let the tank fill.
- Bleed the air: Turn on a hot water faucet somewhere in the house (like the bathtub). At first, it will sputter and hiss as air escapes. Once you have a steady stream of water, the air is purged.
- Check for leaks: Inspect every joint. A small drip now can become a flood later.
- Wait: It typically takes 1 to 2 hours for a standard tank to reach its set temperature for the first time.
If you are in League City or the surrounding areas and aren’t comfortable with these final checks, we offer water heater service in League City to ensure your system is running perfectly.
Long-Term Care Tips
- Anode Rod: This “sacrificial” rod hangs inside the tank and attracts corrosive elements so they eat the rod instead of the tank. Check it every 2 to 4 years and replace it if it’s looking thin.
- Annual Flush: Drain a few gallons from the bottom of the tank every year to remove sediment. This keeps the heater quiet and efficient.
- Vacation Mode: If you’re heading out of town for a week, turn your gas heater to “Vacation” mode to save energy while keeping the pilot light lit.
Frequently Asked Questions
Should I install a water heater myself or hire a professional?
If you are comfortable with basic plumbing, soldering, and electrical work, a standard electric tank swap is feasible. However, if you are dealing with gas lines, switching fuel types (e.g., electric to gas), or installing a tankless system, we strongly recommend hiring a professional. The risks of gas leaks, carbon monoxide poisoning, or improper venting are simply too high for “learning on the job.”
When is an expansion tank necessary for installation?
An expansion tank is necessary if you have a “closed-loop” plumbing system. You can tell if you have one by looking for a check valve or a pressure-reducing valve on your main water line. Many modern building codes in the Houston and Clear Lake areas now require them for all new installations to protect the plumbing system from pressure-related stress.
How do I know if my gas water heater is venting properly?
You can perform a “smoke test.” After the burner has been running for a minute or two, hold a smoking match or incense stick near the draft hood (the gap between the tank and the vent pipe). The smoke should be sucked up into the vent. If the smoke is blown back into the room, you have a “backdrafting” issue, which can lead to dangerous carbon monoxide buildup. Shut the unit off immediately and call a pro.
Conclusion
A proper water heater installation is an investment in your home’s comfort and safety. Whether you choose a high-efficiency heat pump model or a reliable gas tank, the quality of the installation determines how long that unit will last.
At The Overall Plumber, we take the stress out of the process. We proudly serve homeowners across Brazoria County, Galveston County, and Harris County—from the shores of Tiki Island to the neighborhoods of Pearland and Sugar Land. We offer a satisfaction guarantee, priority scheduling, and we never charge overtime fees. Our team is expert in navigating local Texas codes and ensuring your home stays supplied with reliable hot water.
Ready for an upgrade? Schedule your hot water heater replacement with us today and experience the peace of mind that comes with professional service.