


When a Small Leak at Your Toilet Base Becomes a Big Problem
A toilet seal repair kit is the most direct solution when your toilet starts leaking at the base, releasing sewer odors, or rocking on the floor. Here is a quick overview of what you need to know:
- What it is: A kit that includes a new seal (wax or wax-free), hardware, and sometimes spacers to create a watertight connection between your toilet and the floor drain.
- When you need one: Water pooling at the base, sewer gas smells, a wobbling toilet, or visible floor damage around the toilet.
- Main types: Traditional wax rings, modern rubber/elastomer seals, and hybrid wax-rubber kits.
- Average cost: Kits range from around $9 to $27 for DIY. Professional repair costs more but covers labor and any hidden damage.
- Key benefit of modern kits: Rubber and elastomer seals resist heat, can be repositioned during install, and do not melt or shift the way wax rings can.
Most homeowners ignore a slow toilet leak until the floor underneath starts to rot. That slow drip is not just wasting water — it is quietly destroying your subfloor, creating mold risk, and letting sewer gas into your home.
The good news is that fixing it is often a straightforward DIY repair with the right kit and a basic set of tools.
I’m Dayton Whitworth, a second-generation plumber serving Houston and the greater Gulf Coast area, and I have replaced more toilet seals than I can count — from simple wax ring swaps to full flange rebuilds where years of leaking had already done serious damage. In this guide, I will walk you through every toilet seal repair kit option so you can make the right call for your situation.
Signs You Need a Toilet Seal Repair Kit
Identifying a failing toilet seal early can save you thousands of dollars in structural floor repairs. Because the toilet seal sits directly beneath the porcelain base, you cannot see it degrade. Instead, you have to watch for the warning signs that water or sewer gas is escaping past the barrier.
Here are the primary indicators that your toilet seal is broken and needs to be replaced:
- Water Pooling Around the Toilet Base: If you constantly see a small puddle of water on the bathroom tile at the bottom of the toilet, the seal has likely failed. While this can sometimes be confused with tank condensation or a leak from the supply line, a persistent puddle that returns after being wiped away is a classic sign of a bad floor seal. If you want to dive deeper into why this happens, check out our guide on how to Stop the Swamp with a New Toilet Seal.
- Persistent Sewer Odors: The toilet seal does more than keep water in; it keeps sewer gases out. If your bathroom has a mysterious, sewage-like smell that does not go away with cleaning, sewer gas is likely slipping past a deformed or dried-out wax ring.
- A Rocking or Wobbling Toilet: A toilet should be firmly anchored to the floor. If it moves, rocks, or wobbles when you sit down, it puts physical stress on the seal. Traditional wax rings have zero elasticity; once the toilet moves even slightly, the wax deforms and creates a permanent gap where water can leak.
- Floor and Ceiling Damage: If your bathroom is on the second floor, a failing seal might not pool on the bathroom floor at all. Instead, it might seep directly into the subfloor, showing up as water stains, bubbling paint, or sagging drywall on the ceiling below.
Wax Rings vs. Wax-Free Seals: Which is Best?
When shopping for a toilet seal repair kit, you will find two primary categories: traditional wax rings and modern wax-free (elastomer or rubber) seals. Deciding which one is right for your home depends on your DIY comfort level, your budget, and your local environment.
| Feature | Traditional Wax Ring | Modern Elastomer / Rubber Seal |
|---|---|---|
| Material | 100% Petroleum-based wax | Sticky elastomer, rubber, or foam |
| Repositionable | No (One shot to get it right) | Yes (Can be adjusted multiple times) |
| Temperature Sensitivity | High (Can melt in extreme heat) | None (Remains flexible and resilient) |
| Lifespan | 20–30 years (if undisturbed) | 10+ years (highly chemical resistant) |
| Installation Mess | High (Sticky residue) | None (Clean and user-friendly) |
| Cost | Very low ($3 – $10) | Low to moderate ($9 – $20) |
In the hot, humid climate of the Texas Gulf Coast—including Houston, League City, and Galveston—temperature sensitivity is a real factor. If a home sits vacant without air conditioning during a scorching summer, or if the bathroom floor experiences shifting due to our local expansive clay soils, a traditional wax ring can easily deform, melt, or pull apart.
Modern elastomer gaskets, such as the Tight Seal TightSeal Gaskets, are made of a sticky elastomer that remains resilient and flexible. They do not melt or come loose like wax, making them a highly reliable choice for Texas homes.
Lifespan and Durability of Modern Seals
Modern wax-free seals are engineered to last. For example, the Wax Free Toilet Seal Kit with Hardware – Korky features a robust design that often comes with a 10-year warranty.
A major advantage of modern rubber seals over traditional wax is their resistance to chemical degradation. Many municipalities add chlorine and chloramines to the water supply to treat it. Over time, these chemicals can degrade standard rubber parts inside your toilet tank. While the floor seal does not constantly touch treated tank water, any backup or slow leak of treated water can quickly eat away at inferior materials. High-quality kits use chemical-resistant, non-degrading materials to ensure the seal remains airtight for a decade or more.
Matching the Seal to Your Floor and Flange Height
One of the most common mistakes DIYers make is buying a standard seal when their floor situation requires a specialty solution. The height of your toilet flange relative to your finished floor determines the type of seal you need:
- Flange Above Floor Level (1/4 inch): A standard wax-free seal or a regular wax ring will work perfectly.
- Flange Flush with the Floor: A standard or slightly thicker seal is ideal.
- Flange Recessed Below the Floor: This is incredibly common after remodeling when new, thicker tile or luxury vinyl plank (LVP) flooring is laid over the old floor. If your flange is recessed more than 1/4 inch below the finished floor, a standard seal will not reach the bottom of the toilet. You will need a kit that includes stackable raise spacers (like green elastic and black EVA spacers) to build up the height of the flange before installing the seal.
Understanding Flange Repair and Kit Components
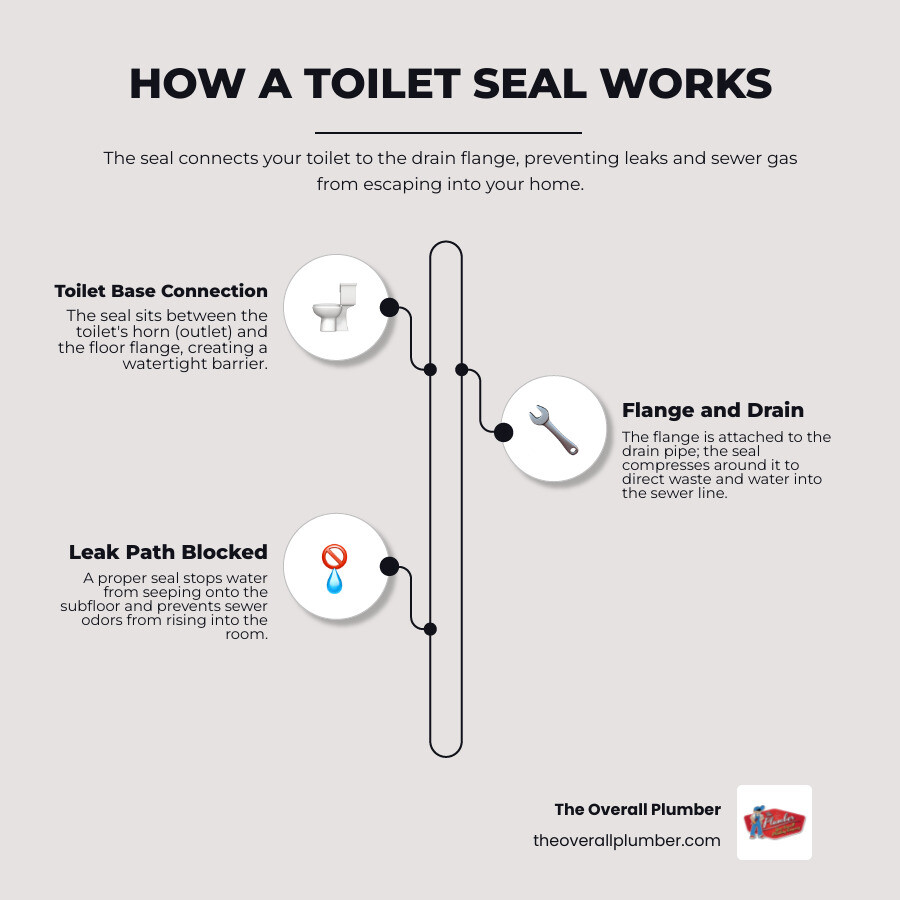
Before you start tearing apart your bathroom, it is helpful to understand the anatomy of your toilet’s connection to the floor. The closet flange (or toilet flange) is the metal or plastic collar secured to the subfloor that connects the toilet to the sewer drain line.
What is Included in a Standard Toilet Seal Repair Kit?
A complete, high-quality toilet seal repair kit should contain everything you need to establish a secure, leak-free connection. For example, a robust kit like the MENNTY Toilet Flange Repair Kit or a specialized kit like the Complete Toilet Repair Kit for 3-inch Flush Valve Toilets – Danco typically includes:
- The Primary Seal: A flexible blue rubber or elastomer gasket designed to fit standard 3-inch or 4-inch drain lines.
- Raise Spacers: Stackable rings (such as a green elastic spacer and a black EVA spacer) to adjust for recessed floor flanges.
- A Repair Flange: A metal or plastic ring that can be secured over a broken or cracked flange.
- No-Rust Hardware: Solid brass closet bolts (typically 3-1/6 inches long), metal washers, plastic retaining washers, and nuts to secure the toilet to the floor.
If you are performing a comprehensive overhaul of your toilet, you might also look at kits like the Mansfield Toilet Fill Valve and Flush Valve Seal Repair Kit to fix internal tank leaks at the same time.
Fixing a Wobbling Toilet or Damaged Flange
If your toilet is rocking, simply replacing the seal will not solve the underlying problem. A rocking toilet will quickly ruin even the most resilient new seal. The wobble is usually caused by one of two things: an uneven floor or a broken toilet flange.
Over time, plastic (PVC) or cast-iron flanges can crack, especially around the slots where the closet bolts slide in. When these slots break, the bolts pull free, and the toilet begins to wobble. A complete flange repair kit allows you to overlay a new metal repair ring directly over the broken flange, securing it to the subfloor with wood or concrete screws to restore perfect structural stability.
DIY Installation Guide: Replacing Your Toilet Seal
If you are handy and comfortable with basic tools, replacing your toilet seal is a highly manageable weekend project. If you have never pulled a toilet before, it is a good idea to read through our complete guide on How to Install a Toilet in 7 Steps to familiarize yourself with the overall process.
Tools and Safety Precautions for DIYers
Before you begin, gather the following tools:
- An adjustable wrench or channel-lock pliers
- A putty knife (for scraping away old wax)
- A bucket and a large sponge
- Rags or paper towels
- Safety glasses and heavy-duty rubber gloves
- A trash bag (for the old wax ring)
Safety Tip: Toilets are made of vitreous china, which is heavy, awkward to lift, and highly fragile. If you drop or over-tighten a porcelain toilet, it can crack instantly. Always lift with your legs, and consider having a helper nearby to assist with lifting and aligning the toilet onto the new bolts.
Step-by-Step: How to Install a Toilet Seal Repair Kit
Here is how to get the job done cleanly and correctly:
- Shut Off the Water: Locate the shut-off valve behind the toilet and turn it clockwise until it stops.
- Drain the Toilet: Flush the toilet and hold the handle down to empty the tank. Use your sponge and bucket to soak up the remaining water in both the tank and the toilet bowl. If you need help with the shut-off valve, refer to Stop the Flow: A Guide to Installing Your New Toilet Shut Off Valve.
- Disconnect the Water Line: Use your adjustable wrench to disconnect the supply line from the bottom of the toilet tank.
- Remove the Floor Bolts: Remove the plastic bolt caps, then unscrew the brass nuts holding the toilet to the floor.
- Lift and Set the Toilet Aside: Carefully lift the toilet straight up off the flange and set it gently onto a garbage bag or an old towel to prevent scratching your bathroom floor.
- Scrape Away the Old Wax: This is the messiest part. Use your putty knife to scrape the old, sticky wax off both the bottom of the toilet bowl (the horn) and the floor flange. Wipe the surfaces clean with paper towels.
- Inspect and Prepare the Flange: Check for cracks. If the flange is recessed, stack your green and black spacers to bring the height flush with or slightly above the finished floor.
- Position the New Seal: Place your new wax-free seal or hybrid gasket over the flange, aligning the bolt holes. Insert your new, no-rust brass closet bolts into the flange slots.
- Set the Toilet: Carefully lift the toilet, align the holes in the porcelain base with the floor bolts, and lower the toilet straight down. Press down firmly with your body weight to seat the toilet.
- Tighten the Hardware: Hand-tighten the plastic washers, metal washers, and brass nuts onto the bolts. Use your wrench to tighten them an extra turn or two. Do not over-tighten, or you will crack the porcelain.
- Reconnect and Test: Reconnect the water supply line, open the shut-off valve, and let the tank fill. Flush the toilet several times while closely watching the base for any signs of water.
Troubleshooting Common Post-Installation Issues
If you finish the installation and notice a problem, don’t panic. Here is how to handle the most common post-installation issues:
- Water Leaking from the Base: Double-check that the leak is actually coming from the floor and not dripping down from the tank-to-bowl gasket or a loose supply line. If it is definitely the floor seal, the toilet may not have been pressed down far enough, or the flange was too deeply recessed for a standard seal without spacers.
- The Toilet Rocks Slightly: If the floor is uneven, the toilet might wobble even with tight bolts. Do not keep tightening the bolts to stop the wobble. Instead, insert plastic toilet shims under the low spots of the toilet base, trim them flush, and seal around the base with a high-quality silicone sealant (leaving a small gap in the back so you can spot future leaks).
- Sewer Smells Return: This means the seal is not airtight. If you used a wax-free seal, you can simply unbolt the toilet, lift it, reposition the seal, and try again. If you used a traditional wax ring, you must discard it and start over with a fresh one.
- Internal Tank Issues: If your toilet is now sealed at the floor but won’t stop running, you may need to address the tank components. Learn How to Replace a Flapper in Less Than an Hour or read our guide on how to stop wasting water: Don’t Flush Cash Away: A Guide to Fixing Your Toilet Fill Valve.
Cost Comparison: DIY vs. Professional Plumber
For many homeowners, the choice between tackling this project themselves or calling a professional comes down to cost and peace of mind.
- DIY Cost: A high-quality toilet seal repair kit (such as the Fluidmaster 7530 Universal Better Than Wax Toilet Seal or the Korky Wax Free Toilet Seal Kit) costs between $9 and $27. Add in a few basic tools if you do not already own them, and your total investment is well under $50.
- Professional Cost: Hiring a licensed plumber to replace a toilet seal typically ranges from $150 to $300, depending on your location and the complexity of the repair (such as whether the flange is broken or the subfloor is rotted).
While DIY is incredibly budget-friendly, a professional plumber brings specialized diagnostic tools. If there is hidden water damage in your subfloor, or if your cast-iron drain line is cracked beneath the concrete slab—a common issue in older homes across Houston and Galveston County—a professional will catch it before it leads to a catastrophic structural failure. For a complete breakdown of what to expect financially, read The Complete Guide to Toilet Replacement Cost.
Professional Toilet Seal and Flange Repair Services
At The Overall Plumber, we understand that not everyone wants to spend their Saturday scraping old, smelly wax off a bathroom floor or wrestling with a heavy porcelain toilet. That is why we provide expert toilet repair and replacement services across Brazoria County, Harris County, and Galveston County.
When you choose us, you get the benefit of our industry-leading guarantees and customer-first policies:
- No Trip Charges & No Overtime Fees: We believe in upfront, transparent pricing with no hidden surprises.
- Priority Scheduling: We get to you fast, especially when a leaking toilet is disrupting your home.
- Satisfaction Guarantees: We stand behind our work 100%. If it isn’t done right, we will make it right.
- Comprehensive Care: From simple seal replacements to full drain cleaning with advanced diagnostic camera inspections, we handle it all.
Whether you need a quick seal replacement or a complete system overhaul, check out our Services: Toilet Replacement Services to see how we can help keep your home’s plumbing running smoothly. Ready to fix your leaking toilet base? Contact The Overall Plumber today to schedule your repair.