


Tankless Water Heater Drain Pan Installation: The Basic Steps
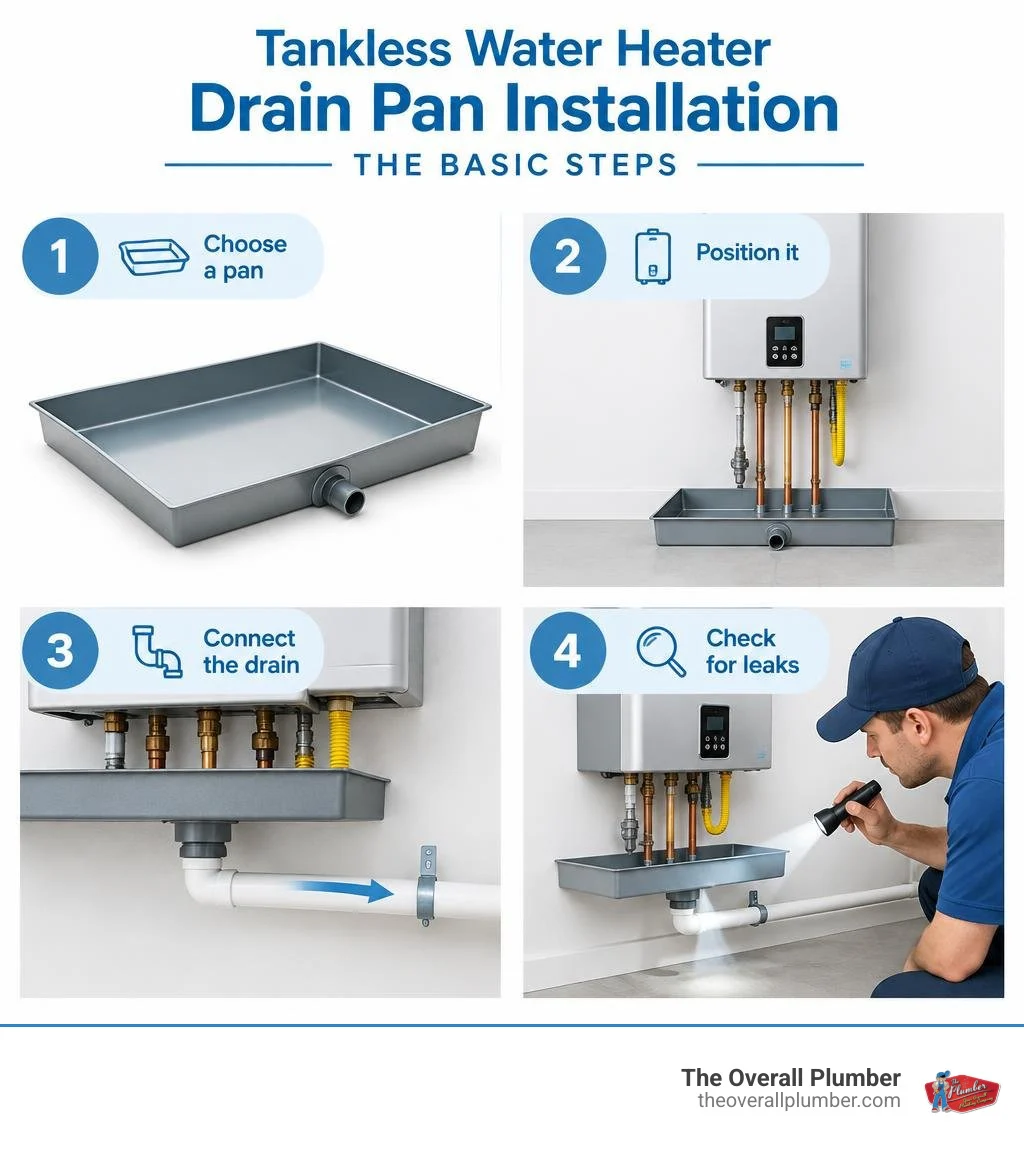
For a tankless water heater drain pan installation, choose a watertight pan that fits beneath the unit and meets local code. Secure it under a wall-mounted heater, or place it on a level base under a floor-mounted one. Connect the pan outlet to a drain line that slopes toward an approved discharge point. Keep the heater’s condensate and relief-valve discharge out of the pan.
A tankless heater has no storage tank, but its pipes and connections can still leak. A pan helps direct that water away from floors, walls, and ceilings.
This guide explains tankless water heater drain pan installation, including where local code and the heater’s instructions should guide your next step.
Why Drain Pans and Plumbing Codes Matter for Tankless Systems
Many homeowners assume that switching from a traditional 50-gallon storage tank to an on-demand unit eliminates the risk of indoor flooding. While there is no massive tank waiting to rupture, an active leak inside a wall-mounted or floor-mounted unit can still wreak havoc. High-pressure supply lines, internal heat exchangers, and copper fittings can develop pinhole leaks or loose seals over time. Uncontained water leaking inside an attic, closet, or upper-floor utility room can cause more than $30,000 in structural framing rot, drywall collapse, and ruined flooring.
Plumbing and mechanical codes across Texas strictly regulate water heater setups to prevent catastrophic structural damage. Standard building codes, including guidelines modeled after the Uniform Plumbing Code and California Plumbing Code (CPC 507.5), require a watertight, corrosion-resistant drain pan with a dedicated drainage line whenever a water heater is installed in an attic, ceiling assembly, or any indoor location where leakage could cause property damage.
Reviewing official regional Tankless Water Heater Guidelines shows that inspectors look for specific pan dimensions, non-combustible material clearances, and independent drain outlets. If you are planning an overhaul of your home’s system, pairing this setup with our comprehensive water heater installation guide ensures every component satisfies municipal inspection standards from day one.
Choosing the Right Pan: Materials, Sizing, and Code Compliance
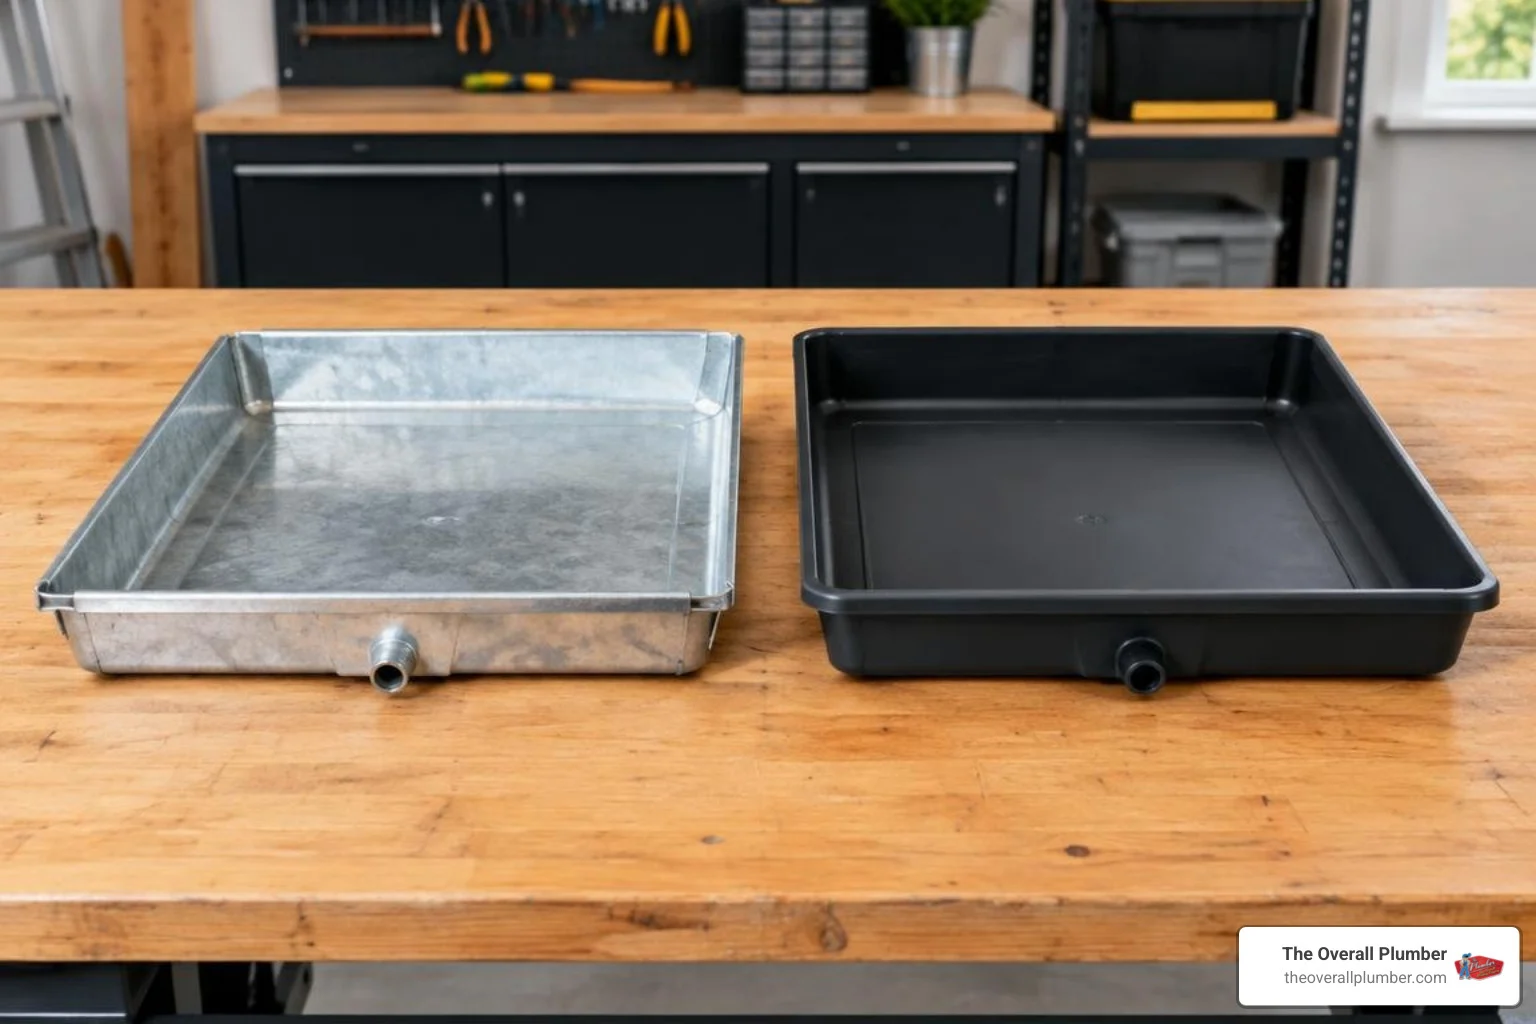
Selecting an appropriate pan comes down to unit dimensions, fuel type, and local building requirements. Tankless drain pans are distinct from traditional round tank trays. They are engineered with a compact, rectangular profile designed to capture dripping water directly beneath inlet and outlet pipe clusters without protruding into your living space.
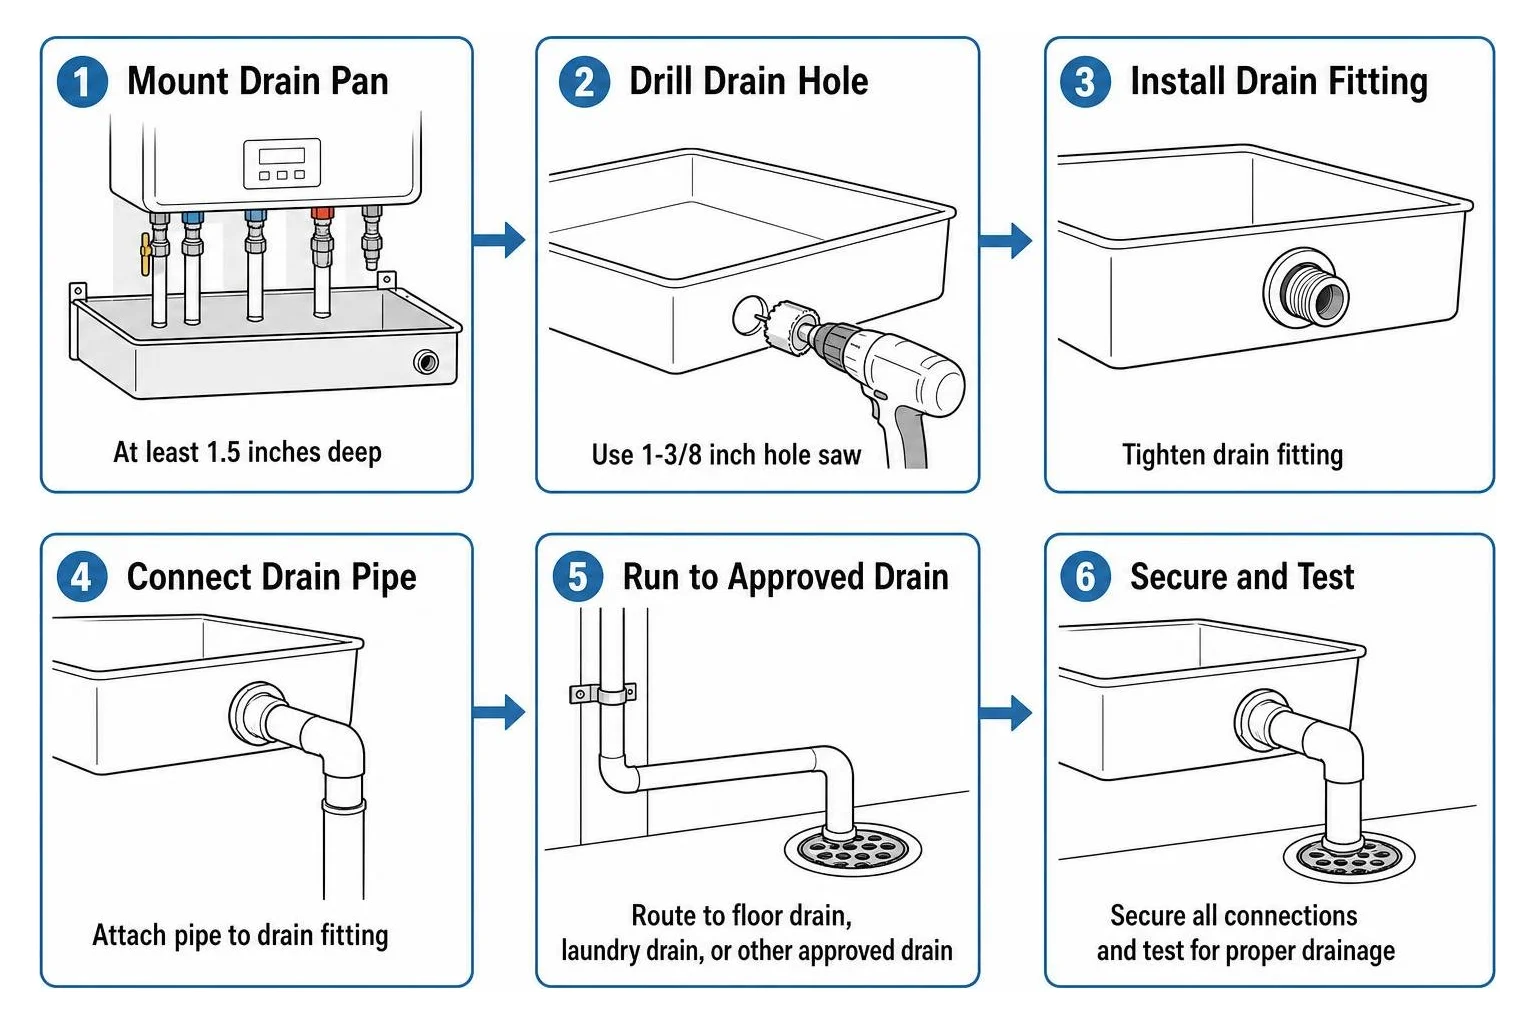
Standard code requires the pan to be at least 1.5 inches deep to hold sudden spills and direct them efficiently into the drain fitting. Most wall-mounted residential tankless models have a maximum width of 17 inches and a depth of 10 inches, making a pan with matching proportions essential for catching every stray drop.
| Feature | Galvanized / Metal Drain Pan | High-Impact Polymer Drain Pan |
|---|---|---|
| Material Thickness | Minimum 24-gauge (0.016 inches) | Minimum 0.0625 inches |
| Durability | High impact & crush resistance | Corrosion-proof, crack-resistant |
| Temperature Rating | High thermal threshold | Suitable for zero-clearance units |
| Code Suitability | Universally accepted for gas & electric | Widely accepted for listed zero-clearance electric/gas |
| Primary Advantage | Satisfies strict metal-only local codes | Lightweight, easy to trim for tight side-pipe runs |
While heavy-gauge aluminum or galvanized steel pans are traditionally mandated for gas-fired equipment, modern high-impact plastic pans are commonly approved when a unit is certified for zero-clearance to combustible walls. However, local ordinances in cities like Pasadena outline strict criteria in their TANKLESS WATER HEATERS documentation. Always confirm whether your local inspector mandates 24-gauge sheet metal before finalizing your materials.
Step-by-Step Tankless Water Heater Drain Pan Installation
A clean, leak-free drain pan setup relies on gravity and proper pipe alignment. When undertaking tankless gas installation, installing the pan before completing all water and gas hookups saves time and ensures your plumbing lines align naturally through pre-planned cutouts.
Tools and Materials for Tankless Water Heater Drain Pan Installation
Before starting, gather the necessary plumbing hardware and tools:
- Approved rectangular tankless drain pan (metal or code-compliant polymer)
- 1-3/8 inch hole saw and drill driver
- Bulkhead drain adapter (1-inch or 3/4-inch MIP with rubber gasket and locknut)
- 3/4-inch Schedule 40 PVC or CPVC pipe and matching elbows
- PVC primer and solvent cement
- 100% silicone sealant or plumbing caulk
- Heavy-duty stainless steel mounting screws and washers
- 9-inch magnetic torpedo level
- Tape measure
Wall-Mounted Tankless Water Heater Drain Pan Installation
Most residential tankless units hang on interior or garage walls. Follow these steps to secure the pan beneath a wall-hung unit:
- Locate Wall Studs: Most wall-mounted pans feature pre-molded mounting slots spaced on 16-inch centers. Use a stud finder to locate the framing behind your drywall to ensure solid anchoring.
- Position the Pan: Hold the pan directly below the lower mounting bracket of your water heater (typically 10 to 12 inches below the bottom panel of the unit). This allows sufficient clearance for service valves, isolation kits, and filter cleaning while keeping all plumbing connections directly over the catch basin.
- Trim Side Splash Guards (If Needed): If your unit is mounted over a wide plywood backer board or features tight side-routed piping, trim the upper side splash guards up to 3-1/2 inches as allowed by the manufacturer. Never cut below the 1.5-inch water retention rim.
- Drill the Drain Outlet: Choose an outlet location on the left, right, or bottom corner that provides the straightest run for your discharge pipe. Cut a clean 1-3/8 inch hole using your hole saw.
- Install the Bulkhead Fitting: Slide the drain adapter with its rubber gasket through the hole from the inside. Apply a thin bead of 100% silicone around the outer rim, thread the locknut onto the exterior threads, and hand-tighten firmly with channel locks without cracking the housing.
- Mount to the Wall: Place your level across the pan. Fasten the pan directly into the wall studs using stainless steel screws. Do not overtighten, as crushing the rear structural ribs can tilt the basin away from the drain outlet.
Floor-Mounted Tankless Water Heater Pan Setup
When a tankless heater is installed on a utility platform, floor stand, or inside an equipment closet, placing the pan beneath the unit requires a stable, level base.
- Verify Base Stability: Ensure the concrete pad or wooden platform is level and free of debris. If the floor is uneven, shim the base underneath the pan rather than tilting the heater legs.
- Avoid Bottom-Center Outlets: For floor-mounted configurations, never drill a drain opening through the bottom center of the pan where the weight of the unit or stand rests. Always use a side-discharge bulkhead fitting.
- Position the Equipment: Place the drain pan on the floor and carefully position the tankless unit’s floor stand inside the basin. Ensure the heater does not pinch or obstruct the drain adapter.
- Anchor and Strap: Secure the heater frame and seismic bracing according to local codes, ensuring anchors penetrate the floor without puncturing the watertight integrity of the pan basin. If you are completing a tankless electric water heater installation, verify that electrical conduit runs enter through the top or upper sides of the heater casing, well away from the pan’s water line.
Managing Drain Lines, T&P Valves, and Acidic Condensate
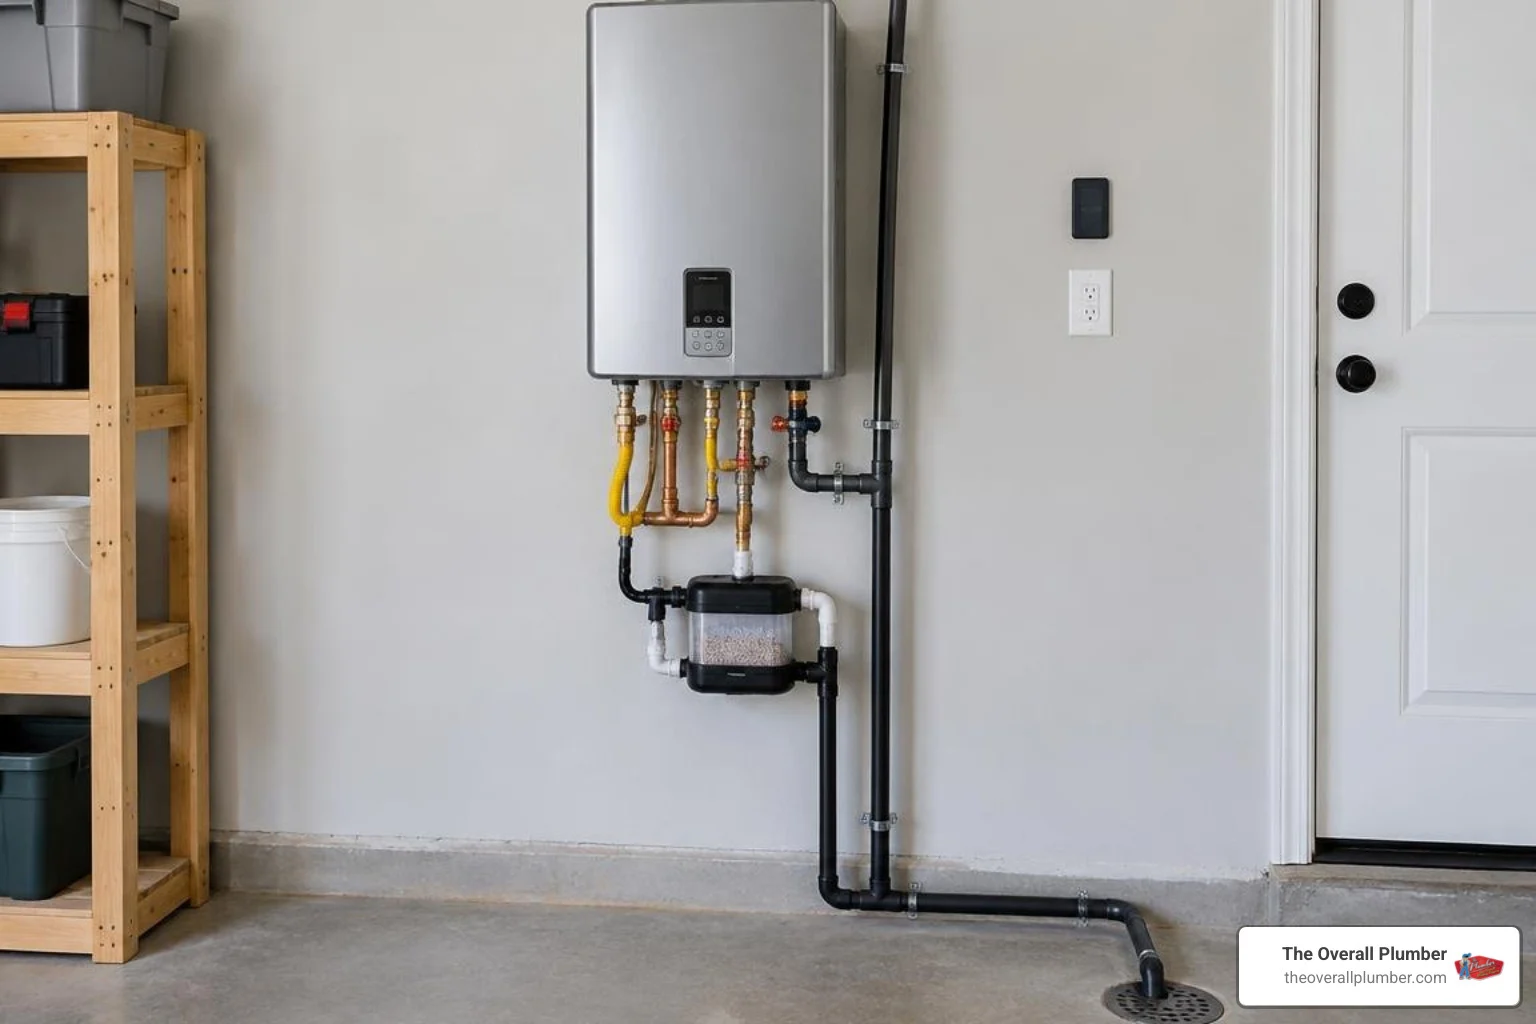
Installing the drain pan is only half the battle; the water caught in the basin must travel safely out of the home. Running drain piping incorrectly is one of the most common reasons DIY installations fail municipal inspections.
- Drain Line Sizing and Pitch: The pan’s drain line must be a minimum of 3/4-inch nominal pipe size (PVC, CPVC, or copper). The pipe must maintain a steady downward slope of at least 1/4 inch per foot (or a minimum of 1/8 inch per foot where horizontal space is constrained) toward an approved termination point.
- Discharge Terminations: The pan drain should route by gravity to an indirect waste receptor, floor drain, or to the exterior of the building. When venting outside, the pipe must terminate between 6 and 24 inches above finished grade, pointing downward to prevent rodent entry and splashback against the foundation. Never install an inline P-trap on a pan drain line, as an unprimed trap will dry out, trap debris, and impede gravity flow during an active leak.
- Separating the Temperature and Pressure (T&P) Relief Valve: Never route the discharge tube from the water heater pressure relief valve into the drain pan. T&P lines are designed to release boiling, pressurized water or steam during an emergency. Discharging this high-velocity volume into a shallow pan can cause boiling water to splash out or melt non-metallic fittings. The T&P relief valve must have its own dedicated, gravity-fed discharge line that runs independently to an approved location.
- Handling Acidic Condensate: High-efficiency condensing tankless units produce acidic condensation during the combustion cycle (with a pH between 3.0 and 5.0). This liquid should never drain directly into the pan basin or into metallic waste lines where it can cause rapid corrosion. Condensate must be routed through dedicated PVC tubing into an inline limestone condensate neutralizer before discharging into public sewer drains or floor waste lines.
Frequently Asked Questions About Tankless Drain Pans
Can I install a drain pan under an existing tankless water heater?
Yes, you can retrofit a drain pan under an existing wall-mounted or floor-mounted unit. For wall-hung units, turn off the power and water, close the isolation valves, and inspect the clearance beneath your pipe cluster. Wall-mount pans with low front profiles and open tops can slide up under the unit’s lower bracket without removing the heater from the wall. You may need to temporarily disconnect the lower cold and hot water unions to slip the pan against the drywall before re-securing the piping through the pan’s side clearance cutouts.
Why can’t I connect the T&P relief valve discharge into the drain pan?
Building codes strictly prohibit dumping T&P relief discharge directly into a shallow drip pan. If your water heater overheats or experiences excessive pressure, the valve opens to release scalding water at full domestic line pressure. A 1.5-inch drain pan cannot contain that volume or velocity, leading to hot water splashing over finished walls and creating severe burn risks. The relief valve requires a separate, uninterrupted pipe directed safely toward the exterior or an approved floor drain.
Does a gas-fired tankless water heater require a metal drain pan?
It depends on your local municipality and the zero-clearance certification of your water heater. High-efficiency gas tankless units are engineered with insulated jackets that remain cool to the touch, permitting the use of durable, high-impact polymer pans in many jurisdictions. However, certain local building departments require 24-gauge galvanized sheet metal pans for all fuel-burning appliances regardless of clearance ratings. Always check with your local building department before purchasing materials.
If you are preparing for a new unit or considering a complete hot water heater replacement in Houston, Pasadena, Pearland, League City, or Galveston, contact The Overall Plumber to discuss installation or a home inspection.