


Fix a Broken Sink Drain Pipe Before It Damages the Cabinet
To fix a broken sink drain pipe, place a bucket below the drain, remove the damaged trap or tailpiece, and replace it with matching 1-1/4-inch or 1-1/2-inch parts. If the break is at the wall, inspect the threaded adapter or wall stub-out first: a sound fitting can usually accept a new slip-joint trap adapter, but badly rotted metal inside the wall needs professional repair.
Most under-sink failures come from corrosion, worn washers, overtightened slip nuts, or a pipe bumped during cleaning or cabinet work. Do not tape over a cracked or rusted drain as a permanent fix. Dry-fit the new parts, use new compression washers, hand-tighten each slip nut, then add only about a quarter turn if needed. Finish by filling and draining the sink while checking every joint with a dry paper towel.
I am Dayton Whitworth, a second-generation plumbing professional serving Greater Brazoria County, Galveston County, Houston, and nearby Gulf Coast communities. I have helped homeowners diagnose and repair broken sink drain pipe problems, from simple failed P-traps to corrosion and damaged fittings hidden behind the wall.
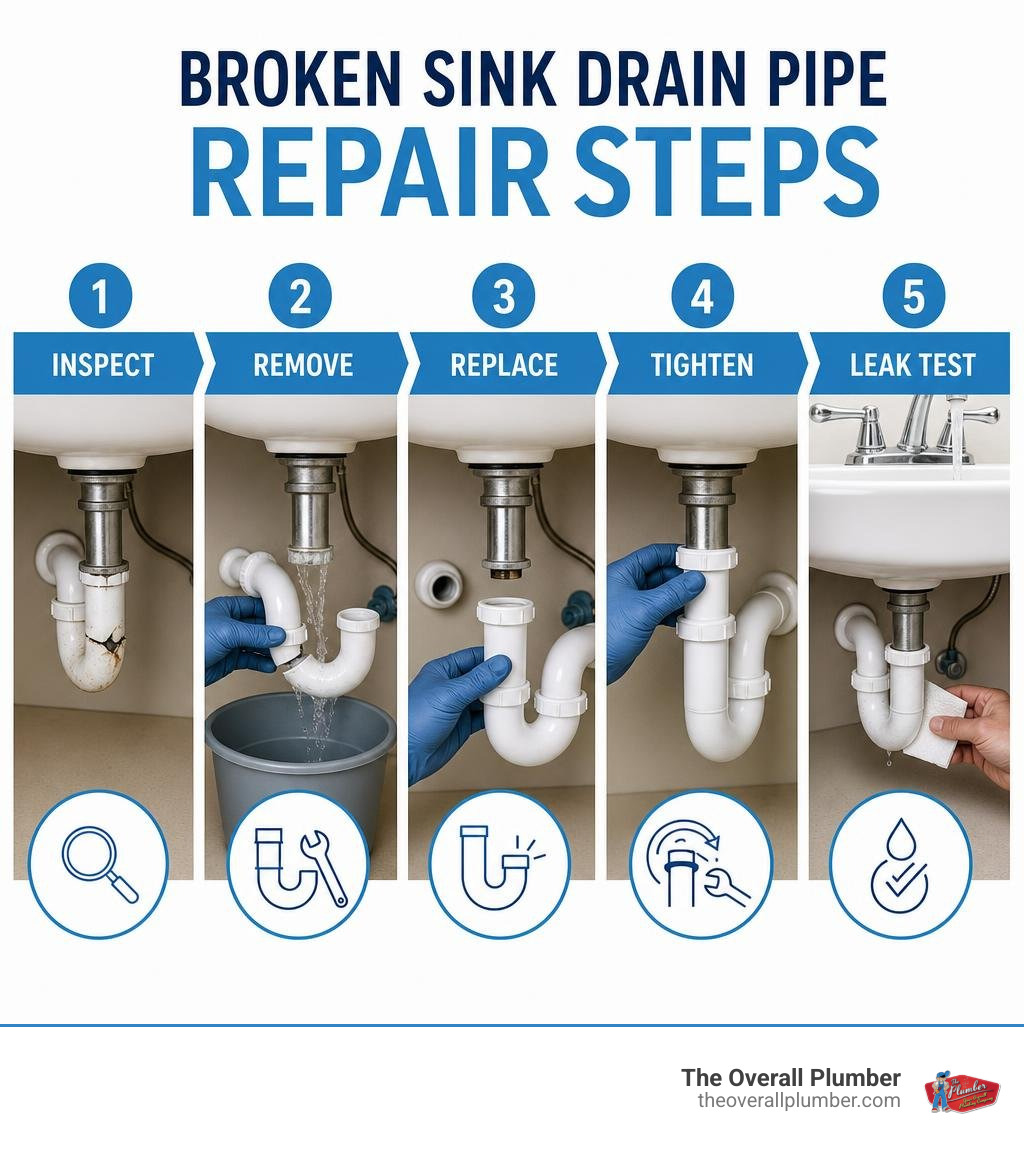
Simple broken sink drain pipe word guide:
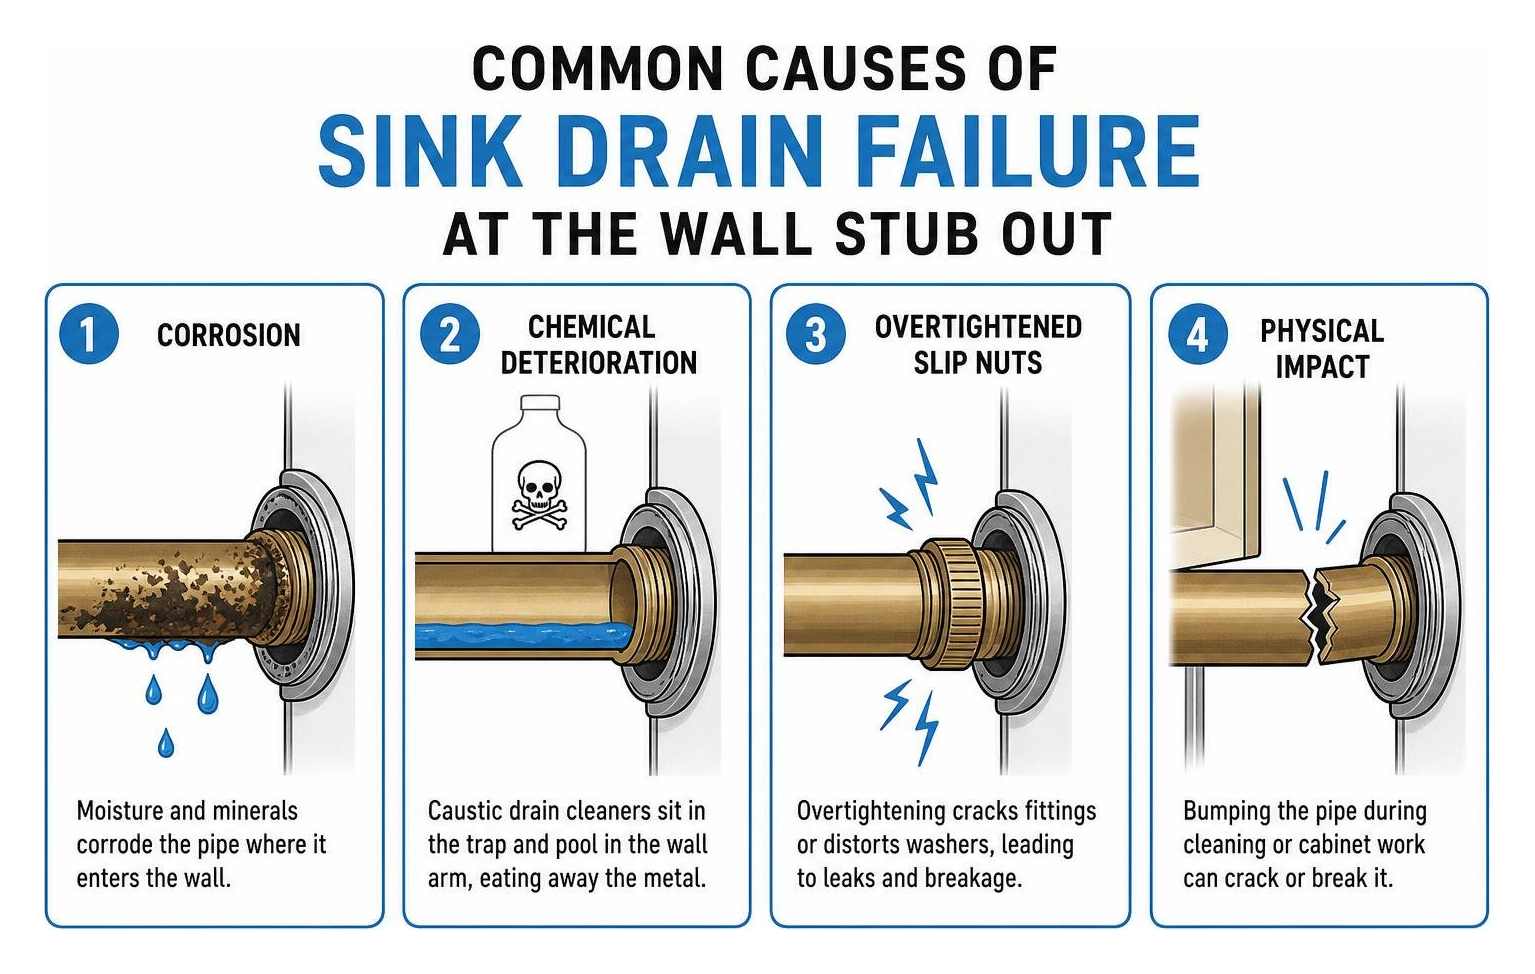
Common Causes of Drain Failure at the Wall Connection
A broken drain under the sink rarely happens out of nowhere. Most of the time, the trouble begins right where the horizontal drain arm enters the wall stub-out. This junction endures constant moisture, chemical exposure, and physical movement.
When wastewater sits against the lower lip of a horizontal pipe, minerals and caustic compounds eat away at thin-wall tubing. If you want to tackle this yourself, our guide on DIY under-sink repairs provides helpful baseline context for understanding under-cabinet drainage dynamics.
Galvanic Corrosion and Chemical Deterioration
Galvanic corrosion is a primary culprit in older plumbing systems throughout the Houston and Galveston areas. When dissimilar metals touch—such as a thin brass tubular drain arm threaded into an old cast iron or galvanized steel sanitary tee—an electrochemical reaction takes place. The softer brass oxidizes rapidly, turning brittle and paper-thin right at the wall junction.
Household chemical drain cleaners dramatically speed up this failure. Liquid drain openers rely on harsh sulfuric acid or sodium hydroxide. While they might temporarily burn through a hair clog, they also sit in the trap and pool along the bottom of the wall arm. Over time, these caustic liquids chew through thin-walled brass and weaken vintage cast iron, causing the metal to crumble the moment someone bumps the vanity.
Structural Stress and Failed Mechanical Joints
Physical strain also ruins sink drain assemblies:
- Cabinet settling and misalignment: As homes settle or heavy vanities shift, the horizontal drain arm is pulled out of square, putting constant shear stress on the wall connection.
- Overtightened slip nuts: Cranking down on plastic or pot-metal slip nuts creates hairline fractures that blow out under heat and water pressure.
- Degraded compression washers: Rubber gaskets harden, dry out, and crack every 5 to 10 years, letting dirty water seep continuously onto metal threads.
- Vibration stress: Garbage disposals and frequent under-sink storage jostling continuously rattle the rigid connections until a joint cracks.
Learning the proper mechanics to fix a broken pipe ensures you avoid putting unnecessary structural torque on delicate wall fittings.
Essential Tools and Replacement Materials for Drain Repairs
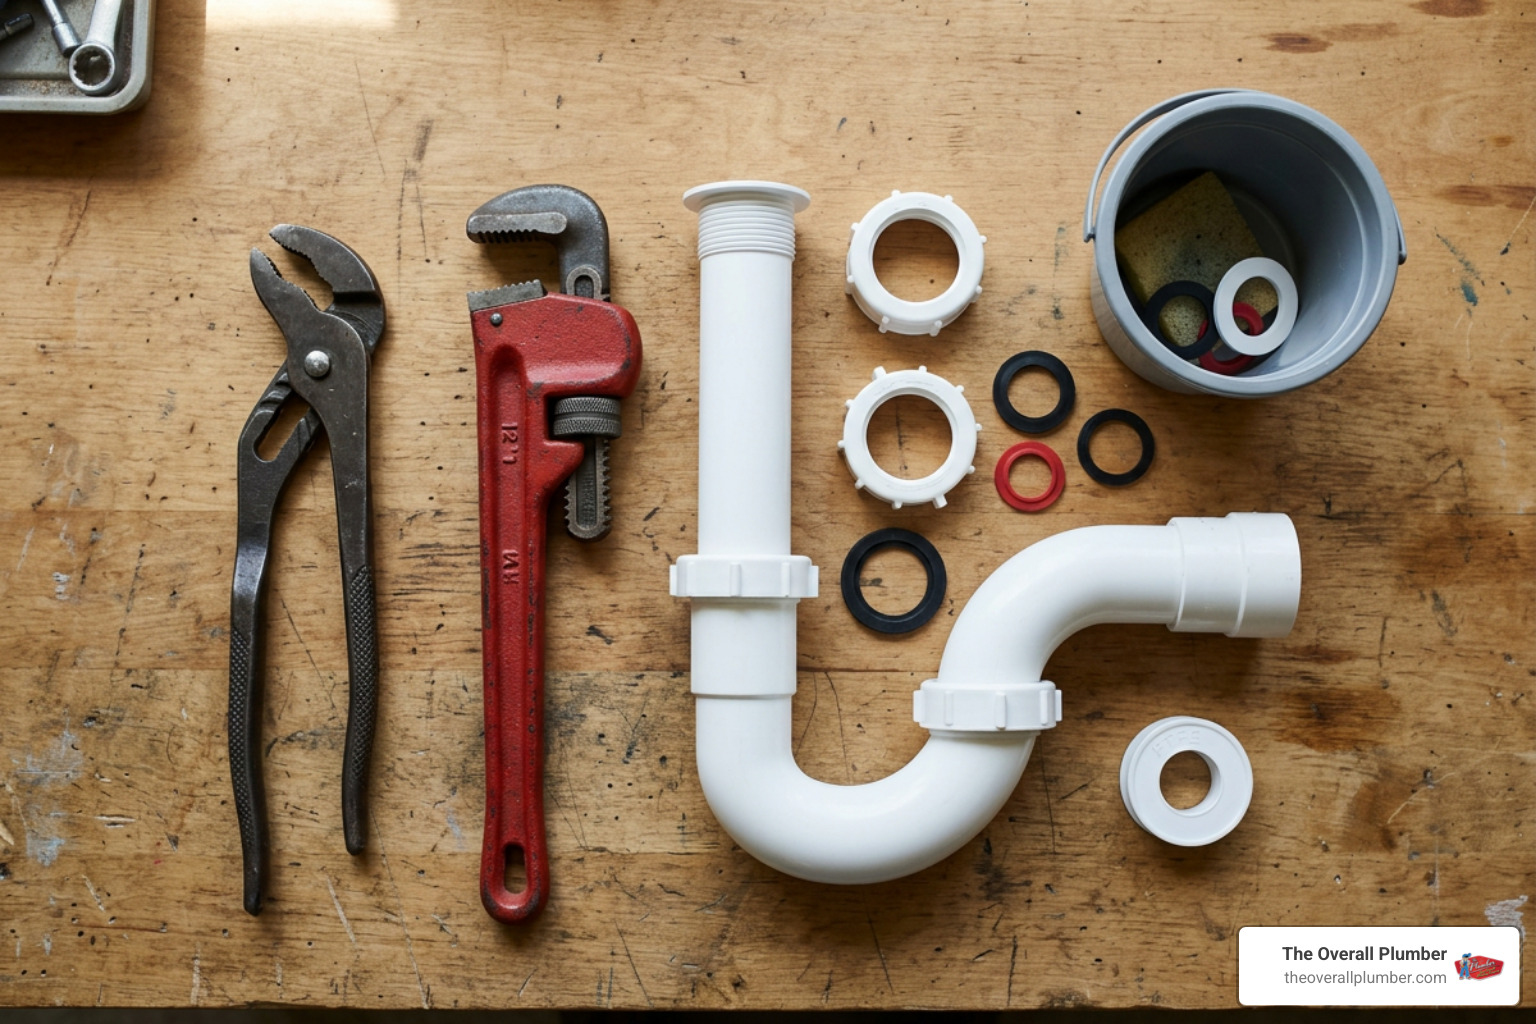
Before you begin taking apart the plumbing beneath your vanity or kitchen basin, gather the right equipment so you are not left stranded with water shut off:
- Catch bucket and dry microfiber rags
- Tongue-and-groove pliers (Channel-lock style)
- Pipe wrench (10-inch or 12-inch)
- Internal pipe wrench or extractor set (for stuck metal nipples)
- Mini-hacksaw or oscillating multi-tool
- Penetrating oil (such as PB Blaster or Kroil)
- Replacement P-trap kit (polypropylene or Schedule 40 PVC)
- New beveled poly or rubber compression washers
- Safety glasses and heavy nitrile gloves
Sizing and Pipe Material Selection
Choosing the right replacement components prevents messy alignment issues. Standard residential sink drains come in two main diameters:
| Pipe Dimension | Typical Application | Common Materials | Key Characteristics |
|---|---|---|---|
| 1-1/4 Inch | Bathroom sinks / Lavatories | Tubular PVC, Polypropylene, Thin-wall Brass | Designed for lower volume drainage; uses smaller slip nuts and washers. |
| 1-1/2 Inch | Kitchen sinks, Bar sinks, Laundry tubs | Schedule 40 PVC, Tubular Polypropylene, ABS | Handles higher flow rates and food debris; standard connection for disposals. |
If you are updating older plumbing, switching to white or black tubular polypropylene is generally ideal for ease of maintenance. For a deeper breakdown of material choices, explore standard drain pipe replacement methods.
Understanding Slip-Joint Compression Mechanics
Modern under-sink drainage relies on slip-joint connections. Instead of glued threads or soldered seams, a slip joint creates a watertight seal using a tapered compression washer squeezed between a slip nut and the pipe wall.
When you tighten the nut onto the external threads of a trap adapter or pipe body, it drives the beveled (pointed) edge of the washer directly into the flared mouth of the receiving fitting. As the washer wedges tight, it expands against the outer wall of the sliding pipe, forming a secure seal that accommodates minor thermal expansion and slight angle adjustments.
Step-by-Step Guide to Replacing a Broken Sink Drain Pipe
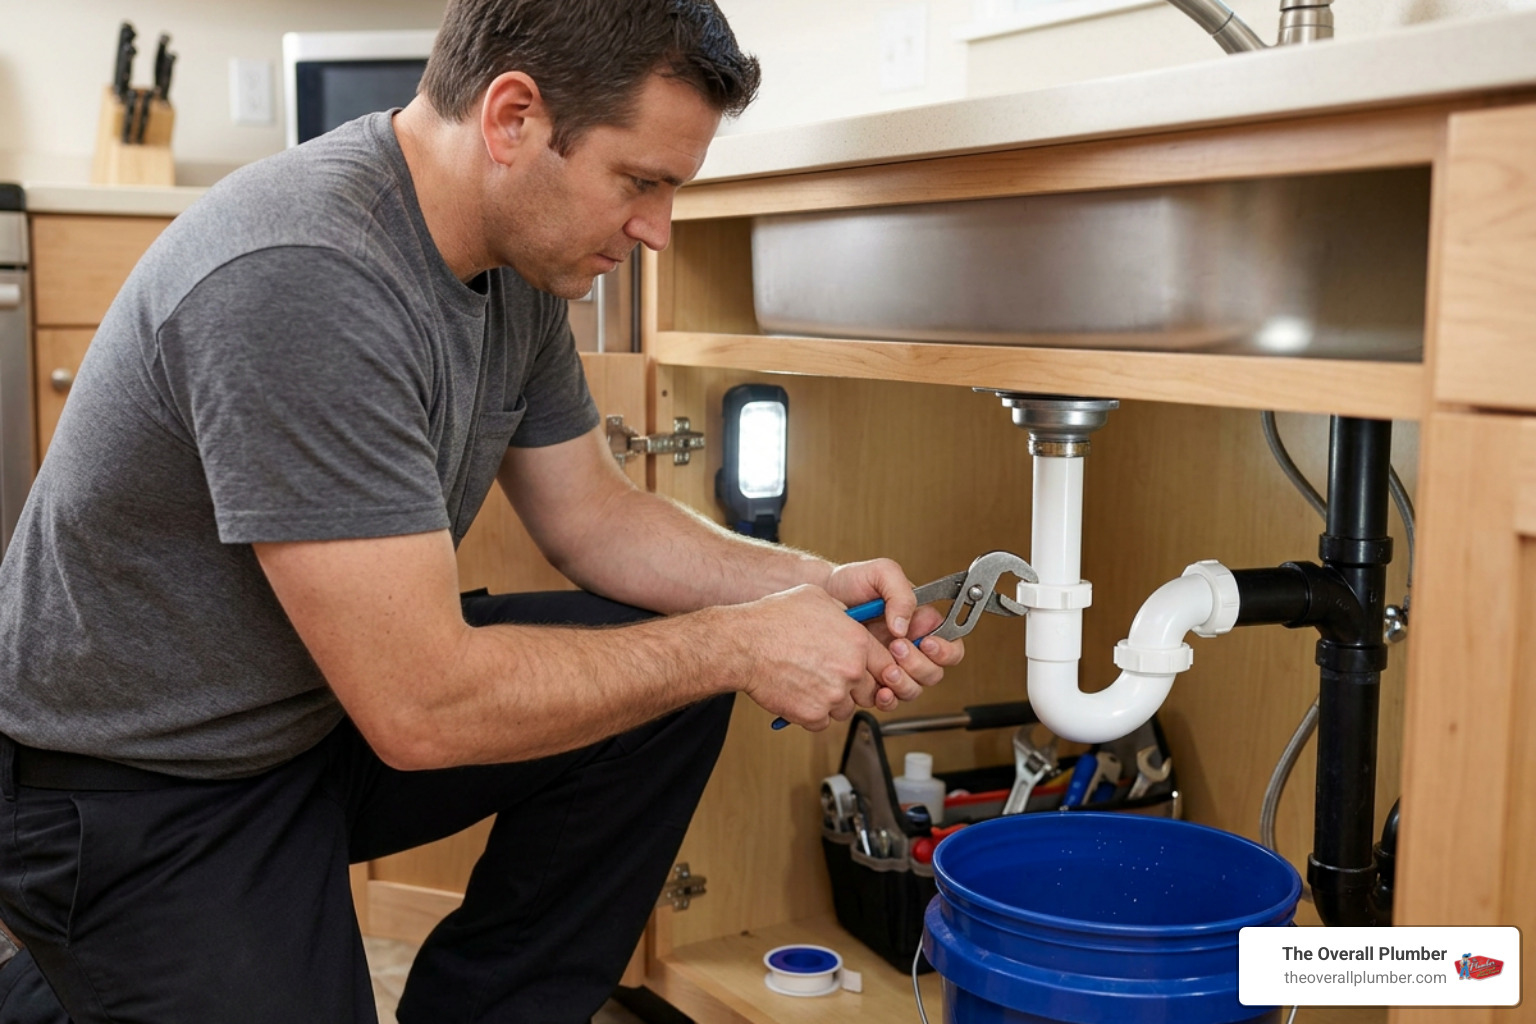
Ready to tackle the repair? Follow these clear steps to safely tear down the damaged components and rebuild your drainage line.
Removing a Broken Sink Drain Pipe From a Corroded Wall Adapter
- Clear the workspace: Turn off the fixture shut-off valves and place a low-profile catch bucket directly beneath the P-trap.
- Apply penetrating oil: If you are dealing with a rusted metal slip nut or threaded adapter at the wall stub-out, spray the threads liberally with penetrating oil and let it soak for 15 to 20 minutes.
- Loosen the joints: Grip the wall fitting with a pipe wrench to back-hold it, then use tongue-and-groove pliers to turn the slip nut counterclockwise.
- Extract sheared pipe sections: If the tubular arm snapped flush inside the wall fitting, do not panic. Use an internal pipe extractor or carefully make two shallow relief cuts along the inside diameter of the stuck pipe collar with a mini-hacksaw blade. Avoid cutting into the female threads of the wall adapter.
- Clean the threads: Use a wire brush to scrub old mineral deposits, pipe dope, and rust out of the female adapter threads so the new connection seats squarely.
If you encounter cracked plastic tubing down the line, review our walkthrough on repairing cracked PVC drain lines for helpful solvent and fitting techniques.
Installing the New Drain Assembly and P-Trap
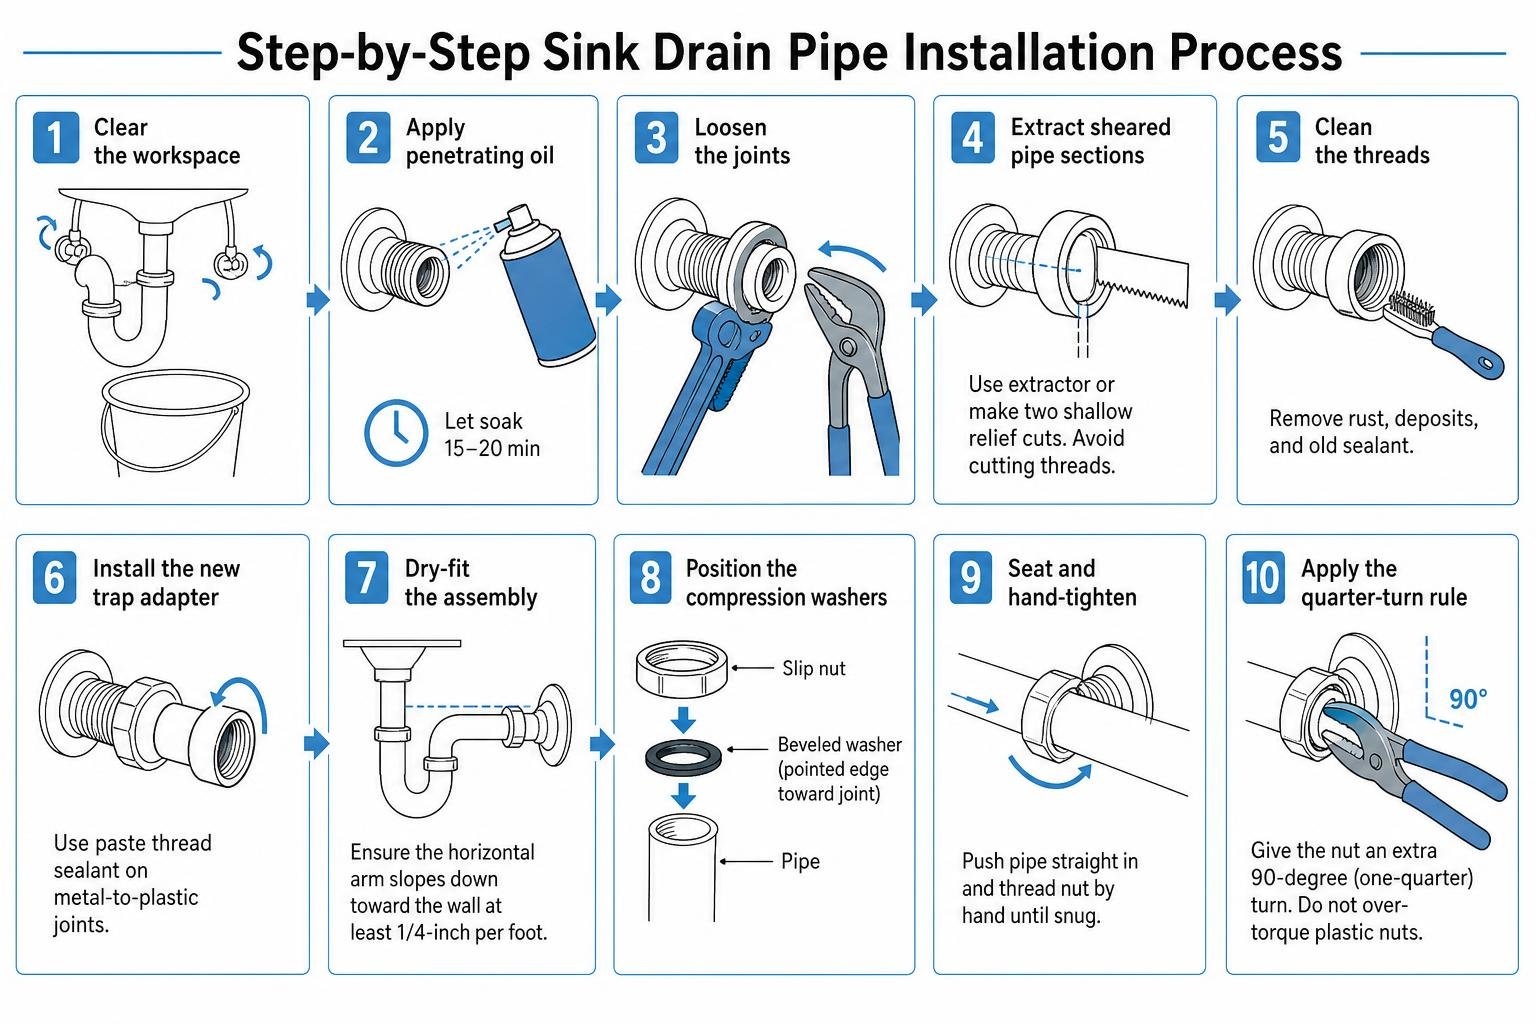
- Install the new trap adapter: Thread a new PVC male trap adapter (also known as a Marvel connector) into the cleaned wall fitting using standard paste thread sealant on metal-to-plastic joints.
- Dry-fit the assembly: Connect the sink tailpiece down to the P-trap U-bend, and align the horizontal trap arm with the wall adapter. Ensure the horizontal arm slopes downward toward the wall at a minimum pitch of 1/4-inch per foot.
- Position the compression washers: Slide the slip nut onto the pipe first, followed by the beveled washer. The tapered, pointed edge of the washer must always face toward the joint opening.
- Seat and hand-tighten: Push the pipe straight into the receiving hub without cocking it to the side. Thread the slip nut down by hand until it is completely snug.
- Apply the quarter-turn rule: Using your tongue-and-groove pliers, give the nut an extra 90-degree (one-quarter) turn. Do not over-torque plastic nuts.
For homeowners dealing with vintage residential infrastructure, our guide on repairing broken cast iron drain pipes covers transitioning older wall stacks to modern PVC.
Testing the New Connection for Leaks
Never rely on a quick trickle of water to verify a drain repair:
- The Basin Fill Test: Place the sink stopper in the basin and fill the sink completely to the rim with water.
- The High-Volume Release: Pull the stopper to release a full rush of water. This creates maximum head pressure and fills the entire diameter of the trap and wall arm.
- The Dry Paper Towel Test: While the basin drains, wrap a clean, dry white paper towel around every mechanical slip joint, the wall adapter, and the base of the sink strainer. If the paper towel picks up even a single drop of moisture, you have located a small leak that requires realigning the washer or tightening the nut by a fraction of an inch.
Addressing Severe In-Wall Corrosion and Damaged Fittings
Sometimes the damage goes deeper than the exposed piping under your vanity. In older homes throughout Pasadena, Pearland, and League City, the wall fitting itself may be completely compromised.
When a Broken Sink Drain Pipe Requires In-Wall Plumbing Repairs
Watch for these warning signs that indicate the problem extends behind the drywall:
- Cracked or missing sanitary tee threads: The threaded hub inside the wall breaks off when you attempt to unscrew the old trap arm.
- Persistent sewer gas odors: A foul smell lingers beneath the vanity even after installing a full water seal in the new P-trap.
- Damp drywall or subflooring: Moisture, bubbling paint, or black mold blooms appear along the back wall or inside the bottom shelf of the vanity.
- Vertical stack degradation: Rust flakes, heavy scaling, or vertical hairline splits cover the main cast iron drainage stack inside the stud bay.
When a cast iron tee is cracked behind the wall, simply screwing in a new plastic adapter will not prevent dirty wastewater from draining into your wall cavity.
Professional Diagnostics and Long-Term Solutions
Fixing an in-wall failure typically requires cutting a clean access panel in the drywall to expose the drainage stack. A professional plumber cuts away the cracked sanitary tee using reciprocating saws or snap cutters and splices in a modern Schedule 40 PVC tee using heavy-duty shielded rubber transition couplings (often called mission bands).
We also use advanced diagnostic tools like motorized drain augers and self-leveling fiber-optic cameras to inspect the line past the wall. Scheduling a video camera sewer inspection verifies that your main horizontal drain is completely free of tree root intrusions, heavy grease sludge, or structural dips before we close up the wall.
Frequently Asked Questions About Sink Drain Repairs
What is the quarter-turn rule for tightening slip-joint nuts?
The quarter-turn rule is the gold standard for securing plastic slip joints without cracking them. Tighten the slip nut as firmly as you can using only your bare hands. Once the nut is hand-tight, place tongue-and-groove pliers over the nut and turn it exactly 90 degrees (one quarter of a full rotation). This provides enough force to fully compress the beveled washer without crushing the plastic threads or warping the pipe.
Should I use Teflon tape or plumber’s putty on plastic slip joints?
No. Plastic slip-joint nuts do not seal using their threads. The seal is created mechanically when the beveled washer compresses against the smooth outer wall of the pipe. Adding Teflon (PTFE) tape or plumber’s putty to plastic slip-joint threads can cause the nut to slip, cross-thread, or prevent the washer from seating evenly. Keep plastic slip threads clean and dry. Thread tape is only necessary on standard tapered pipe threads (NPT), such as metal-to-metal or plastic threaded pipe nipples.
How do I remove a broken threaded pipe nipple stuck inside the wall?
If a corroded brass or steel drain nipple snaps off flush inside the wall fitting, apply penetrating oil and tap the fitting lightly with a wrench to help the fluid work into the threads. Insert an expanding internal pipe extractor into the broken stub and turn it counterclockwise with a wrench. If it will not budge, make two relief cuts 1/2-inch apart on the interior of the broken nipple using a bare hacksaw blade, taking care not to nick the outer threads. Tap out the small section between the cuts with a cold chisel and needle-nose pliers, and the rest of the nipple will collapse inward for easy removal.
Restoring Your Drain Line with Lasting Results
At The Overall Plumber, we provide comprehensive drain cleaning, precision camera diagnostics, and long-term repair solutions across Houston, Pasadena, Pearland, League City, Friendswood, and the surrounding communities. For dependable broken pipe repair services, call The Overall Plumber to restore your plumbing system quickly.