


When Your Backflow Valve Leaking Vent Won’t Stop Dripping
A backflow valve leaking vent is one of those plumbing problems that seems minor until it isn’t. You notice a drip near your boiler or irrigation line, maybe a small puddle on the floor, and suddenly you’re wondering if something is seriously wrong with your water supply.
Here’s the quick answer most homeowners need:
Why is my backflow valve venting or dripping?
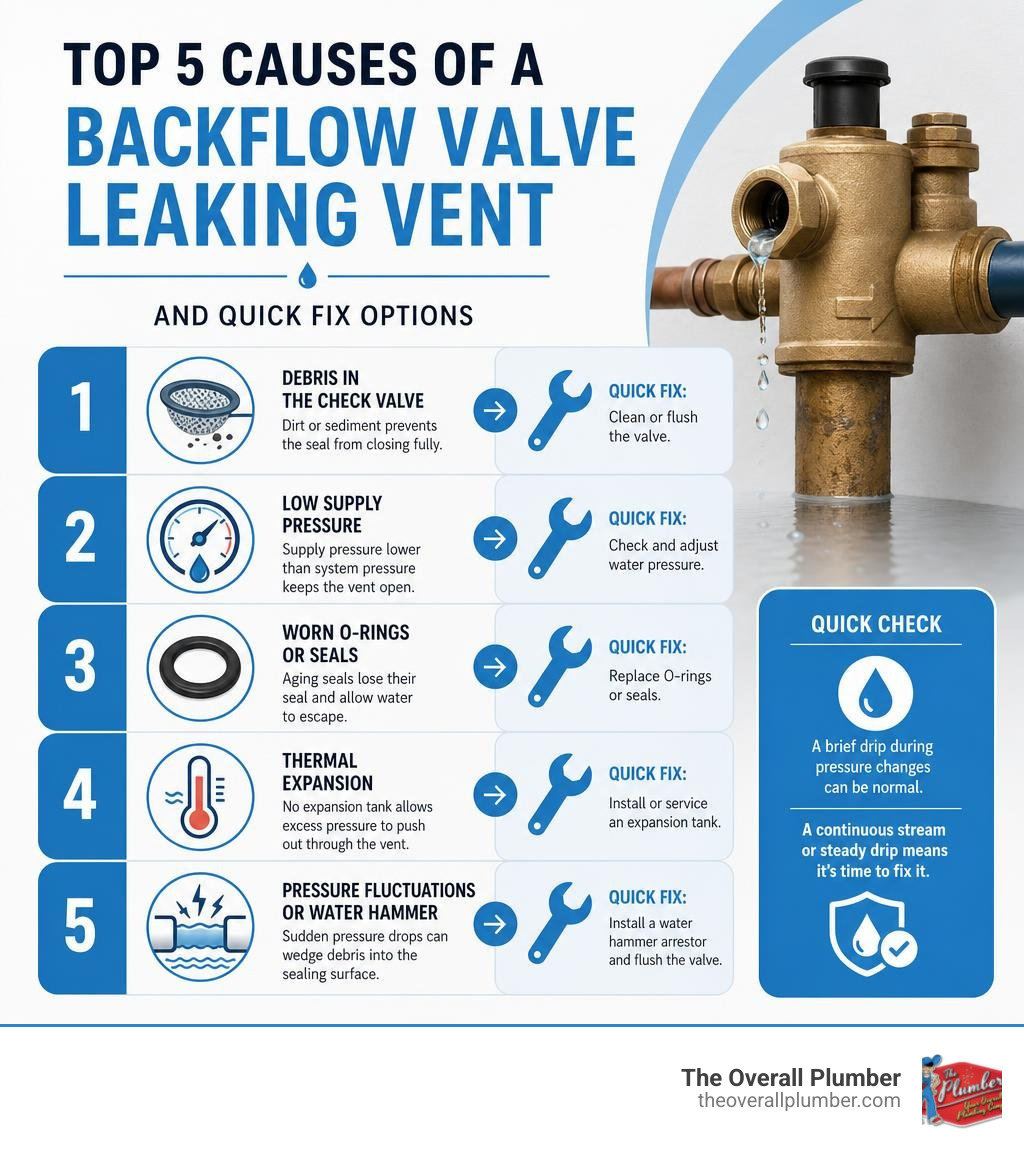
- Debris in the check valve – The most common cause; dirt or sediment prevents the seal from closing fully
- Low supply pressure – If your household water pressure is lower than the boiler or system pressure, the vent stays open
- Worn O-rings or seals – Aging elastomers lose their seal and allow water to escape through the vent
- Thermal expansion – A closed system without a working expansion tank can push excess pressure out through the vent
- Pressure fluctuations or water hammer – Sudden pressure drops can wedge debris into the sealing surface
Not every drip is an emergency. Some backflow preventers spit briefly during pressure changes and that’s normal. But a continuous stream or steady drip always means something needs attention.
The good news? Many of these fixes are straightforward once you know what you’re looking at.
I’m Dayton Whitworth, a second-generation plumber serving Houston and the Gulf Coast, and I’ve diagnosed and repaired backflow valve leaking vent issues across hundreds of residential and commercial systems in Greater Brazoria and Galveston County. In the sections below, I’ll walk you through exactly how to find the cause and fix it.
Backflow valve leaking vent terms you need:
What Causes a Backflow Valve Leaking Vent?
To stop a backflow valve leaking vent, we first have to understand what triggers the water release. A backflow assembly is a mechanical gatekeeper. When everything is working perfectly, water flows in one direction. But when the balance of pressure shifts or physical barriers fail, the vent acts as a safety valve, spilling water to prevent contamination.
Here are the primary culprits behind a leaking vent:
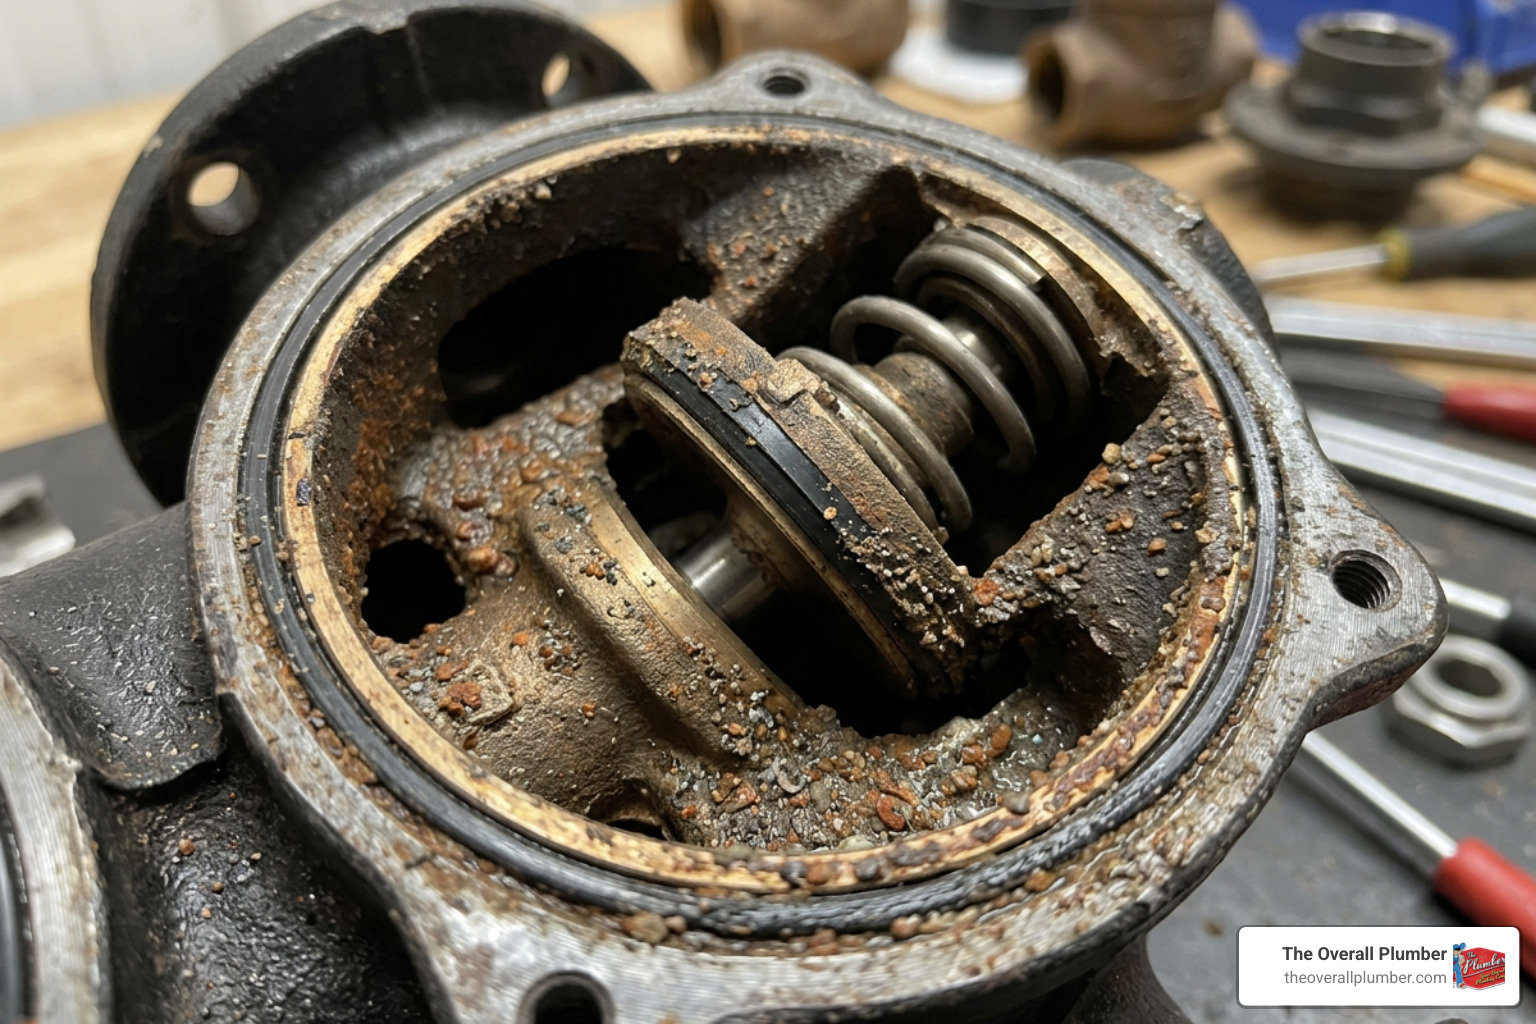
- Debris and Sediment Buildup: This is the undisputed champion of backflow leaks. Solder balls, copper shavings, rust particles, or Teflon tape shards can travel down your pipes. If a tiny piece of debris gets wedged in the narrow sealing surface of a check valve, the valve cannot close completely. Water will continuously bypass the seal and run right out of the vent.
- Worn-Out O-Rings and Seals: Over time, the rubber elastomers inside the device degrade, especially when exposed to chlorine, UV rays, or extreme temperature swings. A dry, cracked, or flattened O-ring cannot maintain a watertight seal.
- Low Water Supply Pressure: Backflow preventers rely on a certain threshold of incoming water pressure to keep the internal spring-loaded atmospheric vent closed. If your municipal supply pressure drops—or if household water demand spikes dramatically—the pressure differential decreases, causing the vent to sag open and drip.
- Thermal Expansion: In closed plumbing systems (like those with a hot water boiler or a water heater), heating water causes it to expand. If there is no functional expansion tank to absorb this extra volume, the resulting pressure spike forces the backflow device’s relief valve to open.
- Water Hammer and Pressure Surges: Fast-closing valves on washing machines, dishwashers, or irrigation systems send shockwaves through the piping. These sudden spikes can cause the check valves to momentarily break contact, allowing water to spit out of the vent.
To dive deeper into the terminology of these systems and understand how various mechanical parts interact, check out our guide on Backflow Valves Terms Demystified.
How a Backflow Preventer Works and Why It Vents
At its core, a backflow preventer is designed to keep non-potable water (like boiler water containing chemical treatments, or lawn sprinkler water containing fertilizers) from siphoning backward into your clean drinking water supply.

The device achieves this using a combination of check valves and an atmospheric vent. Under normal operating conditions:
- Clean water enters the inlet side of the device.
- The incoming pressure pushes open the first check valve.
- This same pressure acts on a diaphragm or piston mechanism, keeping the atmospheric vent tightly sealed.
- The water then travels through the second check valve and onward to the boiler or irrigation system.
If the incoming supply pressure drops significantly below the downstream pressure (backsiphonage), or if the downstream pressure spikes above the supply pressure (backpressure), the internal springs instantly snap the check valves shut. Simultaneously, the atmospheric vent opens to relieve the pressure and discharge any water that tries to cross the boundary.
For a complete breakdown of how these dual-check systems function mechanically, refer to the Caleffi Technical Specifications.
The Role of the Intermediate Atmospheric Vent
The intermediate atmospheric vent is the ultimate fail-safe. If the check valves fail to seal perfectly due to debris or damage, the open vent ensures that any backflowing water is dumped safely onto the floor or into a drain rather than being forced back into the potable water system.
This design is critical for high-hazard connections. For instance, a boiler makeup water line contains stagnant water treated with toxic rust inhibitors. If a pressure drop occurs while the backflow preventer is fouled, the intermediate vent opens, letting the water escape to the atmosphere. You can learn more about how these protective boundaries keep your home safe in our article, Stop the Sludge: A Complete Guide to the Backflow Preventer for Sink Systems.
Normal Spitting vs. a Continuous Backflow Valve Leaking Vent
It is common for homeowners to confuse normal, temporary relief discharges with an active leak. Let’s compare the two:
| Behavior | What It Looks Like | Primary Cause | Is It Normal? |
|---|---|---|---|
| Normal Spitting | A brief “spit” or spray of water when a valve opens or closes. | Sudden pressure fluctuations or water hammer from downstream appliances. | Yes. It means the valve is reacting to system pressure changes. |
| Nuisance Dripping | A slow, steady drip-drip-drip that never stops, even when the system is idle. | Small debris wedged in the seals or a slightly worn O-ring. | No. Indicates a minor seal failure that requires cleaning or repair. |
| Continuous Stream | A solid, heavy flow of water pouring from the vent port. | Major check valve failure, completely blocked seat, or severely low supply pressure. | No. This is a system failure. The water supply must be isolated immediately. |
If you are experiencing persistent dripping or a solid stream, you are likely dealing with a fouled second check valve or a damaged internal diaphragm. Many technicians and DIYers discuss these exact troubleshooting scenarios in the Heating Help Community Discussion, highlighting how often a simple cleaning can resolve what looks like a catastrophic failure.
Step-by-Step Troubleshooting for a Backflow Preventer
Before you roll up your sleeves to tackle a backflow valve leaking vent, you need to gather the right tools and take proper safety precautions.
Tools and Materials Needed:
- Adjustable wrench or channel lock pliers
- Small screwdriver or pick tool
- A soft-bristle brush (like an old toothbrush)
- Silicone-based, food-grade plumber’s grease
- A replacement repair kit (if seals are damaged)
- A bucket and towels to catch residual water
Safety Warning: Always turn off the water supply and bleed off the system pressure before attempting to disassemble any backflow preventer. Working on a pressurized line can shoot heavy brass parts or springs out at high speed, causing injury or water damage to your home.
If you are working on an outdoor system, such as a lawn sprinkler line, you may want to review The Ultimate Guide to Choosing a Backflow Preventer for Outside Faucet Protection to ensure your setup complies with local freeze and backflow standards.
Step-by-Step Diagnostics for a Backflow Valve Leaking Vent
To pinpoint the exact cause of your leak, follow this diagnostic sequence:
- Observe the Leak Pattern: Watch the vent for a few minutes. Is it dripping constantly, or does it only leak when a specific appliance (like a washing machine or irrigation zone) turns on?
- Check Downstream Isolation: Close the downstream isolation valve (the shut-off valve after the backflow preventer). If the leaking stops, the issue is likely coming from backpressure or thermal expansion on the system side. If it continues to leak, the problem is within the backflow preventer itself (usually a fouled first check valve or low inlet pressure).
- Document the Setup: Take a clear, high-resolution photo of the backflow preventer, its orientation, and the exact spot where the water is escaping. Having these photos is incredibly helpful if you need to consult a professional or find the correct rebuild kit at a local supply house.
Cleaning the Valve and Checking Seals
In nine out of ten cases, a leaking backflow vent is caused by debris. Cleaning the valve is a highly effective, low-cost first step.
- Shut Off the Water: Close the upstream isolation valve to stop the flow of water.
- Bleed the Pressure: Open a test cock or a downstream faucet to relieve any trapped pressure.
- Disassemble the Housing: Using your wrench, carefully loosen the union nuts or the cap of the backflow preventer (on models like the Watts 9D, you will typically loosen the second nut from the inlet end to access the spool).
- Extract the Internal Spool: Gently pull out the check valve assembly. Be careful not to drop or damage the internal springs.
- Clean and Inspect: Rinse the components under clean water. Use your soft-bristle brush to scrub away any scale, rust, or sand from the rubber discs and plastic seats. Inspect the O-rings for cracks or flattening.
- Lubricate and Reassemble: Apply a thin layer of food-grade silicone grease to the O-rings. Carefully slide the assembly back into the body, ensuring everything aligns correctly. Tighten the union connections hand-tight plus an additional half-turn—do not overtighten, as this can crush the fiber washers and cause new leaks!
Addressing Pressure Fluctuations and Thermal Expansion
If your backflow vent continues to drip after a thorough cleaning, the issue might be systemic rather than mechanical:
- Install an Upstream Check Valve: If pressure drops in your main water line are causing the backflow valve to “spit” or drip, installing a soft-seated swing check valve upstream of the backflow preventer can stabilize the inlet pressure and eliminate nuisance venting.
- Check the Expansion Tank: If the leak occurs on a boiler feed line, check the pressure charge on your heating system’s expansion tank. If the tank is waterlogged, thermal expansion will routinely push system pressure above the backflow threshold, forcing the vent to open.
- Add a Pressure Reducing Valve (PRV): If your municipal water pressure is exceptionally high or fluctuates wildly, installing a PRV upstream will help maintain a steady, safe operating pressure.
Rebuilding or Replacing the Assembly
If cleaning the internal components reveals torn rubber diaphragms, deep scratches on the plastic seats, or a cracked metal body, you must decide whether to rebuild or replace.
- Rebuild Kits: Most major manufacturers (such as Watts or Caleffi) offer rubber rebuild kits containing new O-rings, check discs, and springs. These kits typically cost between $15 and $30 and are an excellent option if the brass housing is still in pristine condition.
- Full Replacement: If the internal cast-iron or brass seats are heavily pitted or corroded, a rebuild kit will not stop the leak. In this scenario, replacing the entire unit is the only permanent solution. A new residential backflow preventer (like a 1/2-inch Watts 9D) is relatively inexpensive, and replacing the entire unit is often faster and more reliable than trying to rebuild a worn-out shell.
Frequently Asked Questions About Leaking Backflow Vents
Is a dripping backflow vent normal?
No, continuous dripping is not normal. While a brief spit of water during system startup or sudden pressure changes (such as when a flushometer toilet is used) is a standard part of the valve’s pressure-relief function, any persistent, ongoing drip indicates that debris is trapped in the seals, an O-ring has failed, or your home’s water pressure is fluctuating unsafely.
Can I cap or plug a leaking backflow vent?
Absolutely not! Under no circumstances should you ever cap, plug, or block a leaking backflow vent. The vent is a critical safety feature designed to protect your family’s drinking water from toxic contamination.
If you plug the vent, any backflow condition will force contaminated water directly past the failed seals and into your potable water supply. Furthermore, capping the vent violates International Plumbing Code (IPC 608.16.2) and local Texas regulations, which can result in heavy fines and severe safety hazards.
How long do backflow preventers typically last?
When properly maintained, high-quality backflow prevention assemblies can reliably function for 35 to 40 years. However, the internal rubber parts, springs, and seals have a much shorter lifespan—usually requiring replacement or rebuilding every 5 to 10 years depending on local water quality and usage.
Annual testing by a certified inspector is required in many Texas jurisdictions to catch small leaks and seal failures before they compromise your water safety.
Schedule Your Professional Backflow Inspection
While a simple cleaning can often resolve a minor drip, diagnosing complex pressure imbalances or rebuilding commercial-grade backflow assemblies requires specialized training and certified testing equipment.
At The Overall Plumber, we are dedicated to keeping the water supply safe and clean across Brazoria County, Houston, Clear Lake, Santa Fe, League City, Texas City, La Porte, Friendswood, Pearland, Pasadena, and Galveston. Our team of licensed plumbing experts provides comprehensive backflow testing, repair, and replacement services.
Why choose us?
- Satisfaction Guarantees: We stand behind the quality of our work on every single job.
- Plumbing Protection Plans: Enjoy peace of mind with routine maintenance that can double the lifespan of your plumbing fixtures.
- No Trip Charges & No Overtime Fees: We believe in honest, transparent pricing without hidden surprises.
Don’t let a mystery drip turn into a major headache or compromise your home’s drinking water. Call us today at (281) 668-8055 or schedule your Back Flow Valve Plumbing Inspection with us today to resolve your backflow issues and keep your home safe, dry, and code-compliant!