


Why a Cast Iron Pipe Leaking in Basement Needs Fast Attention
A cast iron pipe leaking in basement can be a small, repairable defect, but it can also signal deep corrosion or a failing drain line. First, stop using fixtures that drain through the affected pipe, dry the area, and watch for fresh moisture. If there is sewage, a strong sewer-gas odor, water rising through the floor, or a pipe that appears cracked or sagging, call a plumber promptly.
| What you see | What it may mean |
|---|---|
| Even moisture across a cold pipe | Condensation |
| Yellowish or oily residue near the top of an old hub joint | Oil from jute packing, not always an active leak |
| Localized wet rust, dripping, pinholes, or a crack | Active pipe failure |
| Repeated clogs, sewer odor, or damp concrete near a buried line | Possible internal corrosion, blockage, or under-slab leak |
Cast iron drain piping often lasts 50 to 100 years, but many systems installed before 1970 are now near the end of their useful life. A careful diagnosis matters because a simple joint issue, a localized pinhole, and a pipe hollowed out from the bottom need very different repairs.
The Overall Plumber helps Gulf Coast homeowners with drain, pipe-break, and aging plumbing issues, including a cast iron pipe leaking in basement. In this guide, we will help you recognize what the moisture means before you choose a repair path.
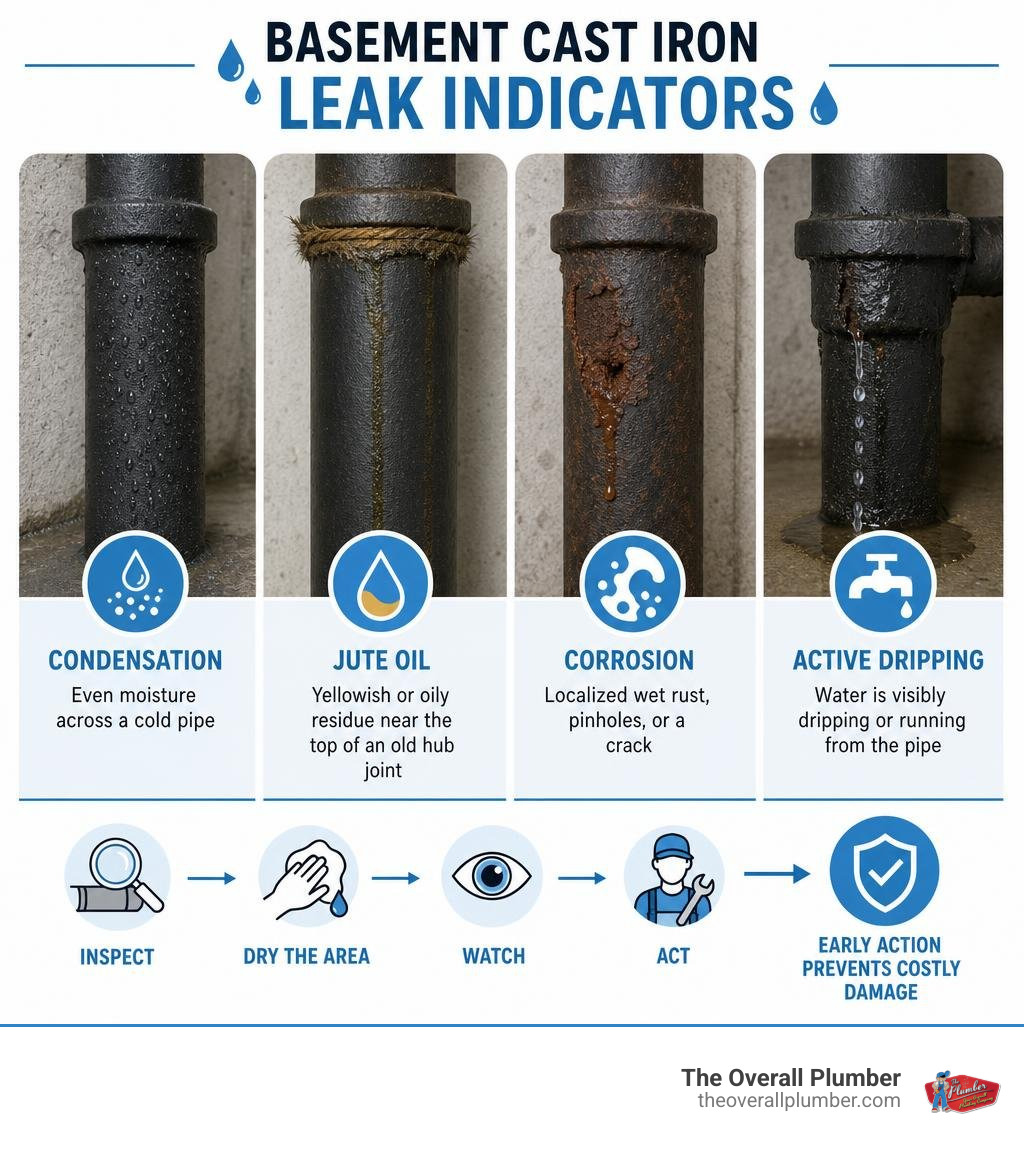
Cast iron pipe leaking in basement terms you need:
Diagnosing a Cast Iron Pipe Leaking in Basement
When you discover wetness around exposed basement plumbing, panic is usually the default response. Before you grab a sledgehammer or assume the worst, we need to locate the exact source of the leak and assess the pipe’s overall structural condition.
Two quick diagnostic techniques can tell you a lot about what is going on inside the pipe:
- The Paper Towel Test: Wipe the suspicious section completely dry with a rag. Wrap bright white paper towels securely around individual joints, fittings, and suspected hairline cracks. Leave them for an hour while running water upstairs. If the towel shows a localized, dark wet spot or rust ring, you have pinpointed an active weep or pinhole leak rather than ambient basement moisture.
- The Ball-Peen Hammer Tapping Test: Lightly tap along the horizontal length and underside of the pipe using a ball-peen hammer or heavy screwdriver handle. A solid pipe wall yields a clear, metallic ring. If you hear a dull thud or if the metal crumbles under light pressure, internal decay has thinned the wall significantly.
Internal corrosion in cast iron pipes typically forms tuberculation—rough, raised mounds of rust that choke water flow and trap debris. Over time, friction and sitting acidic wastewater cause bottom channeling, where the invert (bottom floor) of the pipe erodes completely away while the top half remains visually intact.
Differentiating Condensation, Jute Packing Oil, and Active Water Leaks
Not every wet spot on a dark cast iron line is an active sewage leak. Unnecessary repairs often happen when simple surface sweating or harmless joint seepage is mistaken for structural pipe failure.
- Pipe Sweating (Condensation): During humid summer months, cool groundwater or cold wastewater flowing through thin-walled or uninsulated metal pipes causes moisture in warm basement air to condense on the exterior surface. Sweating presents as a light, uniform coat of moisture along the outer circumference of the pipe rather than trickling drops from a specific spot.
- Jute Packing Oil Seepage: Older cast iron systems (installed prior to modern no-hub gaskets) feature hub-and-spigot bell joints sealed with packed oakum (jute hemp fiber) and hot-poured lead. Over decades, natural oils in the jute can slowly migrate upward, producing amber, sticky droplets or grainy, dark residue on top of the fitting hub. If the droplet feels oily, smells vaguely earthy rather than foul, and remains static without actively dripping, it is usually historical jute oil rather than an immediate water leak.
- Active Water Leaks & Corrosion Knots: Active leaks yield clear or murky water, often accompanied by foul odors, active dripping during fixture use, and raised, dark rust knots along longitudinal seam cracks.
Primary Causes of Cast Iron Pipe Failure in Basements
Cast iron pipes degrade from the inside out due to chemical and mechanical factors inside residential drainage lines:
- Sulfuric Acid Crown Corrosion: Hydrogen sulfide gas produced by standing sewage off-gasses inside drain lines. Microbial activity converts this gas into sulfuric acid, which attacks the inside crown (top arch) of horizontal pipes, causing hidden top-side cracks and sewer gas leaks before liquid escapes.
- Bottom Channeling: Standing water and abrasive sediments slowly carve a continuous groove along the bottom length of horizontal runs until the metal wears paper-thin.
- Downstream Line Blockages: Main line clogs cause wastewater to back up and sit inside lines for prolonged periods. Standing water drastically accelerates oxidation and puts static pressure on legacy bell-and-spigot lead joints, forcing seepage through aged oakum packing.
- 1970s Plumbing Legacy: Cast iron systems installed before 1970 are now 50 to 100 years old, reaching the natural end of their designed service life.
Repair vs. Replacement: Choosing the Right Method
When deciding how to fix a cast iron pipe leaking in basement, evaluate the total structural health of the line rather than just plugging the visible hole.
As a rule of thumb, if corrosion, metal thinning, or bottom channeling affects more than 25 percent of the total pipe wall, localized patching will fail within months. The surrounding metal is simply too thin to support a patch, and nearby weak points will quickly break open.
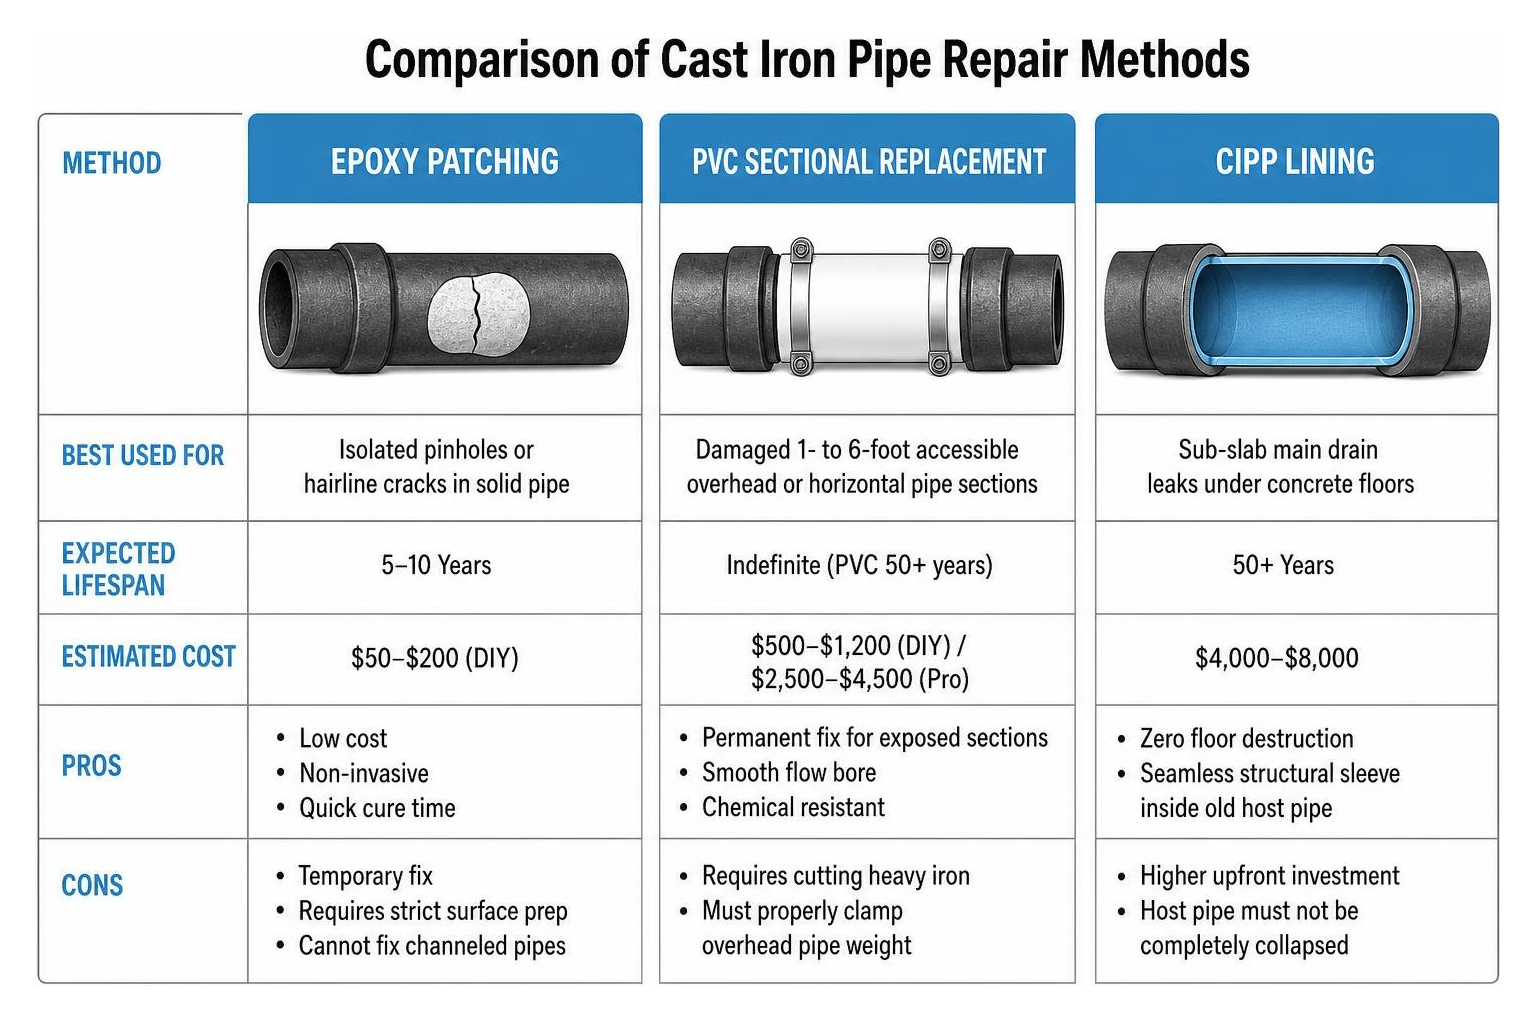
| Method | Best Used For | Expected Lifespan | Estimated Cost | Pros | Cons |
|---|---|---|---|---|---|
| Epoxy Patching | Isolated pinholes or hairline cracks in solid pipe | 5–10 Years | $50–$200 (DIY) | Low cost, non-invasive, quick cure time | Temporary fix; requires strict surface preparation; cannot fix channeled pipes |
| PVC Sectional Swap | Damaged 1- to 6-foot accessible overhead or horizontal pipe sections | Indefinite (PVC 50+ years) | $500–$1,200 (DIY) / $2,500–$4,500 (Pro) | Permanent fix for exposed sections; smooth flow bore; chemical resistant | Requires cutting heavy iron; must properly clamp overhead pipe weight |
| Trenchless CIPP Relining | Sub-slab main drain leaks under concrete basement floors | 50+ Years | $4,000–$8,000 | Zero floor destruction; seamless structural sleeve inside old host pipe | Higher upfront investment; host pipe must not be completely collapsed |
No-Dig Trenchless CIPP Lining vs. Under-Slab Excavation
When a cast iron pipe leaking in basement runs beneath a concrete slab floor, traditional repair requires jackhammering up concrete, excavating wet soil, replacing the pipe, and repouring concrete. This invasive process takes 1 to 3 days, disrupts your living space, and risks causing foundation soil washout or floor settlement if backfilling isn’t handled carefully.
By contrast, Cured-In-Place Pipe (CIPP) lining offers a modern, no-dig alternative. A flexible, epoxy-resin-saturated felt sleeve is pulled into the existing cast iron pipe through an exterior access point or cleanout. Once inflated with air or hot water, the resin cures within hours to form a smooth, seamless “pipe-within-a-pipe” that resists root intrusion and chemical corrosion for over 50 years. Learn more about trenchless repair techniques to evaluate if your slab line qualifies.
Temporary Epoxy Patching for Cast Iron Pipe Leaking in Basement
For accessible, non-pressurized horizontal lines with isolated pinholes or small hairline cracks, two-part epoxy putty provides a budget-friendly stopgap. However, epoxy success relies almost entirely on meticulous surface preparation:
- Shut off water supply to all upstairs fixtures draining into the pipe.
- Grind surface to bare metal: Use an angle grinder or drill-mounted wire wheel to scour away all exterior scale, rust, and paint until you reach shiny, bare silver metal extending at least 2 inches beyond the leak area.
- Degrease thoroughly: Clean the bare metal thoroughly with acetone or denatured alcohol. Avoid mineral spirits, as they leave an oily film that ruins adhesion.
- Knead and apply epoxy: Mix two-part plumbing epoxy putty until it achieves a uniform color without streaks. Firmly press the epoxy into the crack, feathering the edges flat to prevent snags.
- Allow full cure: Let the compound cure for at least 60 minutes before restoring water flow.
For a deeper look into budget fixes, read our guide on Patching Cast Iron Pipe Leaks on a Budget. A well-executed epoxy patch lasts 5 to 10 years, provided the host pipe wall retains structural thickness.
Step-by-Step DIY Guide to Sectional Replacement with PVC
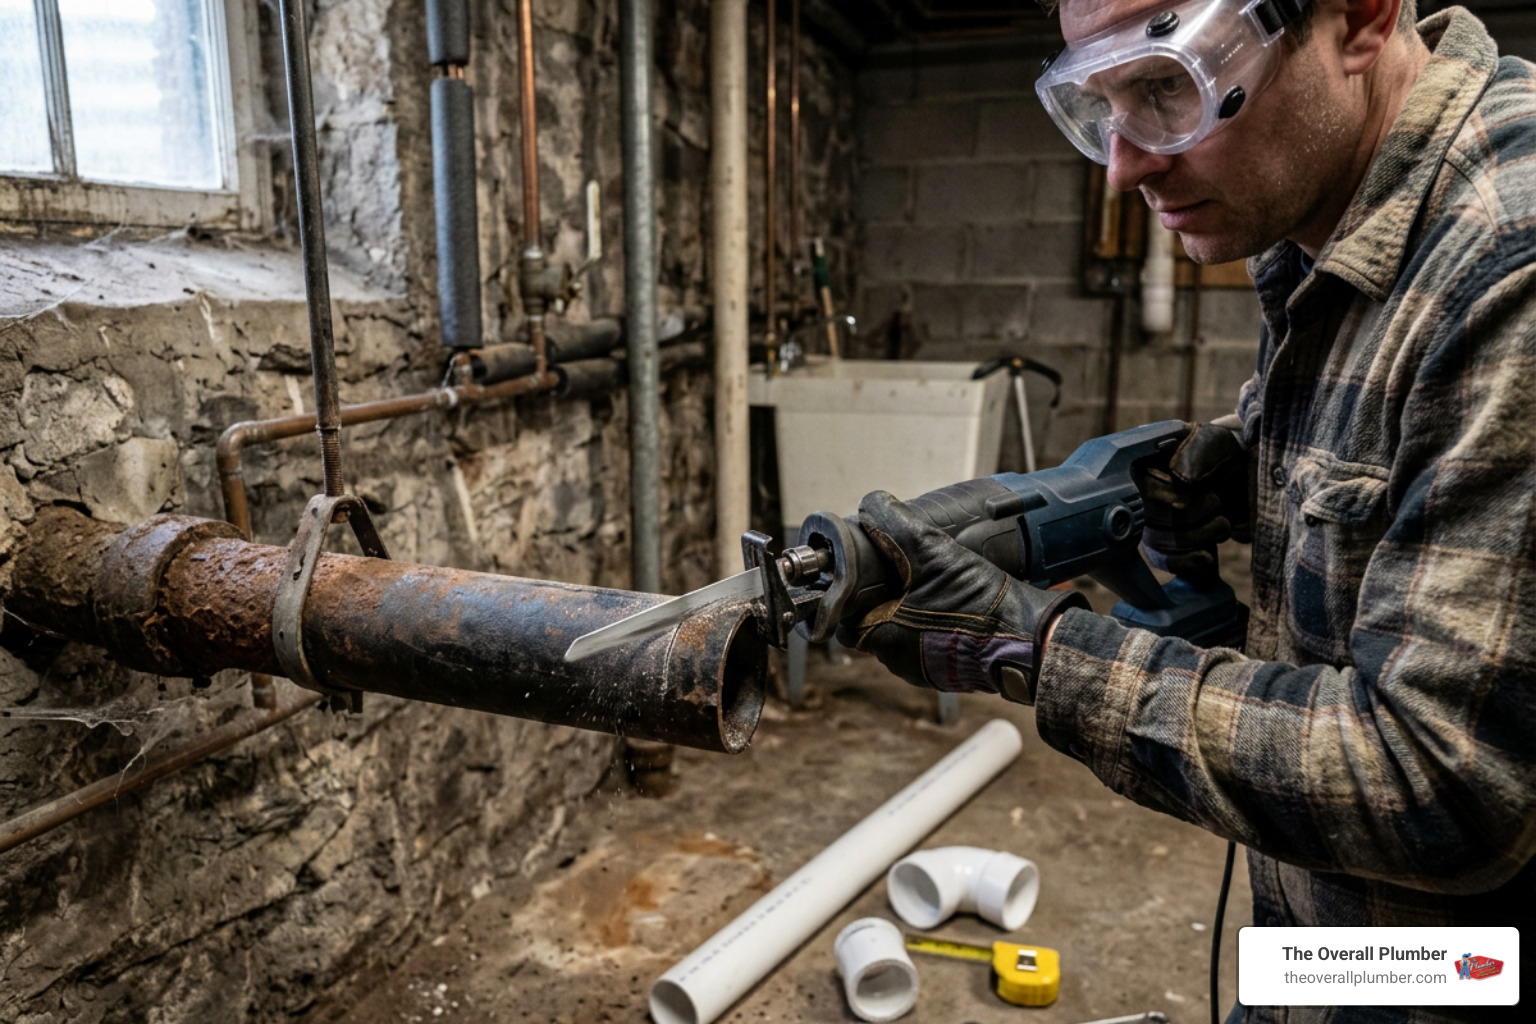
When an accessible section of overhead or horizontal basement pipe suffers severe corrosion, replacing that specific segment with Schedule 40 PVC is the standard permanent solution.
Essential Tools and Preparing the Pipe Stack
Before starting any cutting, gather the proper tools and safety gear:
- Safety Gear: Heavy leather gloves, safety goggles, and a dust mask/respirator.
- Cutting Tools: Reciprocating saw with carbide-tipped blades (such as Diablo Steel Demon Carbide blades) or a rented soil pipe ratchet chain snap cutter.
- Support & Hardware: Heavy-duty friction riser clamps or pipe hanger straps, Schedule 40 PVC pipe, PVC primer and solvent cement.
- Couplings & Measurements: Stainless steel heavy-duty shielded transition couplings (such as Proflex or Mission bands) and a calibrated torque wrench set to 60 inch-pounds.
CRITICAL STEP: Supporting Vertical Pipe Weight
Cast iron is extremely heavy—a 4-inch stack weighs approximately 13 pounds per linear foot. Cutting out a lower horizontal or vertical section without securing the upper pipe can cause the entire upper stack to fall, causing catastrophic structural damage or severe personal injury. Always attach heavy-duty riser clamps or friction brackets anchored securely to wooden floor joists directly above your planned cut locations before making a single slice.
Cutting Damaged Pipe Safely and Joining PVC with Shielded Couplings
Once the vertical weight is secured, follow these steps to replace the damaged segment:
- Mark Your Cuts: Extend your cut lines at least 2 inches past all visible rust, cracking, or surface pitting into clean, solid metal.
- Make Clean Cuts: Cut perpendicular to the pipe. If using a reciprocating saw with carbide blades, hold the blade steady without forcing it; let the carbide teeth cut through the dense metal smoothly. If using a ratchet snap cutter in tight quarters, wrap the chain evenly around the pipe and squeeze incrementally until the pipe snaps cleanly.
- Deburr and Clean Edges: File away sharp iron burs and wipe the cut pipe ends clean of grease and debris.
- Measure and Cut Replacement PVC: Measure the exact gap between the two clean cast iron pipe ends. Cut your replacement Schedule 40 PVC piece 1/4 inch shorter than the total gap measurement. This slight expansion gap prevents binding and accommodates subtle structural building movement.
- Install Shielded Transition Couplings: Slip heavy-duty stainless steel shielded couplings over the cast iron ends. Unlike standard unshielded rubber Fernco boots, shielded couplings feature a rigid metal outer sleeve that prevents pipe sag, joint shearing, and misalignment under load.
- Position and Torque: Slide the PVC bridge piece into position. Slide the neoprene rubber sleeves across the joints, wrap the metal shields over them, and tighten the stainless steel band clamps in an alternating pattern. Using a torque wrench, tighten each band screw to exactly 60 inch-pounds to ensure a watertight seal without cracking the new PVC or crushing aged iron.
For more technical details on executing pipe swaps, review Cast Iron Pipe Repair 101: From Trenchless Lining to PVC Swaps.
Preventing Future Corrosion and When to Call a Professional
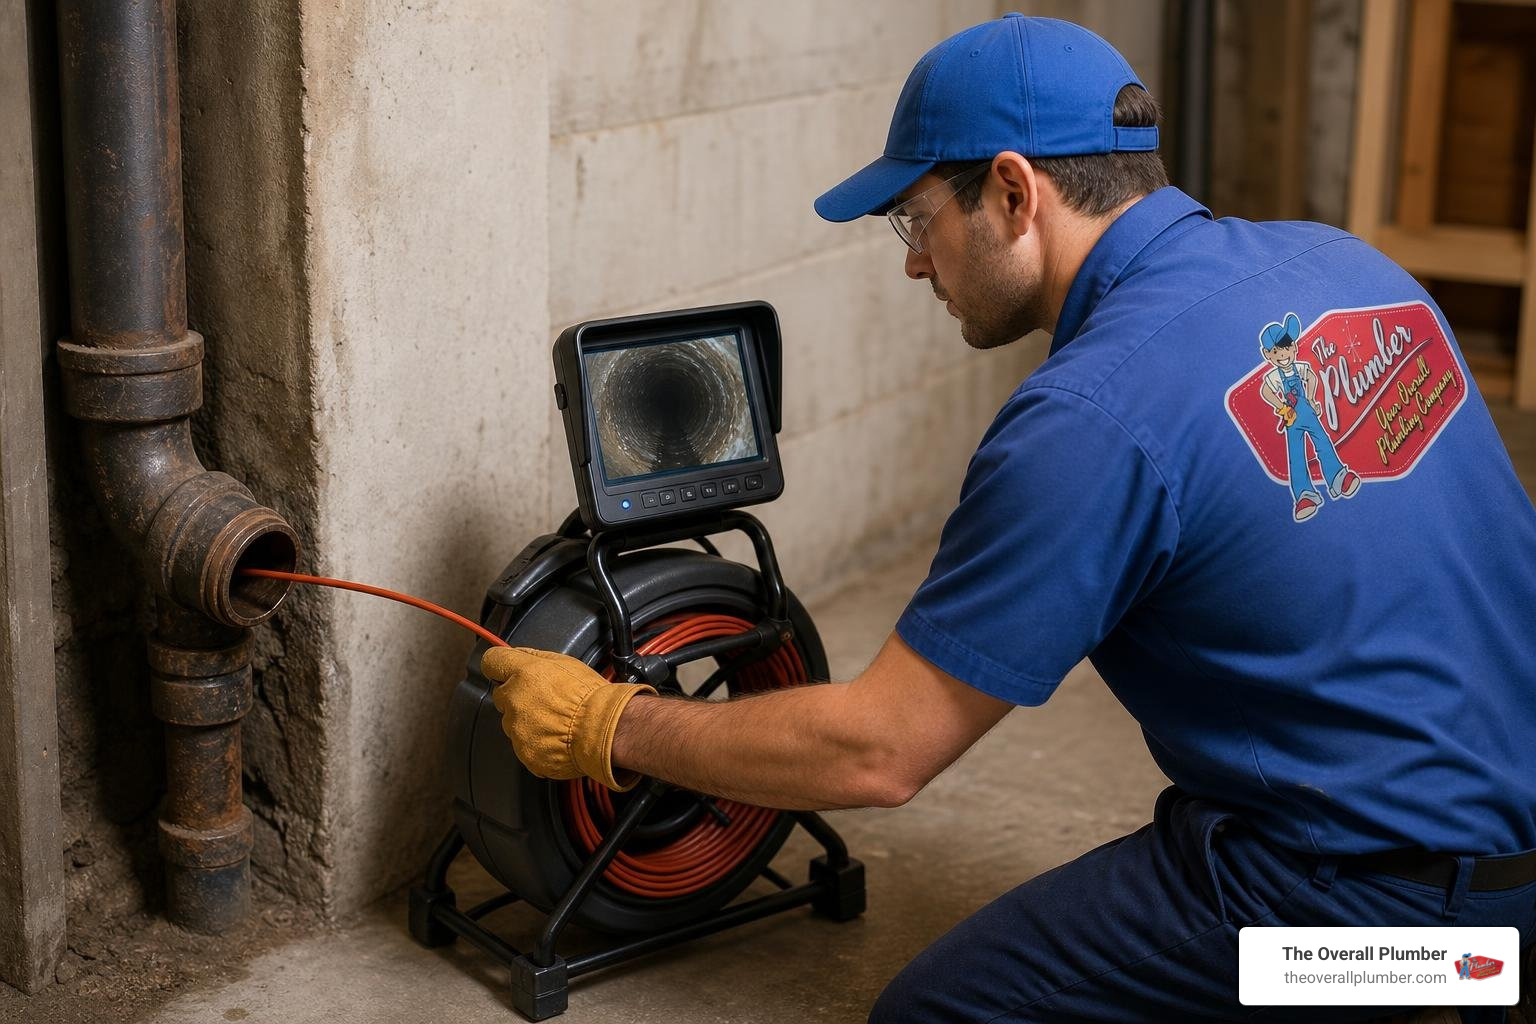
Fixing an active leak solves the immediate problem, but long-term preventative measures are required to protect the rest of your home’s legacy cast iron plumbing.
Maintaining Aging Cast Iron Pipes to Prevent Future Leaks
- Eliminate Caustic Drain Cleaners: Stop using harsh store-bought chemical drain openers containing sodium hydroxide or sulfuric acid. These intense chemicals strip internal pipe coatings, generate intense heat that cracks brittle iron, and pool in bottom channels, accelerating rust.
- Use Enzymatic Cleaners: Flush lines monthly with organic enzymatic drain treatments. Enzymatic formulas digest grease, hair, and soap scum naturally without corroding metal walls.
- Schedule Routine Hydro-Jetting: Have a professional hydro-jet your main lines every 24 months. Hydro-jetting uses controlled water pressure to scour away tuberculation build-up and scale without damaging the iron wall.
- Install a Water Softener: Hard water mineral deposits accelerate scale accumulation inside cast iron pipes. Treating hard water reduces internal oxidation rates over time.
For additional identification and care tips, see this guide on identifying structural pipe corrosion.
How to Handle an Active Cast Iron Pipe Leaking in Basement
While DIY sectional repairs are doable for straightforward, accessible horizontal pipes overhead, sub-slab foundation leaks, extensive bottom channeling, or unstable vertical main stacks require licensed professional equipment.
At The Overall Plumber, we specialize in comprehensive drain diagnostics, video sewer camera inspections, precision sectional repairs, and sub-slab replacements across Brazoria County, Houston, Clear Lake, Santa Fe, League City, Texas City, La Porte, Friendswood, Pearland, Pasadena, Galveston, Harris County, and Galveston County, Texas.
When you deal with an urgent broken drain line, we protect your property and peace of mind with:
- No trip charges
- No overtime fees
- Priority scheduling for active leaks
- Comprehensive satisfaction guarantees
If you need fast, dependable service for an active break, learn more about our options for Broken Pipe Repair.
Frequently Asked Questions About Basement Cast Iron Pipe Repair
How long does a cast iron pipe repair last in a basement?
A temporary epoxy patch on a non-pressurized drain line typically lasts 5 to 10 years, depending on the remaining thickness of the surrounding metal wall. A sectional replacement using Schedule 40 PVC joined with heavy-duty stainless steel shielded couplings lasts over 50 years. Trenchless CIPP liners carry a structural service life rating exceeding 50 years.
Do I need to dig up my basement concrete floor to fix a cast iron leak?
Not necessarily. If a sewer camera inspection shows the pipe retains sufficient structural shape, professional trenchless Cured-In-Place Pipe (CIPP) lining can create a new interior pipe sleeve without breaking concrete. However, if the sub-slab pipe has completely collapsed, structural excavation and replacement with PVC are required.
Can I use regular unshielded rubber Fernco couplings for cast iron repair?
In most municipal plumbing codes across Texas, unshielded rubber couplings are prohibited on sanitary sewer lines. Unshielded boots lack lateral stiffness, allowing heavy cast iron pipes to sag, shift, or shear over time. Always install heavy-duty shielded couplings with full stainless steel metal bands, torqued evenly to 60 inch-pounds.
If you are dealing with a cast iron pipe leaking in basement or need expert drain diagnostics, our team at The Overall Plumber is here to help. Contact us today to schedule your cleanout camera inspection or repair with zero trip charges and priority service.