


That Dripping Faucet Is Costing You More Than You Think
Leaky faucet repair is one of the most common — and most ignored — home maintenance tasks. A faucet dripping just once per second wastes over 3,000 gallons of water every year. That’s real money disappearing down your drain, month after month.
Here’s how to fix a leaky faucet in 5 steps:
- Turn off the water supply at the shut-off valves under the sink
- Remove the handle by prying off the decorative cap and unscrewing the handle screw
- Replace the worn part — washer, O-ring, or cartridge depending on your faucet type
- Reassemble the faucet and lubricate parts with silicone plumber’s grease
- Turn the water back on slowly and test for leaks
Most repairs take 30 minutes or less and cost under $15 in parts.
Beyond the water bill, ignoring a drip can lead to real damage. Persistent moisture under a sink can warp cabinet floors, trigger mold growth, and signal a bigger problem developing inside your plumbing.
The good news? Most leaky faucets are a straightforward DIY fix — if you know your faucet type and replace the right part.
I’m Dayton Whitworth, a second-generation plumber serving the Greater Houston and Gulf Coast area, and I’ve handled hundreds of leaky faucet repair jobs ranging from simple washer swaps to full fixture replacements. In this guide, I’ll walk you through exactly what to do so you can fix it right the first time.

Why Your Tap is Dripping: Common Causes and Water Waste
When you hear that rhythmic, maddening drip, drip, drip in the middle of the night, you aren’t just losing sleep — you are actively watching your hard-earned money wash down the drain. Water conservation is more than an environmental talking point; in our hot Texas climate, it is a practical way to keep your household utility bills under control.
A single dripping faucet can waste approximately 90 liters of water per week, which is easily enough to fill up an entire bathtub. Over a year, a slow leak of one drop per second adds up to over 3,000 gallons of wasted water. If you want to dive deeper into how small leaks add up, you can read the official guide on how to fix a faucet leak | Portland.gov to see how municipal water systems emphasize this exact issue.
To understand how to stop the drip, we first have to understand why it is happening. Faucets contain moving parts that constant water pressure and friction wear down over time. Here are the primary culprits behind a dripping tap:
- Worn-Out Washers: This is the absolute classic cause of leaks in traditional two-handle faucets. Every time you turn the handle to shut off the water, a rubber washer is compressed against a metal valve seat to form a seal. Over time, that rubber hardens, cracks, or deforms, allowing water to squeeze past.
- Damaged O-Rings: O-rings are small rubber rings that seal the gaps between various moving parts of the faucet, particularly around the spout or the handle stem. If your faucet leaks from the base of the spout when the water is turned on, a worn O-ring is almost certainly to blame.
- Corroded Valve Seats: The valve seat acts as the connection between the faucet stem and the spout. Over time, mineral deposits from hard water can build up and corrode this metal seat, making it rough. Even if you put a brand-new rubber washer in, a pitted valve seat will quickly slice through the rubber or fail to form a tight seal.
- Loose Packing Nuts: The packing nut holds the stem assembly firmly in place inside the faucet body. If this nut works itself loose over years of turning the handle, water will seep upward and pool around the handle itself.
- Failed Cartridges: Modern faucets often use a plastic or brass cylinder called a cartridge to control water flow. Inside, internal seals can fail, or the cartridge body itself can crack, letting water bypass the shut-off mechanism entirely.
Understanding these common failure points is the first step toward reclaiming your quiet nights. If you want a broader overview of how water leaks behave throughout your home, take a look at our detailed breakdown of Faucet Leaks.
Identify Your Faucet Type Before You Begin
Before you run out to the local hardware store in Pearland or League City to buy replacement parts, you must identify exactly what kind of faucet you have. If you skip this step, you are highly likely to buy parts that do not fit, leading to frustrating return trips.
There are four primary types of faucets found in residential homes: compression, cartridge, ball, and ceramic disc.
Compression Faucets
These are the oldest and most traditional fixtures, almost always featuring two separate handles (one for hot, one for cold). They operate using a screw-like stem mechanism. When you turn the handle, you are physically screwing a rubber washer down against a metal valve seat to block the water. If you have to twist the handles firmly to get the water to stop completely, you have a compression faucet.
Cartridge Faucets
Cartridge faucets can have either one handle or two. Inside, they contain a hollow cartridge that rotates or slides up and down to align water inlets with outlets. Unlike compression faucets, which require you to apply physical pressure to seal the valve, a cartridge faucet operates smoothly with a consistent stopping point. If turning your two-handle faucet off feels effortless and smooth, it is likely a cartridge style.
Ball Faucets
Commonly found in kitchens, ball faucets are single-handle fixtures that utilize a slotted metal or plastic ball inside the housing. The handle controls the ball, which rotates over hot and cold water inlets to adjust both temperature and flow. Because they have many moving parts (including springs, small rubber seals, and O-rings), they are slightly more complex to rebuild than cartridge styles.
Ceramic Disc Faucets
These are high-end, modern, single-handle faucets. Inside, two highly polished, flat ceramic discs slide against each other. When the openings in the discs align, water flows; when they slide apart, they form an airtight, watertight seal. Ceramic disc faucets are incredibly durable and rarely leak. If they do, it is usually because the rubber seals beneath the ceramic cylinder have worn down or mineral buildup has disrupted the smooth seal.
To help you visualize how these different types stack up, here is a quick comparison table:
| Faucet Type | Handle Configuration | Internal Mechanism | Repair Difficulty | Common Leak Cause |
|---|---|---|---|---|
| Compression | Two Handles | Threaded stem with rubber washer | Easy | Worn-out rubber washer or corroded valve seat |
| Cartridge | One or Two Handles | Hollow plastic/brass cartridge cylinder | Easy to Medium | Damaged cartridge body or worn cartridge O-rings |
| Ball | Single Handle | Slotted rotating ball with springs/seats | Medium | Worn rubber seats, weak springs, or bad O-rings |
| Ceramic Disc | Single Handle | Two polished ceramic discs in a cylinder | Medium | Mineral buildup or worn inlet seals under the cylinder |

Taking a few minutes to identify your faucet type saves hours of frustration. A single-handle faucet will almost always be a cartridge, ball, or ceramic disc type, while a classic two-handle faucet is either compression or cartridge.
The 5-Step Leaky Faucet Repair Guide
Once you have identified your faucet type, it is time to roll up your sleeves and get to work. Preparing your workspace is just as important as the actual repair. Plumbing often happens in tight, dark spaces, and nothing ruins a Saturday morning faster than dropping a tiny brass screw down the drain.
Before you touch a wrench, protect your sink. Put a towel or a sink strainer over the drain opening. This simple trick prevents small washers, screws, and springs from falling into the P-trap.
Additionally, wrap a layer of masking tape around the jaws of your adjustable wrench or pliers. This protects the shiny chrome or brushed nickel finish of your faucet from getting scratched or gouged during disassembly. For a visual walkthrough of these preparation steps, you can check out this comprehensive Step-by-step guide on Home Depot.
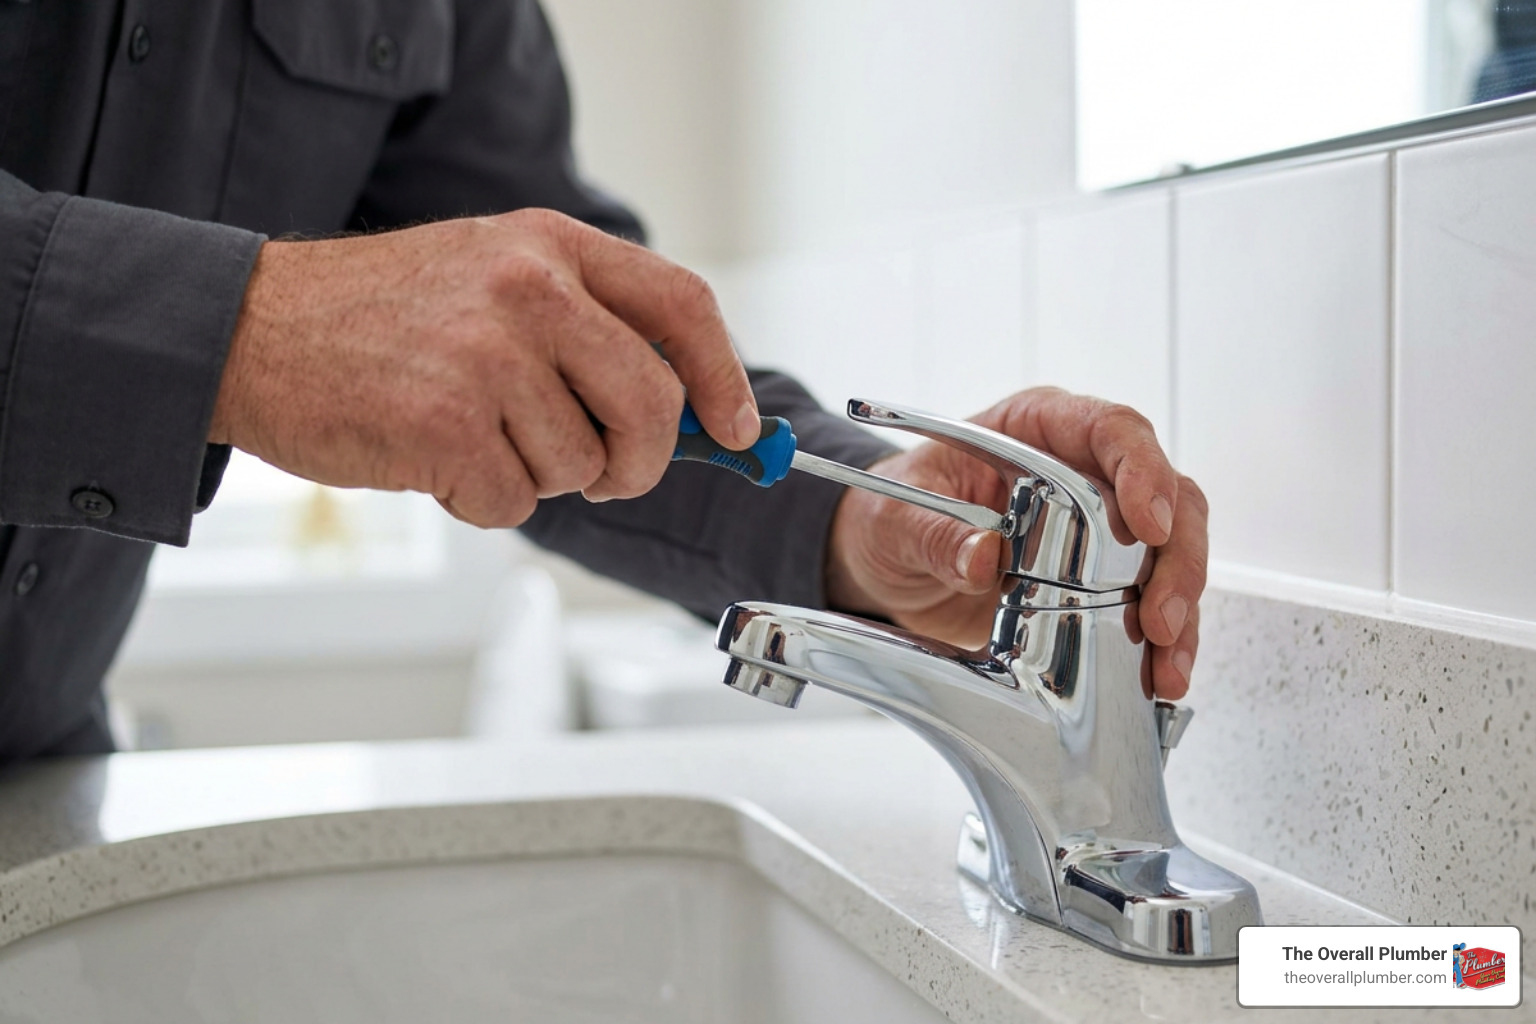
Let’s break down the repair process into five clear, manageable steps.
Step 1: Turn Off the Water and Gather Tools for Leaky Faucet Repair
The absolute first rule of plumbing: never disassemble a pressurized fixture. If you forget this step, you will get an impromptu kitchen shower, and you risk flooding your vanity cabinet.
Look underneath your sink for the hot and cold water shutoff valves. Turn these oval-shaped handles clockwise until they stop. If they are tight, turn them gently — do not force them, as old plastic valves can snap.
Once the valves are closed, open the faucet handles completely to relieve any remaining pressure and drain the water resting in the spout. If your under-sink shutoff valves are stuck or corroded, you will need to turn off the main water supply valve for the entire house, which is typically located near your water meter or where the main line enters your home. If you run into a broader piping issue while turning off the water, you can learn how to fix a leaking pipe quickly to keep your home safe.
Gather your tools before you begin:
- An adjustable wrench
- Flathead and Phillips screwdrivers
- An Allen (hex) wrench (often needed for single-handle set screws)
- Silicone plumber’s grease
- Replacement parts (washers, O-rings, or a replacement cartridge)
- Penetrating oil (like WD-40, if parts are rusted or stuck)
Step 2: Remove the Handle and Stem for Leaky Faucet Repair
To access the source of the leak, you must remove the faucet handle. Most handles have a hidden screw. Look for a small decorative cap (sometimes marked “H” or “C”) on top of the handle. Gently pry this cap off with a thin flathead screwdriver to reveal the screw beneath. On single-handle faucets, look for a small metal plug or set screw hidden on the front, back, or side of the handle, which you can loosen with an Allen wrench.
Once the screw is out, pull the handle straight up. If it is stuck due to mineral deposits, wiggle it gently back and forth while pulling upward. Never strike the handle with a hammer, as you can easily crack the internal brass or ceramic components.
With the handle removed, you will see the stem or cartridge assembly held in place by a brass packing nut or a retaining clip. Use your taped adjustable wrench to unscrew the packing nut counterclockwise. If your faucet uses a retaining clip (common on cartridge models), gently pry it out with a small flathead screwdriver or needle-nose pliers. Keep track of the exact order of every part you remove; we highly recommend taking photos with your phone at each stage of disassembly.
Step 3: Replace the Damaged Washers, O-Rings, or Cartridge
Now that the internal mechanism is exposed, you can swap out the failing parts based on your faucet type:
- For Compression Faucets: Look at the very bottom of the brass stem you extracted. You will see a rubber washer held in place by a small brass screw. Unscrew the screw, pull off the old, flattened washer, and replace it with a new one of the exact same size. If the screw itself is corroded, replace that too. If you notice leaks around the handle stem, slide off the old rubber O-ring higher up on the stem and install a fresh one.
- For Cartridge, Ball, or Ceramic Disc Faucets: Instead of individual washers, these modern fixtures usually require replacing the entire cartridge or cylinder. Pull the old cartridge straight out of the faucet body (you may need a cartridge puller tool if it is stuck due to hard water calcification). Take the old cartridge to your local hardware store in Galveston or Pasadena to ensure you purchase an exact brand-specific match. Generic “universal” parts rarely seal correctly.
While the faucet is disassembled, peer inside the faucet body with a flashlight. Check the metal valve seat at the bottom. If it looks pitted, rough, or covered in white mineral crust, scrape the buildup away with a small wire brush or soak it in white vinegar. If the metal itself is deeply corroded, the valve seat will need to be resurfaced with a seat-dressing tool, or the entire faucet fixture will need to be replaced. For a similar process on shower fixtures, check out our guide to fixing a leaky shower valve.
Step 4: Reassemble the Faucet and Apply Plumber’s Grease
Before you slide the new cartridge or stem back into place, apply a thin coating of silicone plumber’s grease to any new rubber O-rings or seals. This lubrication helps the parts slide smoothly into place without pinching or tearing, and it ensures a watertight seal that will last for years.
Warning: Never use petroleum-based products like Vaseline on rubber plumbing parts. Petroleum degrades rubber over time, causing it to swell, soften, and fail prematurely.
Slide the stem or new cartridge back into the faucet body, ensuring it aligns perfectly with the internal slots or notches. If you are working on a cartridge faucet, slide the retaining clip back into its groove. For compression models, thread the packing nut back on by hand first to avoid cross-threading, then tighten it gently with your adjustable wrench. Do not overtighten this nut; you only need it snug enough to prevent water from seeping out. Overtightening can crack plastic cartridges or bind the handle, making it incredibly difficult to turn.
Step 5: Turn the Water On Slowly and Test Your Work
With everything securely reassembled, make sure your faucet handles are turned to the “off” position. Go back under the sink and slowly open the hot and cold water shutoff valves. Opening them too quickly can cause a sudden surge of air and water pressure (water hammer) that can damage your new seals or loosen joints further down the line.
Once the shutoff valves are fully open, inspect the area under the sink for any immediate leaks. Next, turn the faucet handle on slowly to flush out any trapped air. The water might sputter for a few seconds — this is completely normal.
While the water is running, unscrew the aerator (the mesh screen at the very tip of the spout). It is common for loose mineral deposits to break free during a repair and clog the aerator. Rinse any grit out of the screen, screw it back on hand-tight, and turn the faucet off. Watch the spout closely for several minutes to confirm that the persistent drip is officially gone.

When to DIY vs. Hiring a Pro for Leaky Faucet Repair
While a leaky faucet repair is a fantastic weekend DIY project that can save you money, it is important to know your limits. Understanding when to tackle a project yourself and when to call in a professional plumber can save you from costly water damage or a middle-of-the-night emergency.
Let’s look at the financial reality of both options:
- The DIY Route: If you choose to handle the repair yourself, your costs are incredibly low. A basic washer and O-ring assortment kit costs between $5 and $15. If you need to replace an entire cartridge, you can expect to spend between $10 and $100 depending on the brand of your fixture (high-end brands like Moen, Delta, or Kohler tend to have slightly more expensive cartridges).
- The Professional Route: Hiring a licensed plumber typically costs between $100 and $400, with the national average sitting around $270. Most professional plumbers charge an hourly rate between $45 and $200, often with a one-hour minimum service fee to cover travel and diagnostics.
So, how do you decide which path to take?
When to DIY
If your faucet is relatively new (under 10 years old), is a recognizable major brand, and the leak is a simple drip from the end of the spout, you should absolutely try to fix it yourself. The parts are readily available at any local hardware store in Friendswood or Texas City, and the repair requires only basic hand tools.
When to Call a Professional
You should put down the wrench and call a licensed plumber if you encounter any of the following scenarios:
- The parts are stuck or rusted solid: If the packing nut or cartridge refuses to budge, applying excessive force can snap the water lines beneath the sink, turning a minor drip into a major flood.
- The leak is behind the wall or under the cabinet: If you notice water pooling inside your vanity cabinet, mold growing on the drywall, or damp spots on the ceiling below a second-story bathroom, you are dealing with more than a simple faucet seal issue. You need a professional to inspect the supply lines.
- The valve seat is deeply corroded: If you have replaced the washers or cartridge and the drip persists, the metal housing of the faucet body itself is likely damaged. A plumber can assess whether the fixture can be saved or if a full replacement is necessary.
- Your home has old, fragile plumbing: If you live in an older home in Galveston or historic parts of Houston with original galvanized steel or fragile copper pipes, even minor vibrations from DIY work can trigger leaks elsewhere in the system.
For a deeper look at budgeting and managing home plumbing systems across our local communities, check out The Ultimate Guide to Plumbing Repair Houston Homeowners Need.
Common Mistakes to Avoid During a Faucet Repair
Even experienced DIYers can make mistakes when working on plumbing fixtures. To ensure your repair is successful on the first try, keep these common pitfalls in mind:
- Overtightening the Packing Nut or Screws: More torque is not better in plumbing. Overtightening the brass packing nut can strip the threads, crush rubber gaskets, or crack plastic cartridges. Tighten parts until they are snug, then test. You can always tighten a loose nut slightly more if it weeps, but you cannot un-crack a broken cartridge.
- Using Generic Replacement Parts: Many hardware stores sell “universal” plumbing kits. While these may work in a pinch for older compression faucets, modern cartridge and ceramic disc faucets require exact, brand-specific replacement parts. Always bring your old part to the store to compare it directly, or look up your faucet’s model number online before buying.
- Reusing Old O-Rings: When you pull a faucet stem apart, the old rubber O-rings might look fine to the naked eye. However, rubber takes a permanent “set” under pressure over time. Once you disturb the old seal, it will rarely seat correctly a second time. Always replace old O-rings with new ones when disassembling a faucet.
- Scratching Chrome and Nickel Finishes: Metal wrenches on metal plumbing fixtures will leave ugly gouges and scratches. Always protect the finish of your faucet by wrapping masking tape around the jaws of your tools or placing a soft cloth between the wrench and the fixture.
- Forgetting to Plug the Drain: It only takes a split second for a tiny brass screw or a critical retaining clip to slip out of your soapy fingers and tumble down the drain. Always keep the drain plugged or covered with a towel throughout the entire repair process.
By avoiding these simple mistakes, you’ll ensure your DIY repair goes smoothly and lasts for years. If you enjoy learning about quick home fixes, you can find more practical advice in our guide on how to handle No More Drips: The Ultimate Guide to Instant Plumbing Repairs.
Frequently Asked Questions About Faucet Leaks
Why is my faucet still leaking after I replaced the cartridge?
If you have installed a brand-new cartridge and the faucet continues to drip, there are three common causes:
- The cartridge is not fully seated: If the cartridge is not pushed all the way down into the faucet body, water will bypass the rubber seals. Remove the retaining clip or nut, press down firmly on the cartridge, and re-secure it.
- A rubber seal was pinched during installation: If you did not apply silicone plumber’s grease to the O-rings before sliding the cartridge in, the dry rubber may have twisted, pinched, or torn.
- The valve seat inside the faucet body is corroded: If the brass or plastic walls inside the faucet housing are pitted or covered in mineral scale, water will seep around the outside of the new cartridge.
How much water does a dripping faucet actually waste?
A faucet that drips just once per second wastes over 3,000 gallons of water per year. In terms of weekly impact, that is roughly 90 liters of water — enough to fill a standard bathtub or run several loads of laundry. Over time, this constant waste can add $20 or more to your monthly water bill, which quickly outpaces the minor cost of a $5 replacement washer.
Should I repair my faucet or replace the entire fixture?
We generally recommend repairing a faucet if it is under 10 years old, is a high-quality name brand, and the body of the fixture is still in good aesthetic condition. However, you should consider replacing the entire fixture if:
- The faucet is more than 15 years old.
- The base of the faucet is heavily corroded, pitted, or leaking.
- Replacement parts are discontinued or incredibly difficult to find.
- The cost of a new cartridge is close to the price of a new, mid-range faucet (which typically ranges from $80 to $200).
Need help with a faucet that still will not stop dripping? Contact The Overall Plumber for leaky faucet repair in the Greater Houston and Gulf Coast area. We offer satisfaction guarantees, priority scheduling, and no overtime fees. Call us today at (281) 668-5056 for fast, reliable service.