


A Small Leak Can Cost You More Than You Think
Leak repair is something every homeowner will face at some point — and acting fast makes a huge difference.
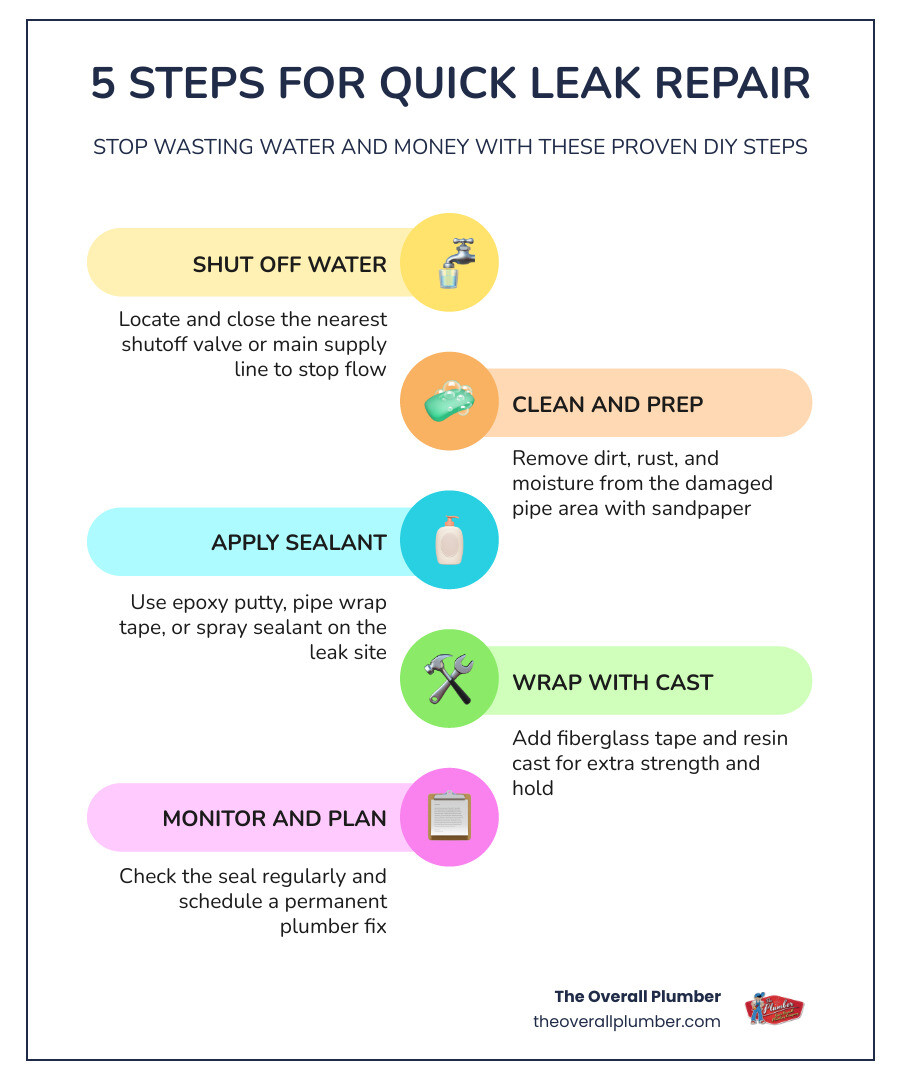
How to fix a leak quickly in 5 steps:
- Shut off the water at the nearest shutoff valve or main supply line
- Clean and prep the pipe by removing dirt, rust, and moisture from the damaged area
- Apply an emergency sealant such as epoxy putty, pipe wrap tape, or a spray sealant
- Wrap with a pipe repair cast for added strength and a longer-lasting temporary hold
- Monitor the repair and schedule a permanent fix with a licensed plumber
Here’s why this matters: the average household leaks more than 10,000 gallons of water every year. A single dripping faucet can waste 3,000 gallons annually. Even a slow, barely-visible drip can quietly add $20 to $150 to your monthly water bill. Nationwide, leaks waste one trillion gallons of water per year — and most of it is preventable.
The good news? Fixing leaks can cut your water bill by up to 10%. And many repairs can be handled quickly with the right products and a few simple steps.
I’m Dayton Whitworth, a second-generation plumber with hands-on leak repair experience across the Gulf Coast — from Houston to Galveston and everywhere in between. Let’s walk through exactly what to do when you spot a leak.
Identifying Common Household Water Leaks
Before you can start on any leak repair, you have to know exactly what you are dealing with. Water is incredibly sneaky. It can start leaking behind a bathroom wall in Pasadena, travel down a support stud, and pool on your kitchen ceiling in Clear Lake. Finding the actual source of the water is half the battle. Let’s break down the most common household leaks we see in our service area and how you can spot them.
Faucet and Fixture Leaks
A dripping faucet is the most obvious offender. Whether it is in your kitchen, bathroom, or utility room, that slow “drip, drip, drip” is usually caused by worn-out rubber washers, deteriorated O-rings, or corroded valve seats. Over time, mineral deposits from our hard Texas water can build up inside the cartridge, preventing a tight seal.
Toilet Leaks
Toilet leaks are often completely silent, making them major culprits behind unexplained spikes in your water utility bill. The most common cause is a degraded toilet flapper that no longer seals tightly against the flush valve. To test this, you can perform a simple toilet dye test: drop a few drops of food coloring into your toilet tank and wait 15 to 20 minutes without flushing. If the color seeps into the toilet bowl, your flapper is leaking and needs to be replaced.
Slab Leaks
A slab leak occurs when the water lines running beneath your home’s concrete foundation crack, corrode, or burst. Because these pipes are encased in concrete, slab leaks can cause massive structural damage before you even notice them.
Common warning signs include warm spots on your tile or vinyl flooring, the sound of running water when all your faucets are turned off, or damp, moldy carpet. If you suspect your foundation is at risk, you can read our comprehensive guide on Is There a Water Leak Under Concrete Slab Here Is How to Tell to identify the warning signs early.
Garbage Disposal Leaks
If you notice puddles forming directly under your kitchen sink, your garbage disposal might be the culprit. These appliances can leak from several different points, including the sink flange, the dishwasher drain connection, the discharge pipe, or even from the bottom of the unit itself if the internal seals have failed. If you are dealing with moisture under your kitchen sink, check out The Lowdown on Leaks Under Your Garbage Disposal to pinpoint the problem area.
The Two-Hour Water Meter Test
If you suspect you have a hidden leak but cannot find it, your water meter is your best diagnostic tool. Ensure all water-using appliances (like washing machines and dishwashers) are turned off and that no one in your home uses any faucets or flushes any toilets.
Locate your water meter box, which is typically found near the curb of your property. Write down the current reading on the dial. Wait exactly two hours without using any water, then check the meter again. If the numbers have changed, or if the low-flow indicator dial (often a small red or blue triangle) is spinning, you have an active leak somewhere in your plumbing system.
5 Steps for Quick DIY Leak Repair
When a pipe springs a leak, panic is your worst enemy. Taking immediate, systematic action can save you thousands of dollars in drywall, flooring, and structural repairs.

While DIY fixes are excellent for stopping immediate water damage, keep in mind that they are almost always temporary. According to How Much Do Pipe Leak Repairs Cost? [2026 Data] – Angi, a professional permanent pipe repair is a highly cost-effective investment when compared to the long-term structural and mold remediation costs of a failed DIY patch.
Let’s look at the five essential steps to quickly stop an active pipe leak.
Step 1: Shut Off the Water and Prep the Pipe
The moment you spot water spraying or dripping from a pipe, your priority is to stop the flow of water. If the leak is near a specific fixture, check for an localized angle stop valve (the small oval handle behind your toilet or under your sink) and turn it clockwise to shut it off.
If there is no localized valve, or if the leak is on a main branch line, you must turn off the main water supply valve to your home. In our part of Texas, the main shutoff is often located near the street inside a concrete meter box, or on the side of your house where the main water line enters the structure.
Safety First: If the leak is located near electrical panels, outlets, or appliances, do not touch the wet areas. Go straight to your home’s breaker box and shut off the power to that zone before addressing the plumbing. Verify the power is off using a non-contact electrical tester.
Once the water is off, use a dry towel to wipe away all standing water, condensation, and moisture from the pipe. To ensure your repair materials adhere properly, the pipe surface must be clean and slightly roughened. Use a wire brush or a piece of medium-grit sandpaper to scrub away any rust, scale, dirt, grease, or mineral deposits. Roughening the surface of PVC, copper, or steel pipes gives your sealants a much stronger physical grip.
Step 2: Apply Emergency Leak Repair Sealants
With the pipe clean and prepped, you can apply an emergency sealant to create a watertight barrier over the crack or pinhole.
- Epoxy Putty: This is a two-part compound that you knead together with your hands (always wear nitrile or latex gloves) until it turns a uniform, solid color. Once mixed, press the putty firmly over the leak site, molding it around the pipe and overlapping the damaged area by at least an inch on all sides. Epoxy putty begins hardening within minutes, so work quickly.
- Pipe Wrap Tape (Self-Fusing Silicone Tape): This specialized tape does not rely on sticky adhesives. Instead, it chemically fuses to itself when stretched and wrapped tightly. Start wrapping the tape about two inches before the leak, stretching it to its maximum capacity as you wrap, and overlap each layer by half. Continue wrapping until you are two inches past the leak.
- Spray Sealants: For hard-to-reach areas or minor, non-pressurized leaks (like gutters or drain lines), products like Polar LeakFix Spray – Instant Waterproof Leak Repair – Polar Specialist Coatings can provide a fast, rubberized protective barrier. Clean the surface thoroughly, apply 2 to 3 thin coats leaving 10 to 15 minutes between each, and let it dry.
- Active Leak Kits: If you cannot completely shut down the water pressure, specialized solutions like the Active Leak Repair Kit | SealXpert are designed to seal active, low-pressure leaks on a wide range of pipe materials (including steel, copper, PVC, and fiberglass) without requiring a complete system shutdown.
Step 3: Use a Specialized Pipe Repair Cast
For high-pressure water lines or structural reinforcement, a simple layer of tape or putty might not hold for long. This is where a professional-grade pipe repair cast comes in. These casts typically consist of a knitted fiberglass tape impregnated with water-activated polyurethane resin.
A highly reliable product for this step is Quick Seal Pipe Repair Nu-Calgon . It is classified as safe for drinking water by Underwriters Laboratories (UL) in accordance with ANSI/NSF Standard 61.
To apply a pipe repair cast:
- Ensure the water pressure is turned off and the pipe surface is roughened.
- Put on the protective latex gloves included in the kit.
- Open the foil pouch, submerge the fiberglass roll in cool water for about 20 seconds, and squeeze it gently to distribute the moisture.
- Wrap the tape tightly around the pipe, starting directly over the leak or putty patch. Build up at least 15 layers (or about a half-inch of thickness), overlapping the edges to create a solid, protective sleeve.
- While the resin is foaming and curing, rub and squeeze the wrap in a twisting motion to smooth out the resin and bond the layers together.
Step 4: Cure the Seal with Advanced Solutions
Depending on the product you use, curing times can vary from a few minutes to a full 24 hours. However, modern technology has introduced rapid-cure solutions that can get your plumbing back online in under a minute.
For incredibly fast, cure-on-command repairs, products like 30 Second Leak Repair | Wood, Fiberglass & Metal | Superior Industries, Inc. use a photo-curable resin that hardens instantly when exposed to a specialized blue LED curing light. This technology works in extreme temperatures and can even be applied underwater, making it perfect for emergency marine, PVC, or copper pipe fixes.
If you are dealing with leaks in non-potable water systems, such as swimming pools, hot tubs, or garden water features, you can use specialized liquid sealants. A product like LeakShot: Fast Pool & Spa Leak Sealant – LeakTronics can seal minor leaks causing up to an inch of daily water loss within 24 hours, without requiring you to drain the water. Simply shake the bottle, pour it into the filtration system, and let it circulate to seal the cracks from the inside out.
Step 5: Monitor the Repair and Plan Next Steps
Once your DIY patch has cured according to the manufacturer’s instructions (usually 30 to 60 minutes for fiberglass wraps and epoxy putties), it is time to test your handiwork.
Slowly turn your main water supply valve back on. Keep a close eye on the repaired area for any signs of weeping, dampness, or active dripping. If the patch holds, congratulations! You have successfully mitigated an emergency.
However, it is vital to remember that DIY repairs are temporary fixes. Fluctuations in water pressure, temperature changes (especially during our hot Texas summers or sudden winter freezes), and chemical reactions within the pipe will eventually cause DIY patches to fail. Use this temporary reprieve to schedule a permanent, code-compliant repair with a professional plumber.
When to Call a Professional for Leak Repair
While a DIY patch can save your home from immediate flooding, there are times when trying to fix a leak yourself can actually make things worse. Professional plumbers have the training, licensing, and advanced diagnostic equipment necessary to find and repair leaks without causing unnecessary damage to your home.
Professional Leak Repair and Detection Services
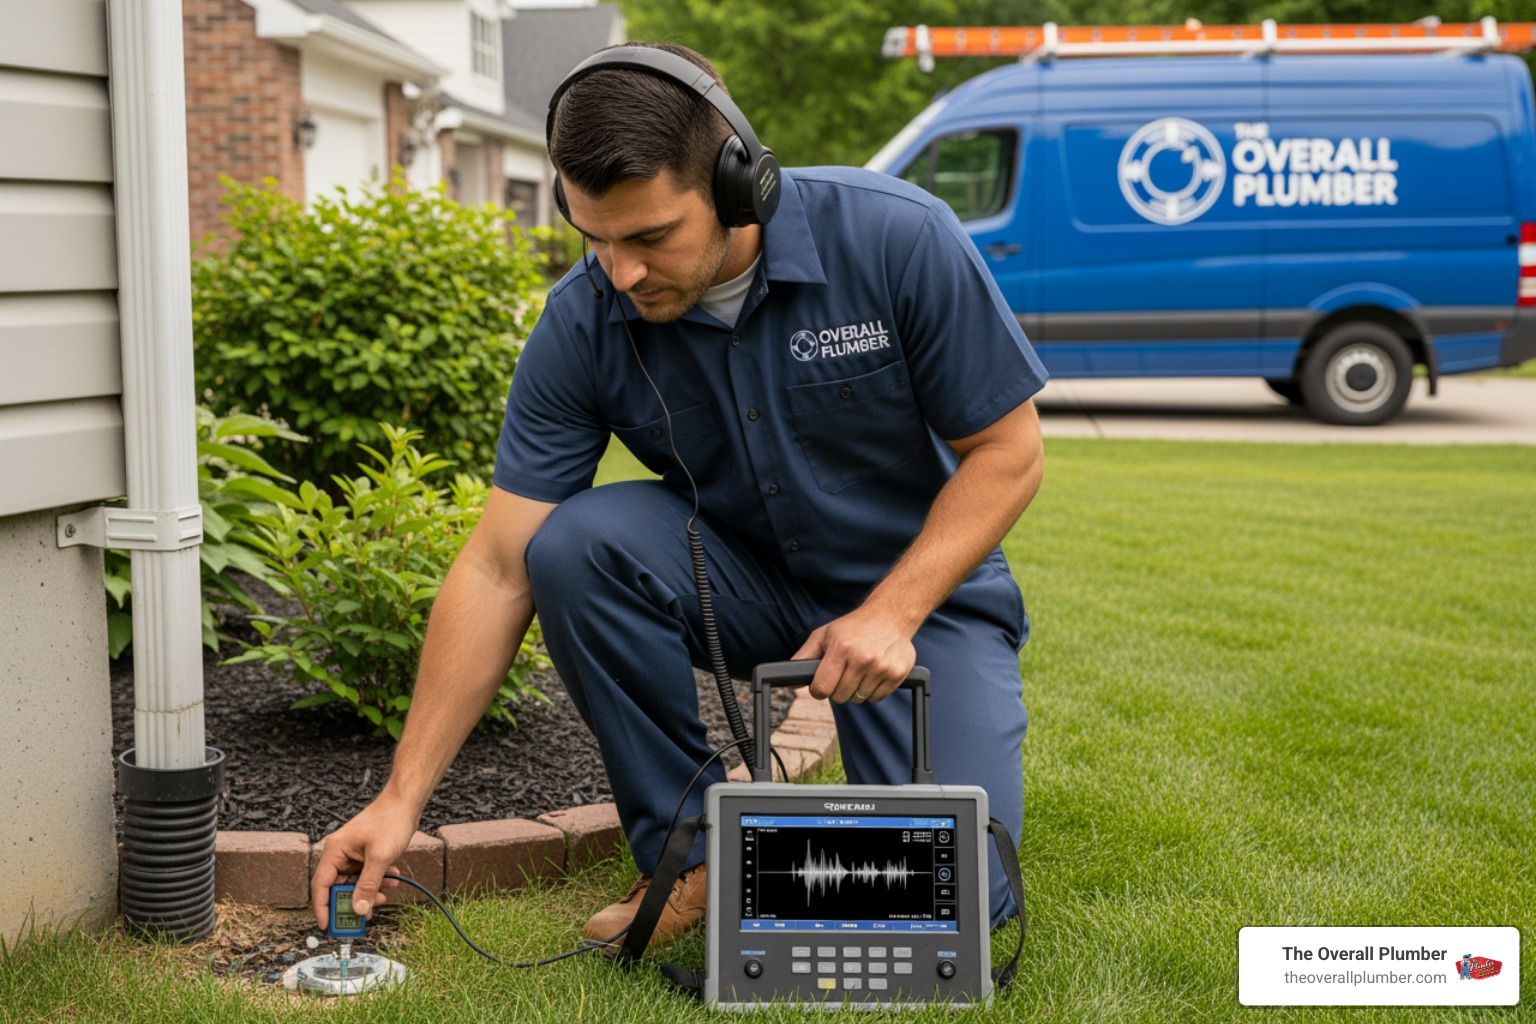
At The Overall Plumber, we use non-invasive, state-of-the-art technology to pinpoint leaks hidden deep behind your walls, under your yard, or beneath your concrete slab foundation.
- Acoustic Sensors: We use highly sensitive ground microphones to listen for the distinct sound of pressurized water escaping from pipes underground or beneath concrete.
- Endoscopic Cameras: Our plumbers can feed tiny, high-definition fiber-optic cameras directly into your drain lines and wall cavities to visually inspect the condition of your pipes without tearing down your drywall.
- Trenchless Repair: When we find a leak under your yard or slab, we often utilize trenchless repair techniques, allowing us to restore your pipes without digging up your beautiful landscaping or jackhammering your foundation.
If you are struggling to find the source of a mystery puddle or a high utility bill, don’t play guessing games with your walls. You can read our advice on Wheres the Water How to Find a Plumber to Find Water Leak to ensure you hire a qualified expert who can locate the problem quickly.
Additionally, if you live in our coastal areas and experience sudden winter freezes, you must act fast to prevent frozen pipes from bursting. Learn what steps to take by reading When to Call a Frozen Pipe Plumber Before Things Get Messy.
For homeowners in Houston and the surrounding communities, we offer comprehensive, guaranteed services. You can learn more about our local capabilities on our Local Leak Detection and Repairs Houston Plumber page.
Financial Assistance and Prevention Strategies
Water damage and high utility bills can put a massive strain on your household budget. Fortunately, there are programs, strategies, and straightforward cost comparisons that can help you manage these expenses.
DIY vs. Professional Repair Costs
While DIY products are cheap upfront, a failed patch can lead to catastrophic water damage. Here is a realistic look at how temporary DIY costs stack up against professional, permanent repairs:
| Repair Method | Average Cost Range | Durability | Best For |
|---|---|---|---|
| DIY Epoxy Putty / Tape | $10 – $30 | Temporary (Days to Weeks) | Emergency shutoff mitigation |
| DIY Fiberglass Cast Kit | $20 – $50 | Short-term (Weeks to Months) | Temporary line reinforcement |
| Professional Pipe Repair | $150 – $450+ | Permanent (Decades) | Main lines, code compliance, peace of mind |
| Professional Slab Leak Repair | $1,000 – $4,000+ | Permanent (Decades) | Pipes under concrete foundations |
Leak Repair Programs and Utility Adjustments
Many local municipal utility districts (MUDs) and cities across our service area offer financial relief if you experience an unexpected, high-volume leak. For example, if you live in League City, you can access resources, report water waste, and apply for leak adjustments directly through the Leaks | The League City Official Website!. These programs can often credit a portion of your water bill once you provide proof (such as a plumber’s invoice) that the leak has been permanently repaired.
Additionally, some utility companies offer Customer Assistance Programs (CAP) or dedicated leak repair assistance programs for low-income homeowners to help cover the costs of emergency plumbing repairs. Always check with your local water provider to see what assistance options are available in your specific community.
Long-Term Prevention Strategies
The best way to handle a leak is to prevent it from happening in the first place. Here are a few simple habits to protect your home:
- Install a Smart Water Shutoff Valve: These devices connect to your main water line and monitor your home’s water flow. If they detect unusual, continuous water usage, they will automatically shut off your main water valve and send an alert to your smartphone.
- Monitor Your Water Pressure: High water pressure (anything over 80 PSI) puts immense stress on your pipes, joints, and appliances, leading to premature leaks. Install a simple pressure gauge on an outdoor spigot to monitor your home’s pressure.
- Schedule Annual Inspections: Having a licensed plumber perform an annual inspection of your water heater, exposed piping, and shutoff valves can help catch minor corrosion and wear before it turns into a major flood.
Frequently Asked Questions About Leak Repair
How much water does a slow leak waste?
Even a tiny, slow drip from a faucet can waste up to 3,000 gallons of water per year. If you have a toilet that runs continuously, it can waste over 200 gallons of water every single day—adding up to more than 70,000 wasted gallons a year! Fixing these minor issues promptly can save you up to 10% on your monthly water bills.
Can I use DIY leak repair products on drinking water pipes?
Only if the product is explicitly certified for potable water use. Look for sealants and pipe casts that carry an Underwriters Laboratories (UL) classification or an ANSI/NSF Standard 61 certification. Using non-certified chemical putties or industrial glues on drinking water lines can leach harmful toxins into your home’s water supply.
What should I do if I suspect an underground slab leak?
If you suspect a slab leak, do not wait. Turn off your water supply when the home is not in use, and call a professional leak detection plumber immediately. Leaving a slab leak unaddressed can cause the soil beneath your home to wash away or swell, leading to severe foundation cracks, shifting walls, and incredibly expensive structural damage.
Need professional help with a stubborn leak? Don’t let water damage ruin your home. Contact the experts at The Overall Plumber today at (281) 668-5056 for fast, reliable service. For immediate assistance, check out our Faucet Leak Services.