


Fundamentals of a Residential Plumbing System
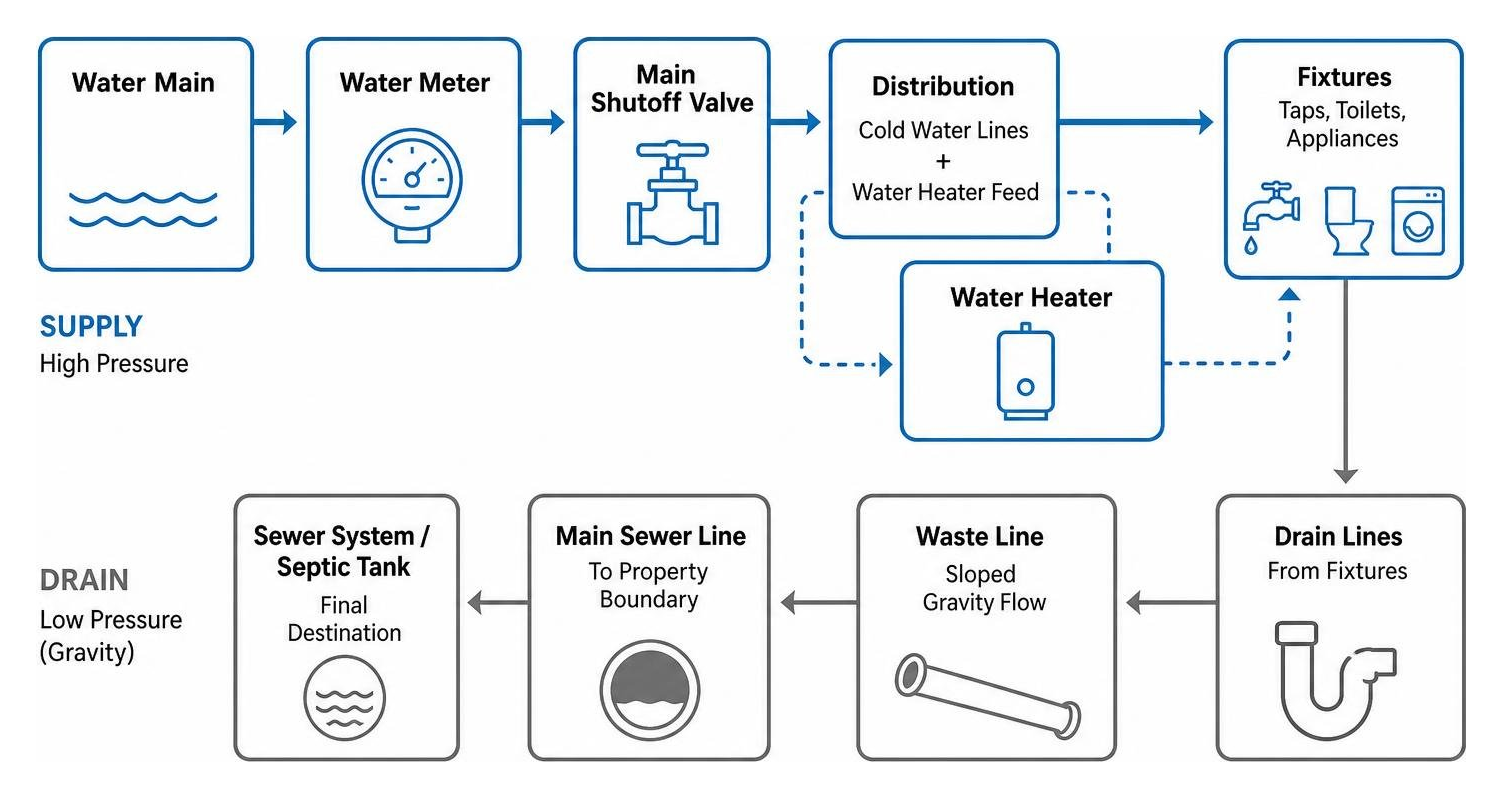
Every house operates on a delicate balance between pressure and gravity. Fresh, potable water enters under high pressure, while used water leaves under low pressure using gravity.
When clean water reaches your property boundary from a municipal water meter or a private well supply, it passes through your main shutoff valve. This single valve is your home’s most critical emergency asset; closing it stops all incoming pressurized flow instantly.
From that shutoff, the incoming line divides into cold water runs and a primary feed to your water heater. Once water fulfills its purpose at an appliance or tap, it drops into the drainage system. This network directs greywater and blackwater down sloped pipes, safely carrying it out through the primary sewer line toward the municipal collection system or your on-site septic tank.
Core Subsystems: Supply Lines, Fixtures, and Drain Networks
To understand how water moves through your home, it helps to break the setup down into three core subsystems:
- Supply Lines: High-pressure delivery pipes (typically 1/2-inch to 1-inch in diameter) that route clean water straight to your taps and appliances without leaks.
- Plumbing Fixtures: The endpoints where you interact with water daily, including sinks, showers, toilets, dishwashers, and hose bibs. Water heaters serve as both an endpoint and a secondary distribution hub, receiving cold supply water and discharging heated water.
- Drain-Waste-Vent (DWV) System: A non-pressurized network of larger pipes (usually 1.5 inches to 4 inches) relying on gravity. The drain lines carry away waste, while vertical vent pipes extend upward through your roof. These atmospheric vents admit air so wastewater drains smoothly without suction, while preventing dangerous sewer gas from slipping past fixture P-traps into your living spaces.
Residential Plumbing vs Commercial Systems
Residential and commercial plumbing share core hydraulic principles, but their scope, loads, and everyday demands differ significantly:
- System Scale and Pipe Sizing: Commercial structures feature high-occupancy restrooms, multi-story risers, and large pipe diameters to handle continuous peak loads. Residential setups use smaller supply lines and branch drains engineered for modest daily family usage.
- Hydraulic Load and Redundancy: Commercial systems often include duplex booster pumps, automated flushometers, industrial grease interceptors, and complex greywater recycling systems. Homes rely primarily on street pressure (or a standard well pump) and straightforward gravity drainage.
- Structural Routing: Commercial piping frequently runs through dropped ceilings, mechanical chases, and concrete slabs. In contrast, residential systems route through wood stud bays and crawlspaces, making maintenance, repiping, and direct homeowner-to-technician communication much simpler.
Designing and Engineering Modern Home Plumbing
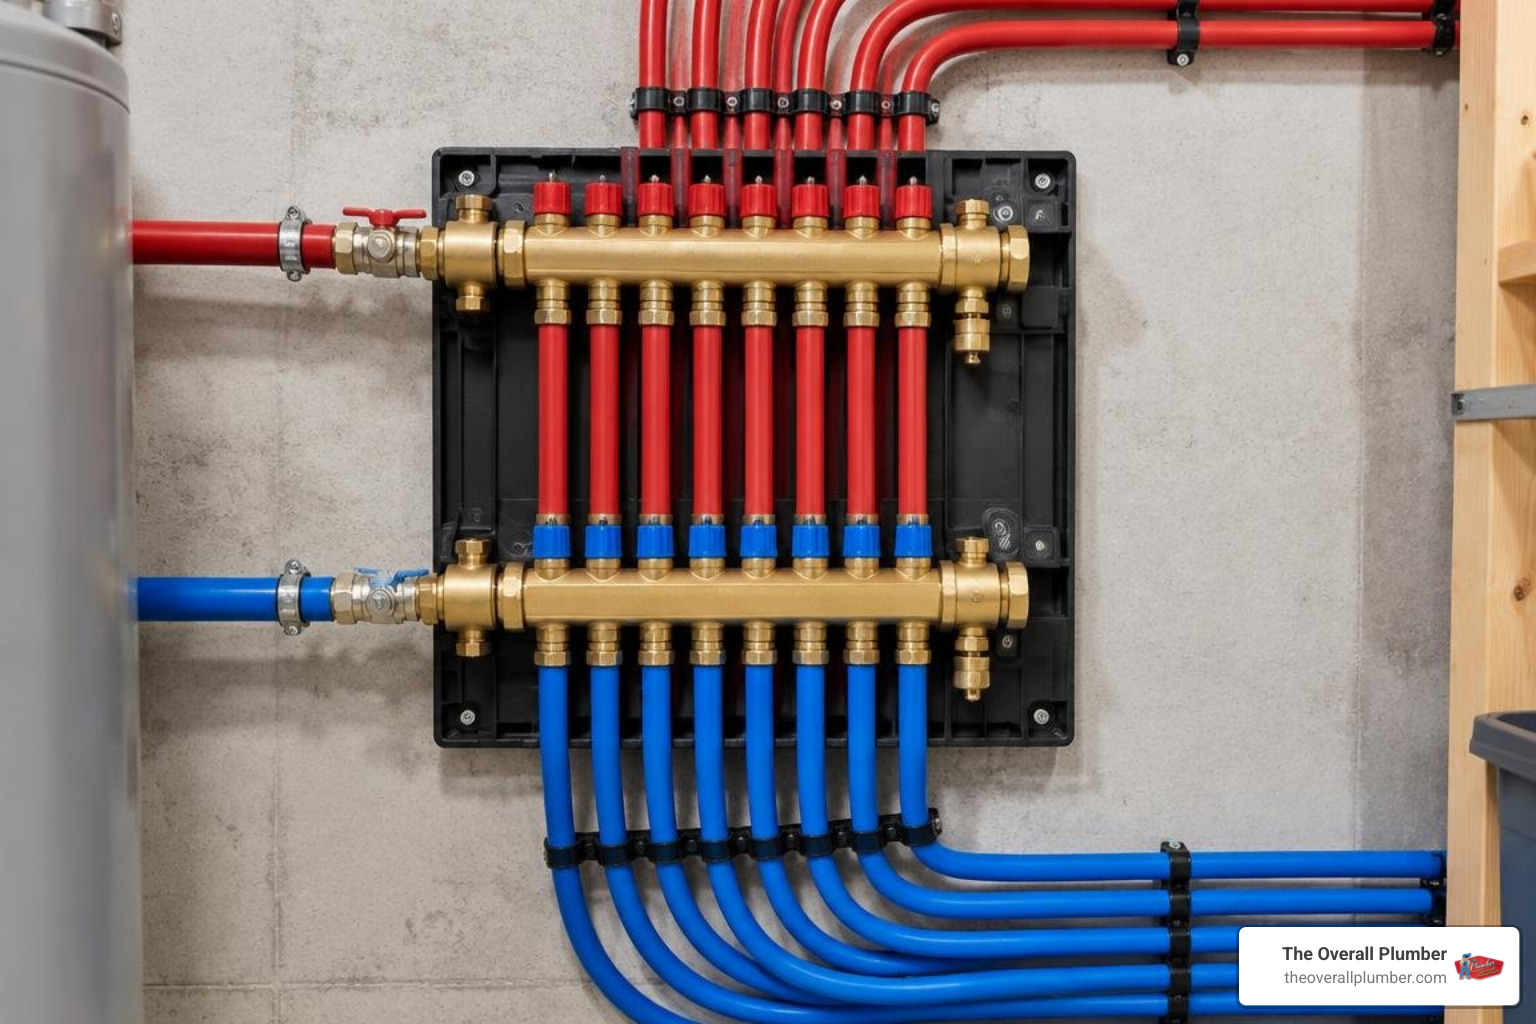
Whether you are building a new house or undertaking a major kitchen remodel, a reliable plumbing design balances flow rates with adequate wastewater drop. Engineers and master plumbers rely on architectural blueprints and plumbing calculations to determine exact pipe diameters and routing paths.
A fundamental part of this planning is calculating your home’s total Water Supply Fixture Units (WSFU). Every fixture is assigned a numerical WSFU rating based on its design flow rate and expected frequency of use. By tallying the total WSFU load—from your master bathtub and laundry room to your exterior hose bibs—we size the incoming water service line and water meter correctly.
Proper engineering also incorporates a Pressure-Reducing Valve (PRV) if incoming street pressure exceeds 80 PSI (pounds per square inch). High pressure stresses pipe joints, strains washing machine hoses, and causes premature water heater failures. Additionally, incorporating a dedicated hot water recirculation loop ensures near-instant hot water at distant taps, saving gallons of water each week.
Pipe Materials: PEX vs. Copper in Residential Plumbing
When repiping or roughing in a new home, choosing between cross-linked polyethylene (PEX) and traditional copper is a major decision.
| Material Feature | PEX Piping (PEX-a / PEX-b) | Traditional Rigid Copper |
|---|---|---|
| Material & Labor Cost | Lower material expense; fast installation | Higher material cost; labor-intensive soldering |
| Flexibility & Fittings | Highly flexible; requires fewer directional elbows | Rigid; requires cut-and-sweat fittings at every turn |
| Freeze Burst Resistance | High (expands slightly under freezing pressures) | Low to Moderate (rigid walls can split when frozen) |
| Expected Lifespan | 40–50+ years | 50–70+ years |
| Corrosion Resistance | Impervious to acidic water and mineral scale | Vulnerable to pinhole leaks from acidic or hard water |
| Antimicrobial Properties | Non-reactive interior surface | Naturally biostatic and antimicrobial |
PEX-a has become the standard for modern installations and remodels because its bend radius allows long, continuous runs with fewer concealed joints. However, copper remains a durable, time-tested option where exposed piping needs rigid structural integrity and UV resistance.
Water Demand Sizing and Manifold Layouts
Modern plumbing design has moved away from old-fashioned, rigid branched layouts toward balanced manifold distribution systems.
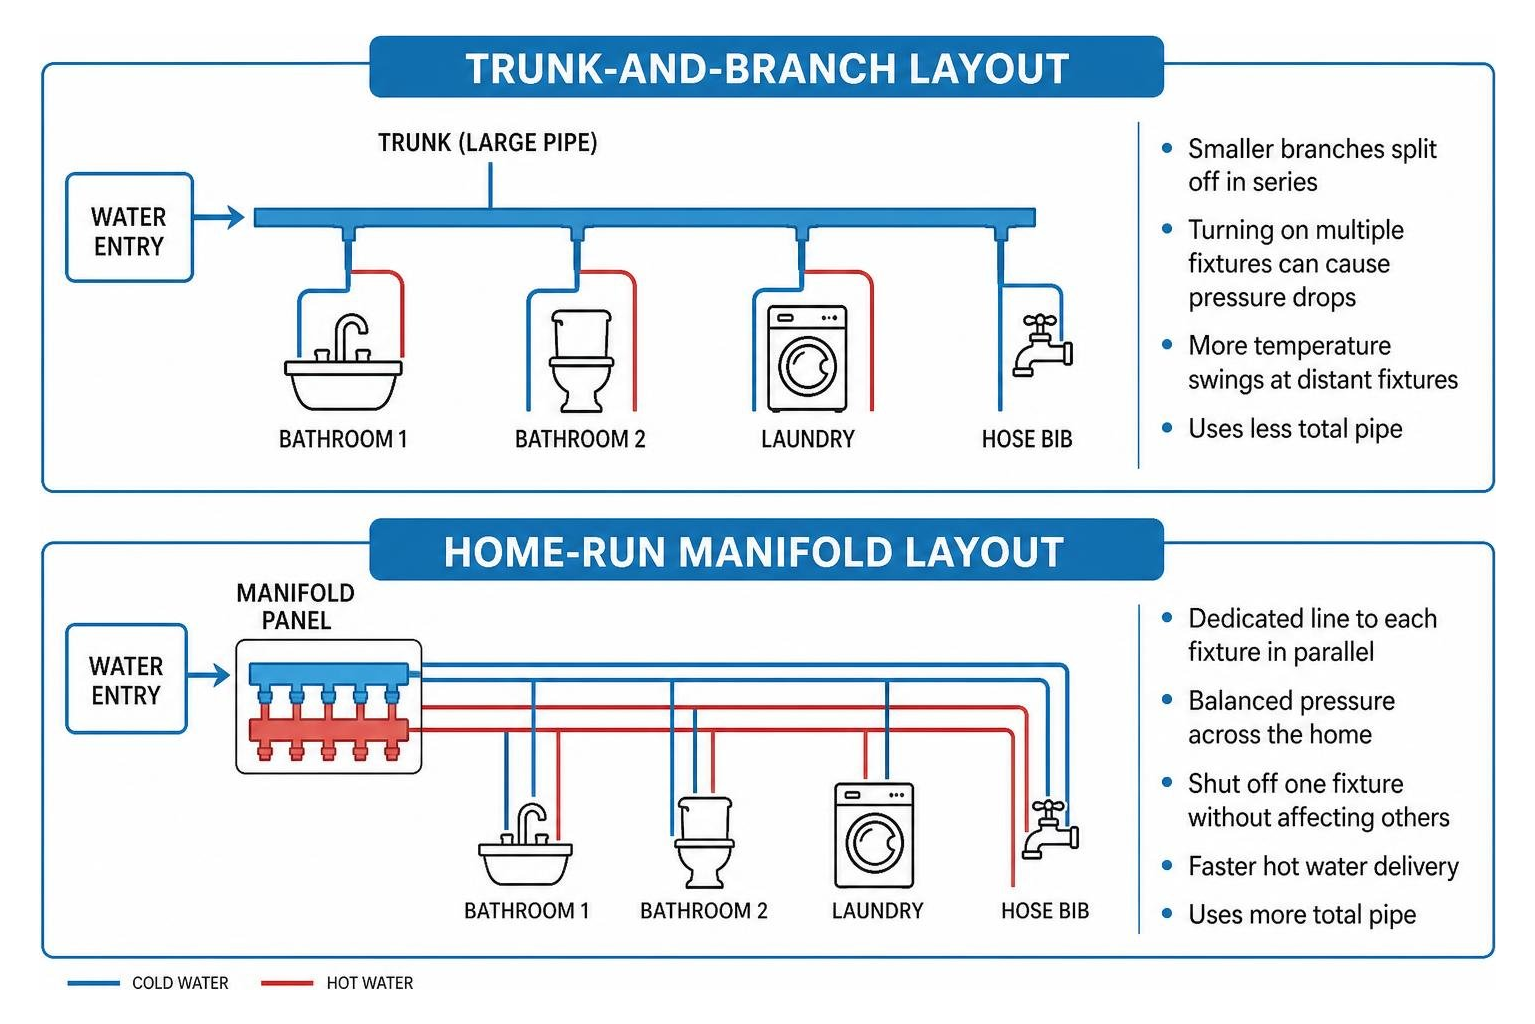
- Trunk-and-Branch Layout: A large central pipe (trunk) runs the length of the home, with smaller branch pipes splitting off to individual fixtures in series. While it uses less total pipe, turning on multiple fixtures simultaneously can cause noticeable pressure drops and temperature swings.
- Home-Run Manifold Layout: A central distribution panel feeds dedicated, flexible PEX lines directly to each individual fixture in parallel. This configuration maintains balanced flow rates across all bathrooms, allows you to shut off water to a single sink without turning off the entire house, and speeds up hot water delivery.
Common Plumbing Services, Maintenance, and Diagnostics
Regular preventative maintenance keeps minor plumbing wear from escalating into structural damage or hidden foundation leaks. Keeping your system running smoothly involves a few routine tasks:
- Monthly Visual Inspections: Check under vanity cabinets, behind toilets, and around the water heater base for moisture or corrosion.
- Semi-Annual Valve Exercises: Turn fixture shutoff valves and your main water shutoff halfway off and on to prevent mineral scale from seizing the handles.
- Safe Drain Cleaning Practices: Avoid harsh chemical drain openers, which corrode metal pipes and weaken PVC glue over time. Use manual drain snakes or enzyme-based cleaners instead.
- Winterization Steps: Disconnect exterior garden hoses, drain outdoor hose bibs, and insulate exposed piping in unconditioned crawlspaces or attics before cold snaps.
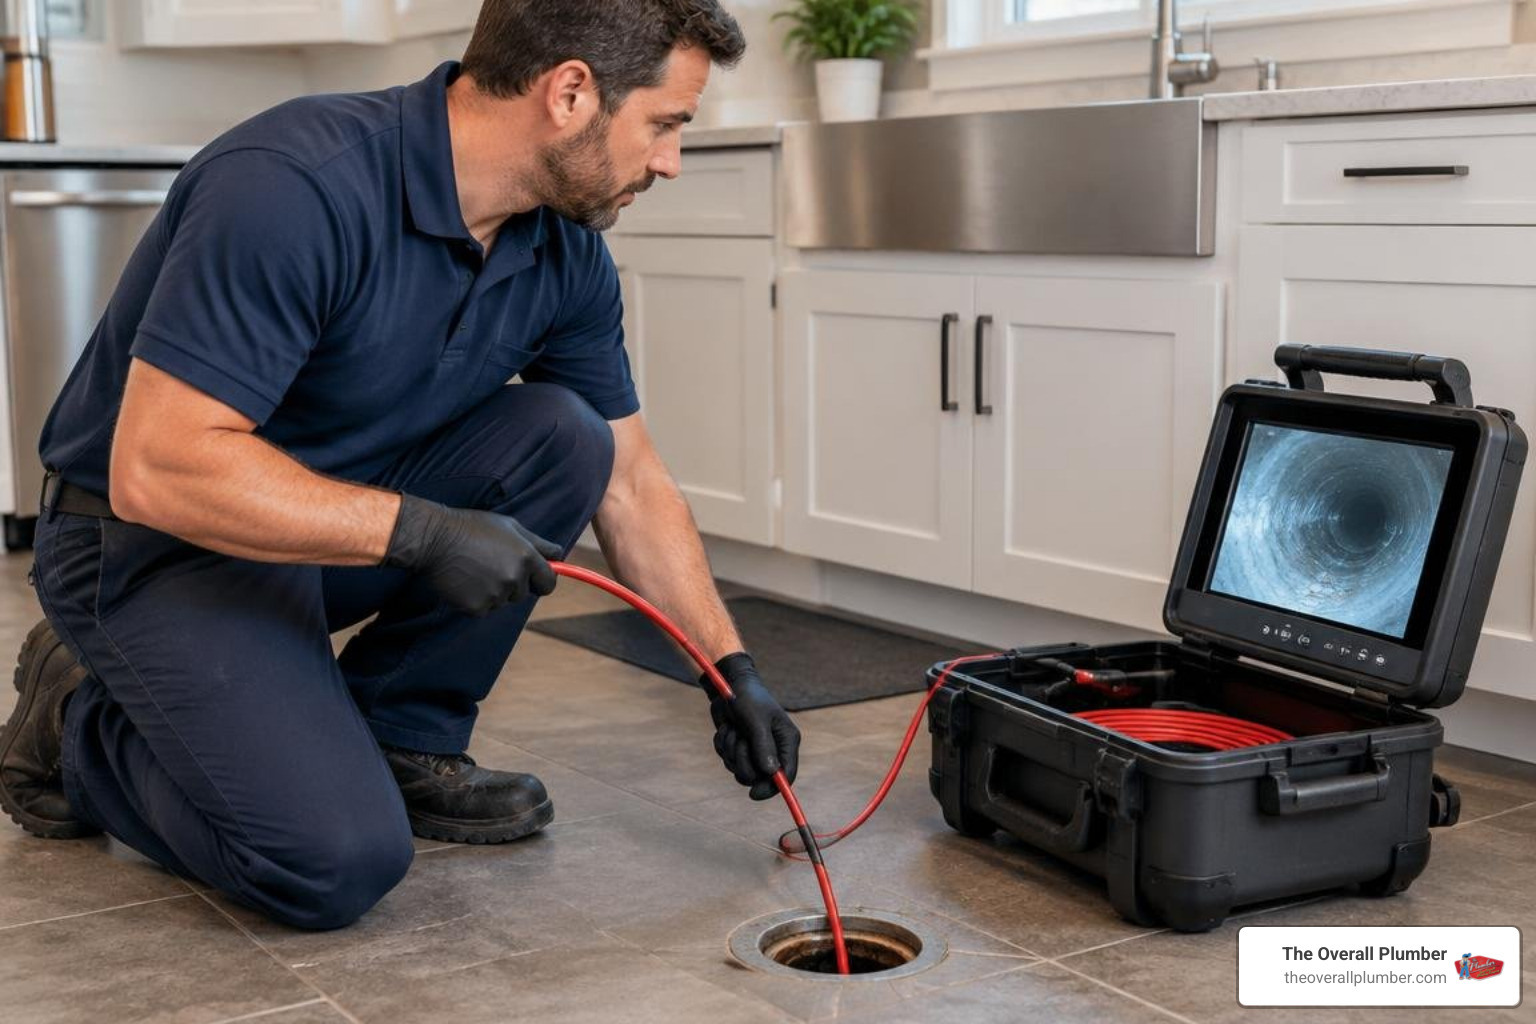
When stubborn clogs or recurring backups happen, professional mechanical auger drain cleaning quickly cuts through solid tree roots, thick soap scum, and heavy grease buildup. For chronic or mysterious sewer backups, high-resolution camera inspections reveal the exact cause—such as pipe belly offsets, cracks, or root intrusions—without unnecessary digging.
If you are dealing with persistent leaks or low pressure, reviewing verified customer feedback and diagnostic options can help you choose a licensed contractor who provides upfront assessments.
Water Heater and Sump Pump Care
Your water heater and sump pump work quietly behind the scenes, making regular upkeep essential to extend their service life:
- Flushing Conventional Storage Tanks: Drain your water heater tank once a year to flush out settled calcium, lime, and sand. Heavy sediment layers act as an insulating barrier, causing the tank bottom to overheat, crack, and waste energy.
- Sacrificial Anode Rod Inspection: Check the anode rod every 2 to 3 years. This metal rod attracts corrosive elements away from the steel tank walls. Replacing a depleted anode rod can double your water heater’s lifespan.
- Tankless Water Heater Descaling: Flush tankless heat exchangers with a food-grade vinegar solution every 12 to 18 months to clear mineral scaling and maintain heating efficiency.
- Sump Pump Float and Check Valve Testing: Pour five gallons of water into your sump pit periodically to ensure the mechanical float switch triggers the motor and the one-way check valve prevents water from draining back into the pit.
- Backflow Prevention: Ensure all outdoor spigots have vacuum breakers installed to stop dirty garden hose water from siphoning back into your clean drinking lines.
Permits, Codes, and Professional Standards
Plumbing work is strictly regulated to protect public health and structural safety. Most municipal building departments base their local ordinances on either the International Plumbing Code (IPC) or the Uniform Plumbing Code (UPC).
Permits are legally required whenever you:
- Install new water supply or drain lines
- Reconfigure walls containing plumbing (wet walls)
- Replace below-ground sewer connections
- Install or replace water heaters and backflow assemblies
The permitting process typically involves an initial plan review, followed by a rough-in inspection before wall cavities are drywalled or concrete slabs are poured. Once all trim work, sinks, and traps are set, an inspector performs the final plumbing inspection to verify proper venting, leak-tight joints, and full code compliance. While some jurisdictions allow homeowners to perform basic repairs on their primary residence, major modifications should always be completed by a licensed, insured plumbing contractor.
Industry Careers and Technical Skills
Licensed residential plumbers undergo years of dedicated technical education and practical training. Entering the trade typically involves completing a vocational certificate program or an apprenticeship covering:
- Reading blueprints, DWV isometric schematics, and structural load calculations
- Mastering pipe joining methods, including copper soldering, PEX expansion crimping, and solvent welding
- Understanding health codes, venting regulations, and gas line sizing formulas
- Developing physical stamina, hand-eye coordination, and spatial awareness to work comfortably in attics, crawlspaces, and compact utility closets
- Troubleshooting complex, multi-fixture hydraulic problems and communicating solutions clearly to homeowners
Frequently Asked Questions About Home Plumbing
When is a permit required for residential plumbing repairs?
Minor repairs—such as swapping a faucet washer, replacing a toilet fill valve, clearing a sink trap, or changing a showerhead—do not require a permit. However, a permit is mandatory whenever you install new piping, alter drainage stacks, replace a water heater, perform trenchless sewer line repairs, or relocate supply lines during a remodel.
How much does it cost to move plumbing during a remodel?
Moving existing plumbing fixtures typically ranges from $2,500 to over $5,000 per fixture, depending on the distance from the main drainage stack and whether your home rests on a wood subfloor or a concrete slab. Relocating a “wet wall”—which carries both primary supply runs and vertical DWV roof vents—requires significant labor and structural planning.
What causes sudden low water pressure across the house?
A sudden, whole-house drop in water pressure usually points to a failing pressure-reducing valve (PRV), a partially closed main shutoff valve, or an unexpected pressure drop in the municipal supply main. If the low pressure is isolated to a single fixture, the issue is likely a clogged faucet aerator, a blocked cartridge screen, or localized mineral buildup.
For persistent drain clogs, water heater maintenance, or system diagnostics, work with a professional team that provides honest evaluations and upfront pricing. Schedule your next maintenance visit or system inspection with The Overall Plumber or call tel:(832) 736-4999 to keep your home’s water lines running safely and efficiently.